Wednesday, September 26, 2018

How Cozy

Hi everyone!  I'm back.  Slight delay in posting due to life in general and the remodel.

My latest project, or at least the one I remembered to photograph, started when a friend sent me a link to a tutorial for soup bowl hot pads.  (This one.). My first thought was "How CUTE!" -- then I couldn't stop thinking about them.  I knew we wouldn't really use them, but she said they do a lot of stand up eating at dog events (she and her hubby do sledding events, etc. with their Siberian Huskies!).  Hmm ...

Cleverly disguising myself as the Sewing Fairy 😏, I asked Heather what colors she and her husband like.  She said "blue and silver/grey", and I hit my fabric stash.  I must admit two things at this point:

  1. It's not like I didn't think Heather was on to me, but it was fun to pretend she didn't.
  2. My stack of blue fabr-- OK, my stacks of blue fabric are rather on the large side of things.
I looked through my lovely blues, but nothing really grabbed me for this project.  At that point, one of my Siberians wandered into my Studio and I thought, "It would be cool if I had something with Sibes on it."  Then I remembered my stack of flannels and ...

IMG_4213FabsForHeather

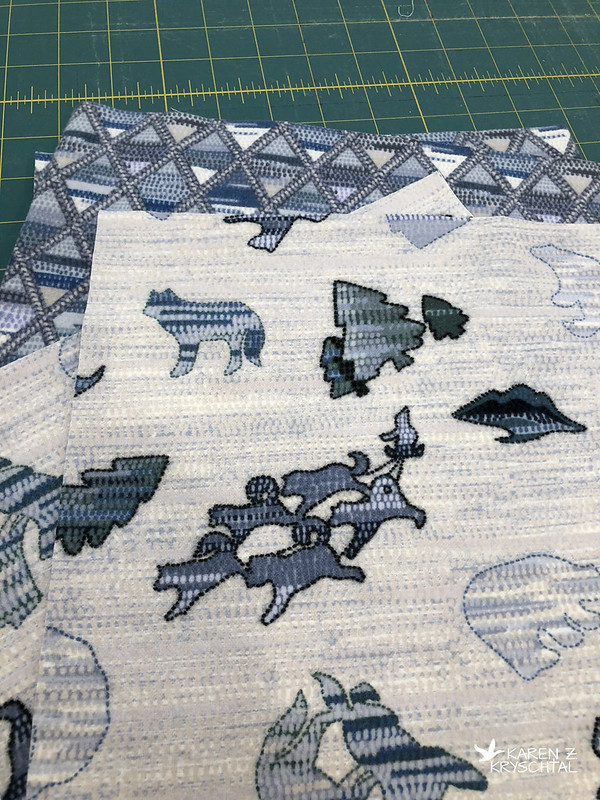
Iditarod-themed flannels.  In blues and silvers.  BOOM! Is that perfect or what? And yes, flannel would be a little trickier to work with since it's bulky, but ... it was perfect. And wouldn't that feel nice on cold hands?

I got to sewing ...

IMG_4214MakingTheX

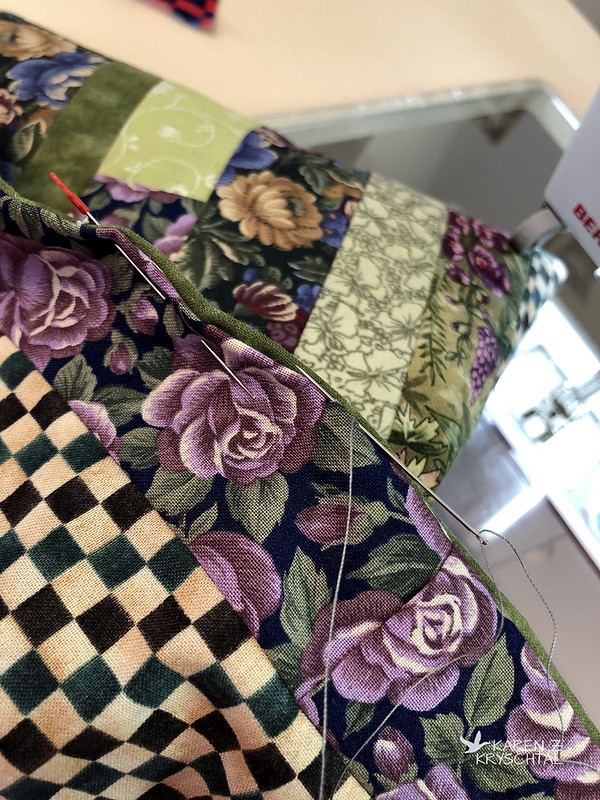
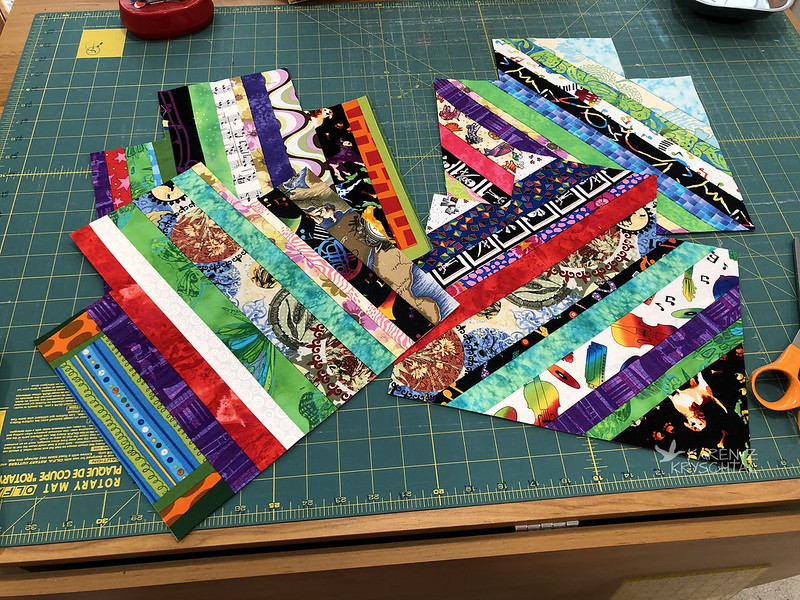
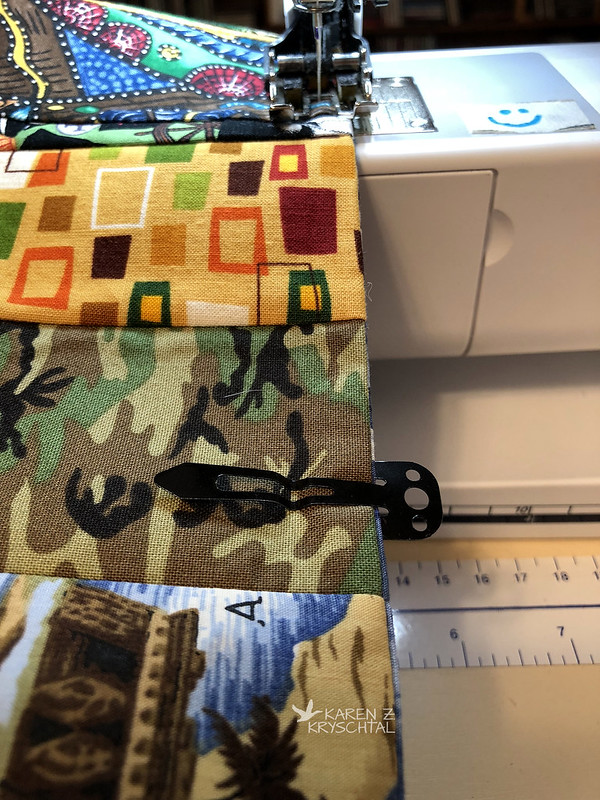
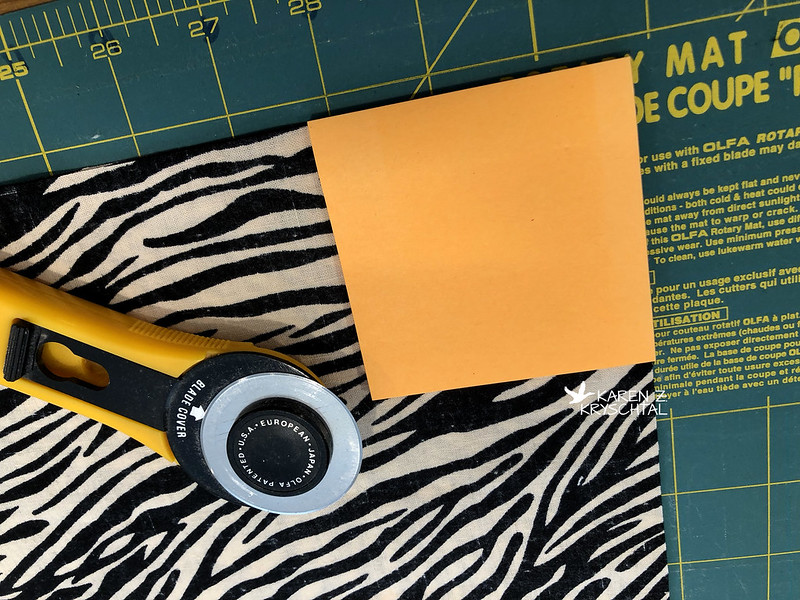
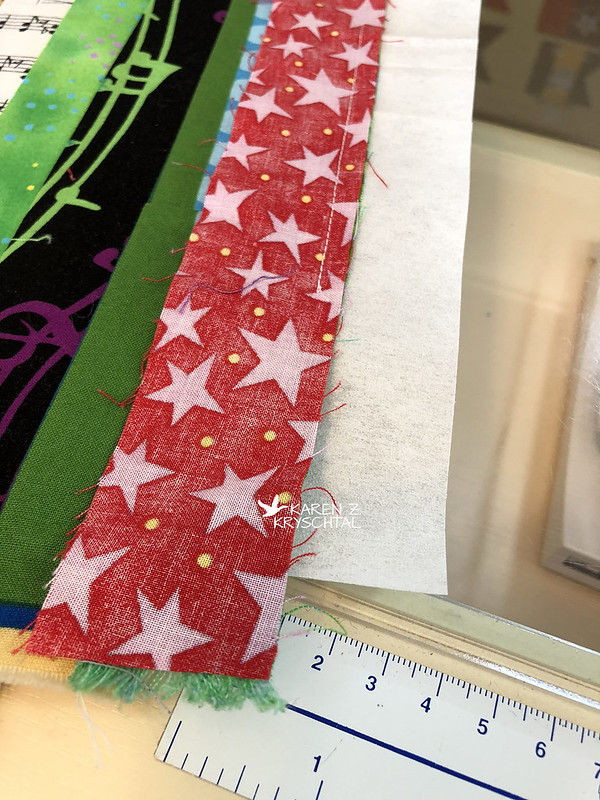
I use my walking foot a LOT - it was perfect for this.  As you can see, I cut my batting a little bit smaller than my flannel.  Why?  To help avoid bulk.  I cut my squares 1/2" larger than called for in the tute so I could have a larger seam allowance.  If Heather needs to wash these, it will help prevent fraying/seam issues.

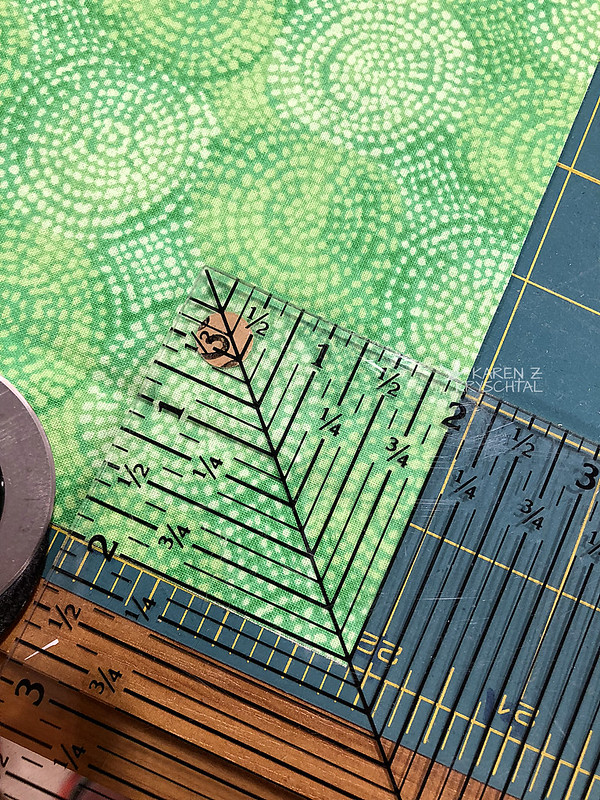
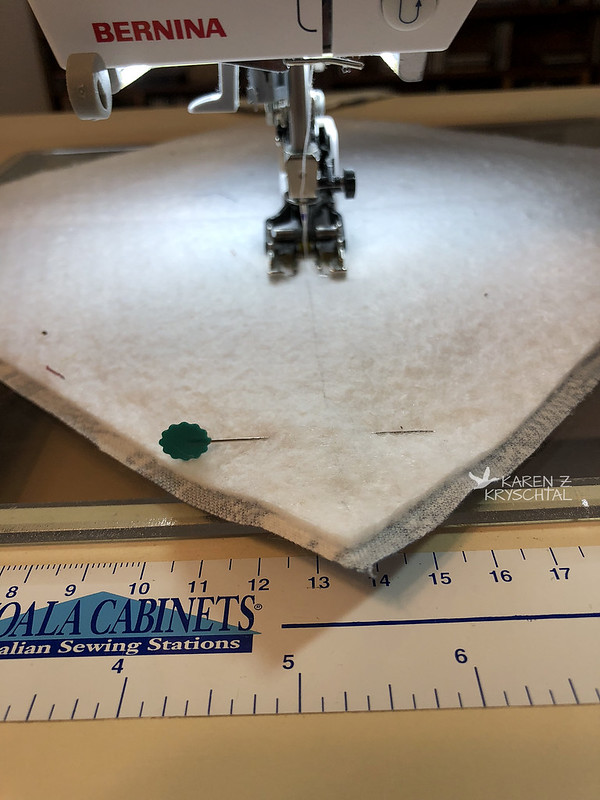
When I made the little notches to help form the bowl shape (watch the vid at the link above and that will make sense), I thought in addition to trimming the triangles off, I'd also cut off some of the excess batting:

IMG_4219TrimmingBatting

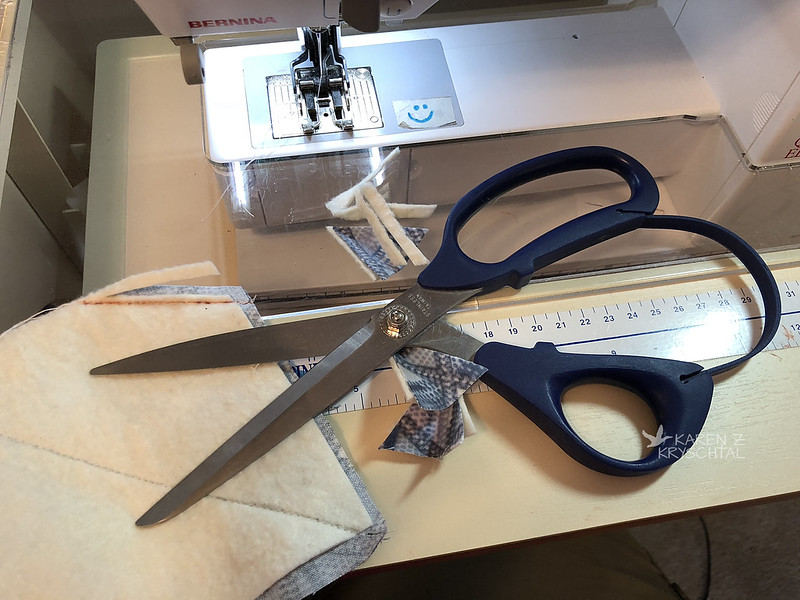
See up there by the scissor blade?  I think it helps the bowl lay better.

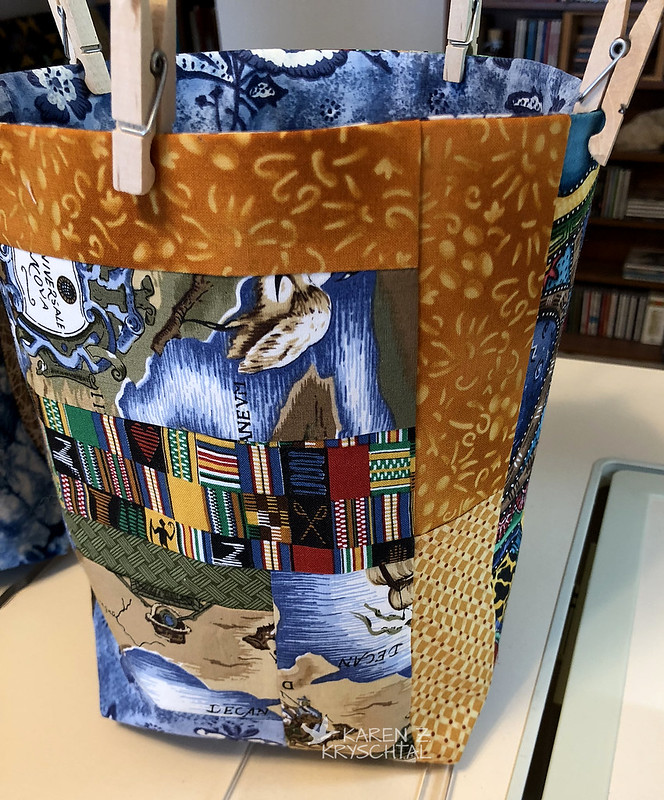
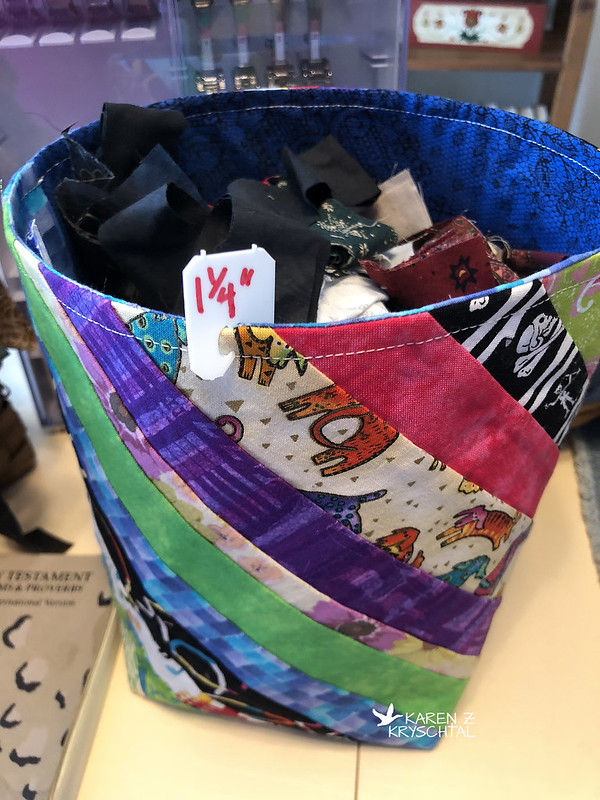
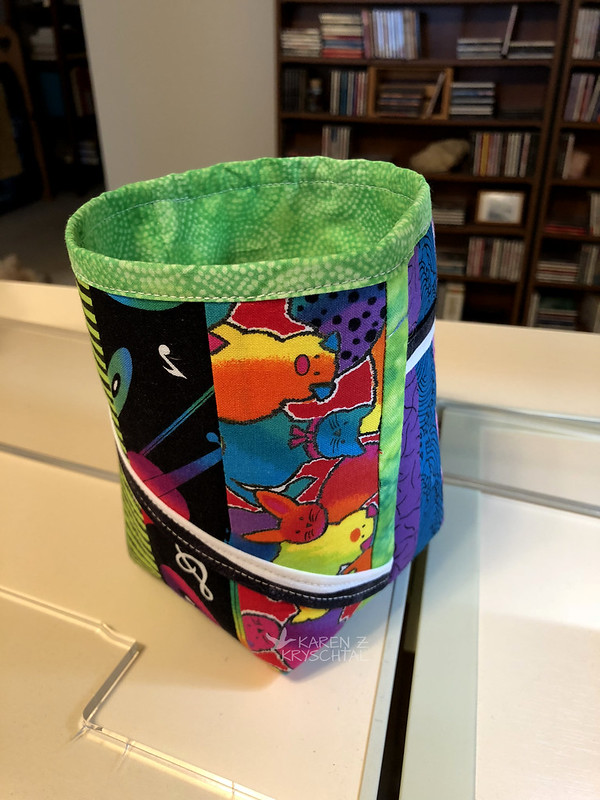
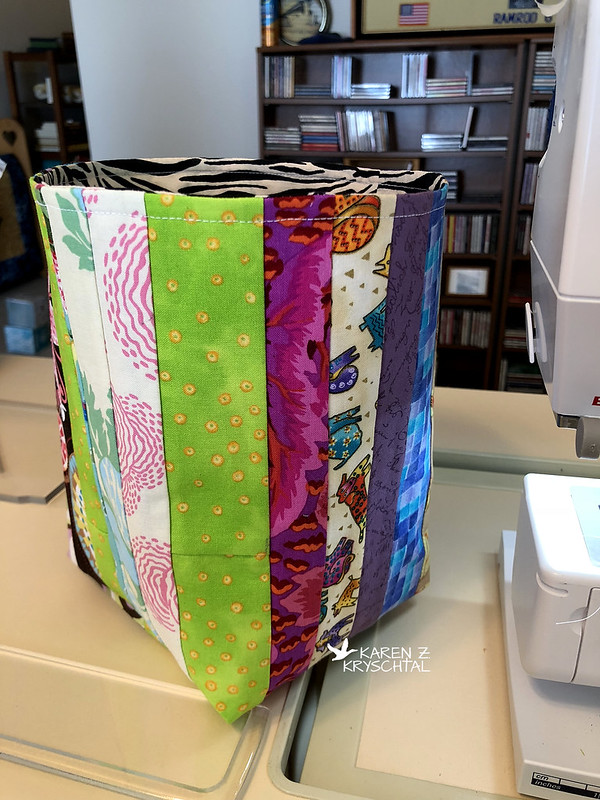
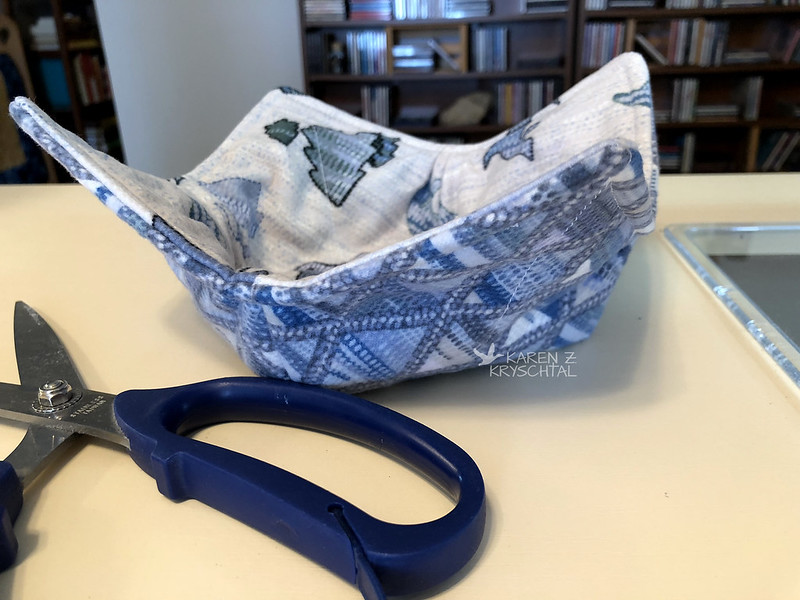
Before I knew it, I had a soup bowl cozy!  My husband started calling it that and it was easier than "soup bowl hot pad", so I went with it.  Check it out:

IMG_4216SoupBowlHotPad

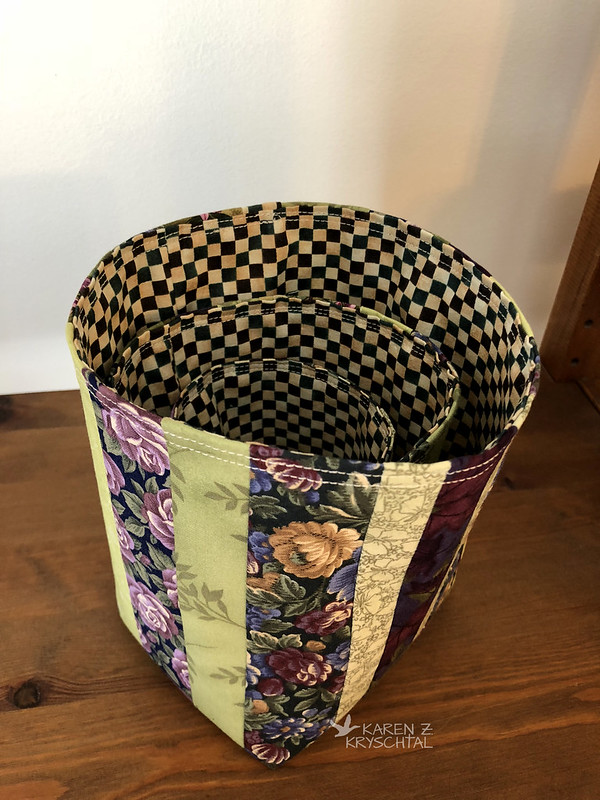
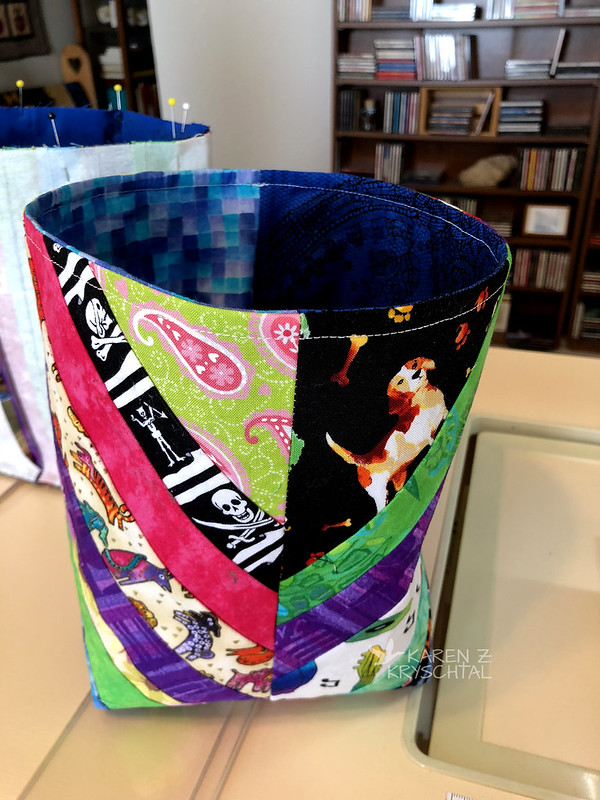
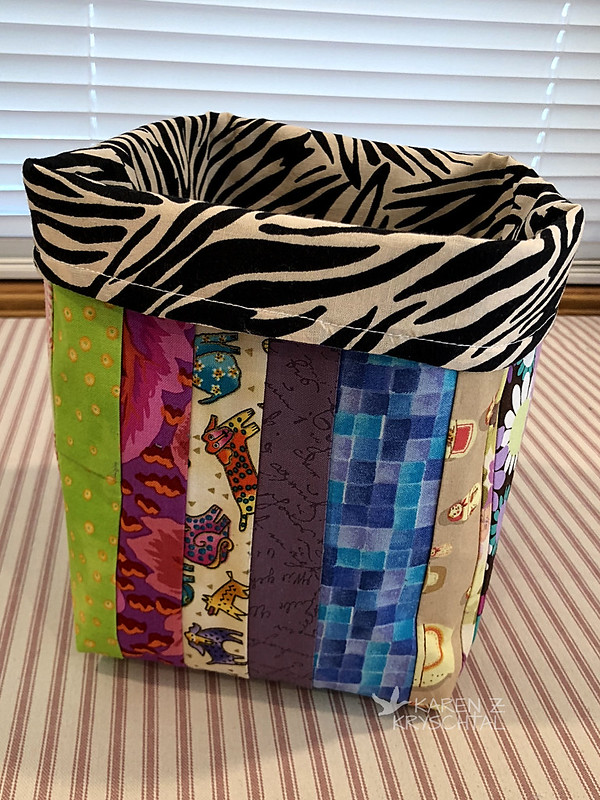
Here's a look at the inside:

IMG_4228SoupBowlHotPad

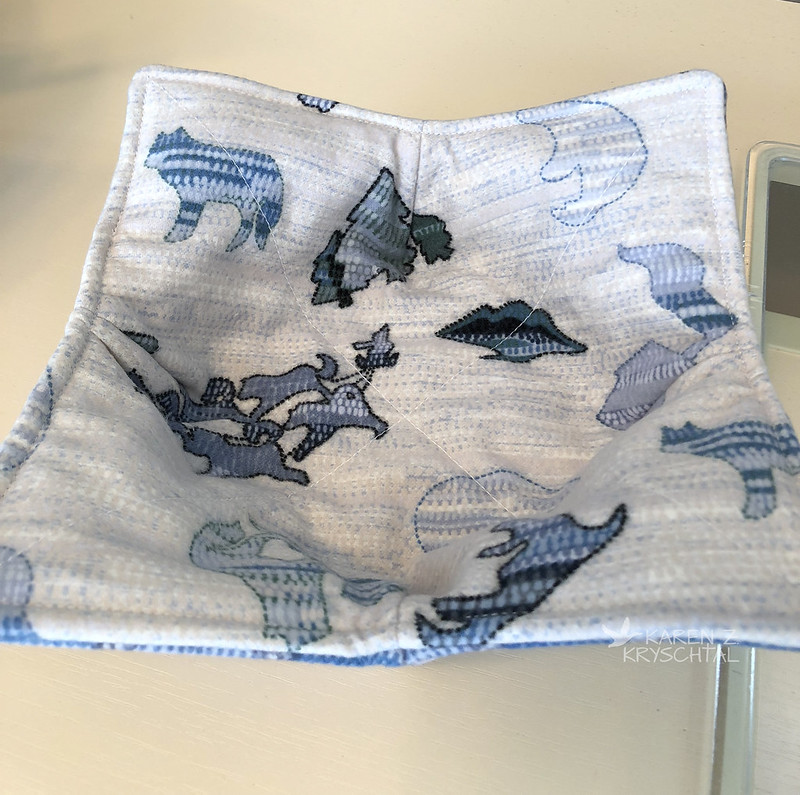
Isn't the fabric the best?!!?

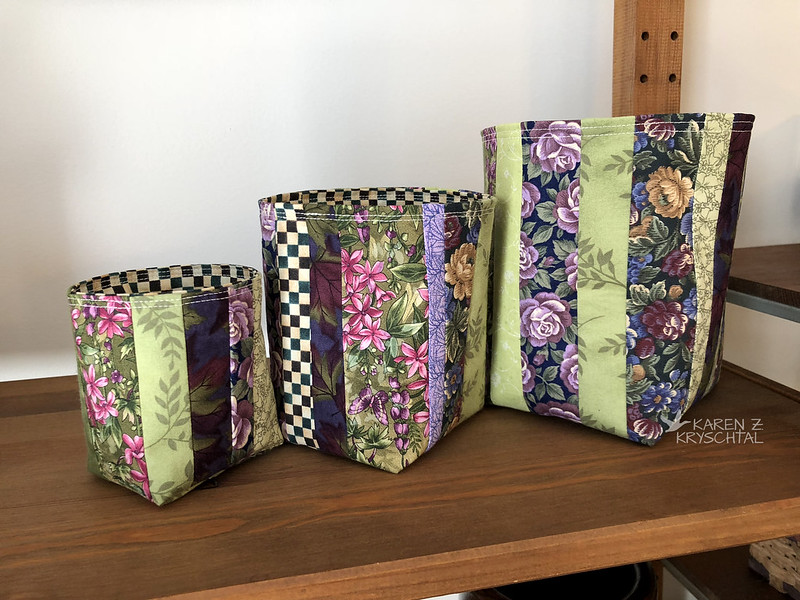
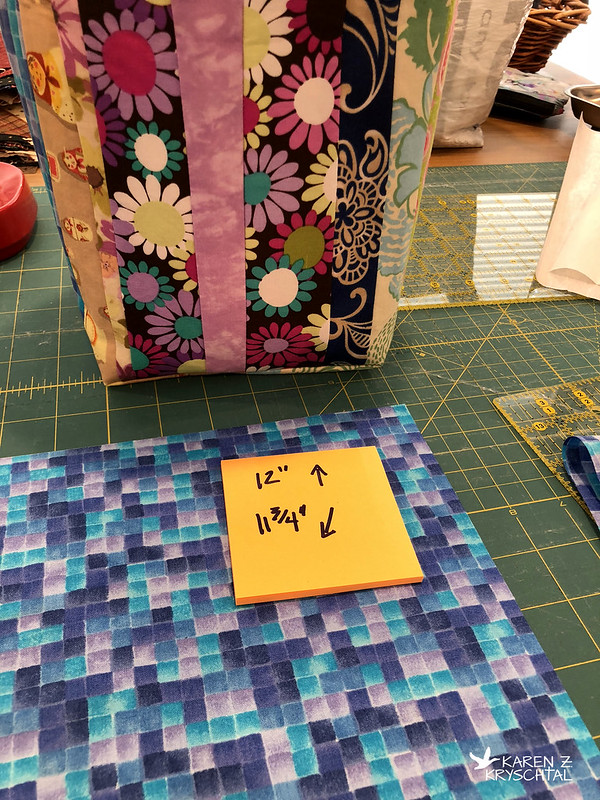
This was so much fun, I decided she needed a set - one for her, one for Dan, and a couple spares:

IMG_4231SoupBowlHotPads

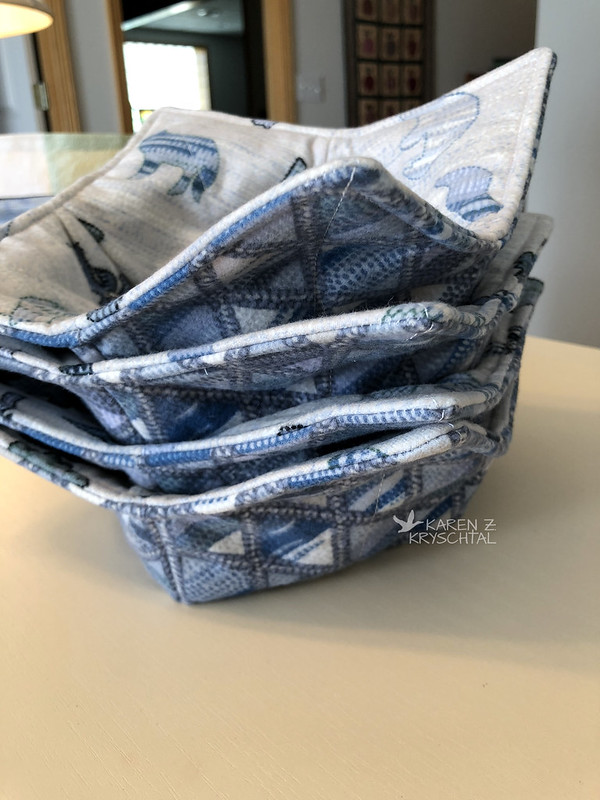
They're also reversible -- just punch them the other way.

I grabbed one of my bowls to see how it works:

IMG_4279SoupBowlHotPad

Tell me those aren't cute!!!

Heather, I hope you and Dan enjoy!  They were super fun to make!

Thanks for reading!

Thursday, September 20, 2018

Greens And Yellows

Greens and yellows.  My worst color area.  A reminder - I am clinically color blind - and I can't differentiate between many greens and yellows.  And golds.  So why have I been playing with them?  I  blame  thank my friend Denise!

Denise (who, ahem, needs to update her blog!) inspired me by posting a photo of the quilt found at this link to her FaceBook page.  Oooh.  Sunflowers.  Aren't they yellow?  Or gold?  And aren't their leaves green?  Yeah, whatever!  I decided I had to do some version of the quilt - and decided to go for a table runner.  And heaven forbid I should have looked at the tutorial -- I thought I'd just wing it.  I also challenged myself to use my scrap strips as much as possible.

I settled on bright greens, any neutrals, a yellow/gold marble-y looking scrap, and a mottled deep brown.  As I visually dissected the quilt photo, I saw 4-patches, 9-patches, and star points.  I started sewing and cutting and ...

IMG_4162WonkySunflowerBlock
9- and 4-patches made with 1.5" strips, centers and background of star points 2.5" 

Please ignore the pink stripes - that's my pressing surface.  But cool!  This could work!  Only rather than do nice, orderly "sunflowers"/stars, I decided to go wonky.  Why?  I could tell you that it's because sunflowers aren't perfect, but we all know it's because I didn't have to measure anything and it's a darn sight easier.  There.  I said it.  And it's really fun.

I realized somewhere along the line that I don't have many green scrap strips, nor do I have many yellow/gold strips.  I don't have much green, gold, or yellow fabric, actually - please see opening paragraph for a possible explanation.  This made me limit my table runner to three blocks - because I will not cut more strips for this!!!  ... unless absolutely necessary.

IMG_4167WonkySunflowerTablerunner

Once I had the blocks made and the 9-patches for the sashing all set, I pondered the sashing itself.  My initial plan was to cut solid chunks 3.5" x 6.5".  Since I don't have 3.5" scrap strips, but have an abundance of neutral 1.5" strips ... I pieced them.

IMG_4168WonkySunflowerTableRunner

I think it adds interest!

IMG_4169WonkySunflowerBlock

Before I knew it, I was almost there!

IMG_4171WonkySunflowerTableRunner

I think this is pretty good for someone who has been spending the mornings out in the yard with her husband and a chain saw.  Frankly, I am surprised I can still move, but that's a story for another day.

Here's the top, all pieced!

IMG_4193WonkySunflowerTableRunner

I did have to cut the green border fabric, I admit.  I thought adding little 4-patches at the corners would be fun.  Can you believe that in doing so, I actually did use up all of the green 1.5" strips?  Well, OK, the bright green ones.  But still!  Yay!

As of now, it's all sandwiched together with batting and backing:

IMG_4194WonkySunflowersTableRunner

It's in my Studio, waiting for me to do the quilting and binding.  I won't have time to work on it today, unfortunately.  The Project Manager from the remodeling crew is coming today to lay out Plan B.  Plan B involves them ripping out everything the first crew they sent did and starting over.  Uhh ... yeah.  It's that bad.

Thanks for reading!

Tuesday, September 18, 2018

Cerene's Bagets

Hi everyone!  I hope all of you are well.  We had an awesome trip down to Quivira NWR to do some birding.  I'm processing the pix still, but will eventually post a few on my other blog.  I mean Cam and Maggie will.  Ahem.  Anyway, as I said in my last post, I made a little something for a friend.  Cerene and I go way back and I feel like she's part of my family.  When she commented on the bagets I've been making, I really wanted to send her one.  Or more.  She was joking and said she likes florals and greens --- and I jumped on the chance to do something for her!

I reached into my scrap strips bagets and made this:

IMG_3962CerenesBaget

My husband came up with this great idea to do "nesting" bagets - so I made a smaller one:

IMG_3959CerenesBagets

And since I like things in odd numbers ...

IMG_3958CerenesBagets

The little one is my favorite!  So ridiculously cute!

Check out the "nest":

IMG_3961CerenesBagets

I was having so much fun, I just couldn't stop there!  I still had a few greens and florals laying on my table and thought Cerene needed a coordinating zippy bag!  Don't you think?  I even hand stitched the lining shut:

IMG_3968HandStitchCerenesZippyBag

It really felt good to have a needle in my hand again!

I decided to put a little "pull" on the zippy bag, just ... because.  I found some green crystal beads and the perfect charm:

IMG_3973CerenesZippyBag

Back in the 80s, Sam, Cerene's rather tall Beagle mix, was besties with my Siberian Huskies and Lab/Aussie mix, so I had to use that charm!  I hope you can see it there; it's perfect.  Why did I even have that?  Obviously for this project.  (For the story on Sam and my pack, please click here.)

Cerene, it gave me such joy to make these for you!  Thank you for your encouragement, kind words, and your friendship!!!

I'm working on a table runner now.  I'm taking on small projects, so I can get back into the groove - then I'll start tackling some of those unfinished projects!  I hope to get down to the Studio later today; we'll see if I can get enough work done first!

Thanks for reading!

Wednesday, September 12, 2018

What Am I Doing?

Hi everyone!  Once again, thank you for the welcome back into blogging on this blog.  I appreciate all of your comments and questions, both here and on FaceBook.

One thing several of you asked about was what I am going to do with all the "bagets" I've been making!

The ones I made out of fused shopping bags right now are serving two functions:  some are in the Studio serving as storage for things like zippers or fasteners or leash and collar parts, and others are in a stack of things that will go into the master bathroom, once the remodel is done.  They will be great organizers for inside the drawers of the vanity - and being plastic, they can be wiped out easily!

For those who may be wondering, the remodel has stalled out a bit, let's say.  We're now hoping it will be completed by Thanksgiving.

The other "bagets", except for the homespun one, are being used already to store my fabric scrap strips!

IMG_3975ScrapStripBinLineUp

I actually allowed myself to throw away the basket of 3/4" strips, as I don't really do miniature quilts any more, and if I decide to take it up again, I'll cut new strips.  Go me.  I still need to make one for the 1" strips, then I'll arrange them all in a more pleasing fashion.  They certainly take up less room in the closet (AKA Karen't House of Fabrics) than the baskets did; I feel like I've reclaimed a little space in there!

The homespun one ... I admit, I've fallen for it.  Try as I may to get away from homespuns and denim, they are my comfort colors.  That little "baget" will go somewhere out where I'll see it and use it.  I just don't know where yet.

I also made a little something for a special friend of mine.  I can't wait to show you, but on the chance that she might read this, I'll wait until it arrives at her house.  It was SUPER fun to do and gave me much joy!!!

That's it for now.  We're planning a birding spree for tomorrow (it's been TOO LONG!), so no sewing for a bit.  I'll be back before you know it.  Wish us luck with the birds!

Thanks for reading!

Friday, September 7, 2018

Homespun

Hi readers!  The "bagets" are continuing to multiply in my Studio.  As I mentioned, I'm going with different themes now.  In digging through my scrap strip baskets, I found a lot of homespuns and decided I had more than enough for a small "baget".

IMG_3854HomespunBaget

I also found that I had some strips pre-sewn, so I thought I'd work those in, too.

IMG_3853HomespunBaget

Why I had those small strips already sewn together, I could not say.  I also don't know why I had fusible fleece, but I had a hunk of that - so I used it for this project.  I'm working hard to gain some space back and use things I have on hand.

I lined with denim, which gave the "baget" even more stability -- and used some of the OODLES of denim I've accumulated.  I mean OODLES.  I see a denim bed-sized quilt in my future.  Let me first get through the remodel from %#&& first, so I can regain some sanity and have some uninterrupted Studio time.

As always, thank you for reading!


PS:  I'm fairly certain the tutorial at this link is the one I read several years ago and made everything sound so nice and easy.  It's well-written and is one that really made it all click for me!

Thursday, September 6, 2018

Holders

I'm not sure what to call them - holders?  Anyway, as I mentioned at the end of yesterday's post, the net-like thingies that the supermarkets use to protect some delicate fruits make really great "holders" for things in the Studio.

IMG_3836WebbingString

I especially like them for balls of twine and webbing.  It's hard to stick a pin in either, and tape can really make a mess.  I think the one around my hot pink webbing came wrapped around an Asian Pear - it's nice and padded!  Very handy and a great way to reuse them!

Thanks for reading!

Wednesday, September 5, 2018

Getting There!

I think getting there really is not just half the fun, but a whole lot of it.  I've been working on my "bagets" over the past few days, here and there, when I have time.  Now that I've started and have more or less of a plan, it's really relaxing!

The "bagets" have been multiplying.  Here are some outside panels for 11 3/4" ones:

IMG_3782Panels

My construction method is sort of like the one at this link.  I'm sure I followed a tutorial somewhere along the way to get started, but it's so inscribed in my head how to do this now that I just wing it.  But if you're curious about how I actually make them, check that link or let me know in the comments.  I would be happy to post a tute if anyone is interested.

Here's a freshly completed "baget":

IMG_3786Baget

Note the topstitching along the top.  It holds everything together nicely.  See the bag in the background?  I had been pinning before sewing the top, but wow, that's a lot to pin through.  Since I often use clothespins when I'm sewing leashes or collars, I thought I'd try that:

IMG_3820BagetTop

They held everything together nicely, but caught on my table and machine too much.  I switched over to the clips I use when I sew my bindings on quilts:

IMG_3821BagetTop

Much better!

You may have noticed I switched fabric themes for the "bagets".  Each "baget" has its own theme, but  I'm going multi-themed overall now.

Part of my problem with the old baskets I had my scraps in was not knowing which basket had which-sized strips in them.  Since I have a selection of bread ties that I used to mark quilt rows (see this link), I thought they might serve a useful purpose here, too.

IMG_3788LabeledBaget
No pins required!

Perfect.

I actually used up all of the interfacing I'd been using.  I'm very pleased about that.  It was either medium weight or heavy weight; I have no idea which.  I needed more "bagets", though, so I took another look into the closet to see what else I had.

I found some small pieces of something heavy, stiff, and sort of padded.  I figured I'd give it a go.

The biggest size I could get two cuts of (for front and back) was 8", so I went with that.

IMG_3822_8inchInterfacing

I found a fab for the lining and cut that to size.  Since I had reduced to 8", I reduced the corner cuts to 2".

IMG_3823CornerFor8inchBaget

It seemed right.

The bag came out very cute and is a nice size.  What I realized after piecing the outside panels though, was that there would be NO turning that baby right-side out through a small hole in the lining.  Normally, I leave a small gap along the bottom edge of the lining when I sew it. I turn that right-side out, put it in the outer bag which is still inside-out, sew along the top edge, then carefully pull the outside of the bag through that gap/hole in the lining, making everything all set.  This ... whatever I used ... was so stiff there was no way I'd be able to do that.  I sewed both the lining and the outside all the way, boxed the corners, then turned the outside right-side out.  I pushed the lining inside and realized I could fold the lining over about 1/4 of an inch twice, bringing it over the top of the outside of the bag, and it would be fine.  I did that, and carefully topstitched it down.

IMG_3826_8inchBaget
A classic "I meant to do that" moment

It looks sort of cute that way.

Do you like that black and white strip on the mini baget?  After I had pieced one of the panels, I realized there was a really goofy face on one of the fab strips that looked totally strange.  I decided to sew the black and white strip on to cover it.  I'm funny like that.

Here's how the line-up is looking:

IMG_3827Bagets

I think the remodelers are leaving early today, so I should be able to get down to my Studio for a bit to continue to march on these.

Before I go, here's a helpful tip I don't think I've shared before.  If you have rolls of interfacing or other materials, and you don't want to stick a pin in to secure the end, use one of those thingies they put around fruit:

IMG_3781MeshThingie

That's a long one; I can't remember what was in it.  Very handy, though!  I have short ones, too, that I put around webbing to keep it tidy.  I'll shoot a pic later.

Have a great day - and as always, thank you for reading!

Sunday, September 2, 2018

Cutting Corners and Other Fun Things

Hi everyone!  I just wanted to give a quick "thanks!" to those of you who left messages here and on FaceBook.  Your encouragement means a lot to me!

I made another zippy bag since I last posted. I used the last washing machine pod and started looking at the bag, wondering ... yeah. Had to try it:

IMG_3710ZippyBag
I fused the two sides between a very flimsy clear bag - I think a produce bag. It didn't completely fuse, but since I was going to do some quilting anyway, I figured it would be fine. I think it pairs nicely with the HyVee bag above it.  Ha ha ha.  On the other side, I fused some other shopping bags together:

IMG_3708ZippyBag
The ink from any bag will rub off and get messy if you have it on top, so I always put another bag on top with either no writing or I flip it so the writing is inside/reads backwards. The BBB bag is either the second or third bag down in the "stack".

Moving right along...

I have baskets in my Studio of my scrap strips. Sizes range from 3/4 of an inch, up to 3. Not only are the baskets getting to be in sorry shape, but they're way too full. To tackle both of those issues, I thought I'd make bags or buckets -- let's call them "bagets" from the scraps to hold more of their friends.

IMG_3764InProcess
I sewed the strips to interfacing I had laying around

In the past, I didn't cut the corners off my panels before boxing corners - I'd box them, then cut.  I started cutting first and it really does make it a bit easier.  I also made an interesting discovery.  I was cutting a 3" square out of each panel and ...

IMG_3766CuttingCorners
Sticky note pad with lining panel

My sticky notes are exactly 3 square inches.  I cut the corners using the stack of stickies as my template.

Here's the first "baget":

IMG_3768Baget
Colorful, functional

It's a bit on the tall side, so depending on how many scrap strips I need to put in it, I can always fold the inside down:

IMG_3771Baget
Boom!

That actually made it feel even sturdier for whatever reason.

I was on a roll, so I moved on to another bag.  I used 12" panels for my first "baget", but didn't quite have enough of the interfacing I was using to do that again.  I had 11 3/4.  Close enough.  I wanted to remember what size each one was, in case I really liked one better, so -

IMG_3772InProcess
Am I the only one who writes notes to herself?

I was rushing.  I admit it.  I made my lining and wanted to get the two panels at least pieced before I had to go upstairs and make dinner.  (Chicken, black bean and corn enchiladas, and they were wonderful.  I'm not just saying that because I get to serve leftovers tonight.)

So what's the rule when you're in a hurry?

IMG_3773InProcess
Well, that's a fine how do you do!

That's right.  My bobbin ran out!  Could it be any other way?

Since I was on the last strip, I hurriedly wound a new bobbin ...

IMG_3774Bobbin
♫ "... You spin me right round, baby, right round ..." ♫

... then sewed that strip on.  It didn't go all the way to the edge of the interfacing.  Of. Course.  Today, I'll be adding yet another strip on, then assembling the "baget".

Thanks for reading!