Tuesday, October 23, 2018

Shamming

Well, not "shamming" in the military slang sense of the word - as per the Urban Dictionary:  Shamming (Military): "To intentionally avoid work, being at work, exercise, etc...".  Yes, the term may well have been tossed around  Army of Four Headquarters with that exact meaning during the first couple months of the month-long remodel.  A lot.  But no.  I mean "shamming" as in pillow shams!

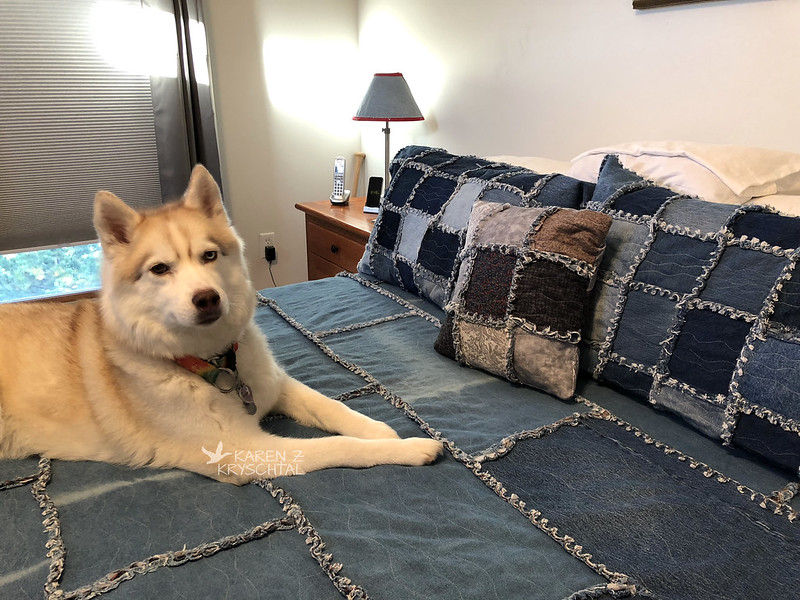
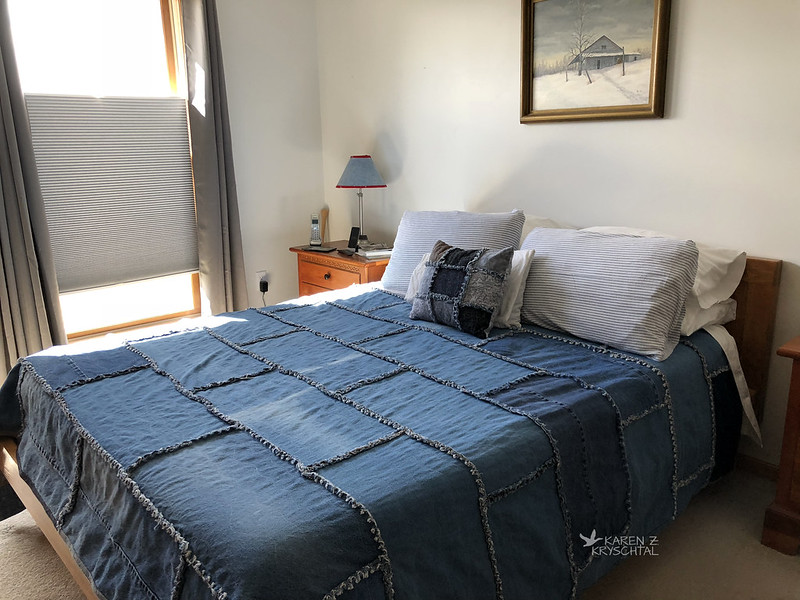
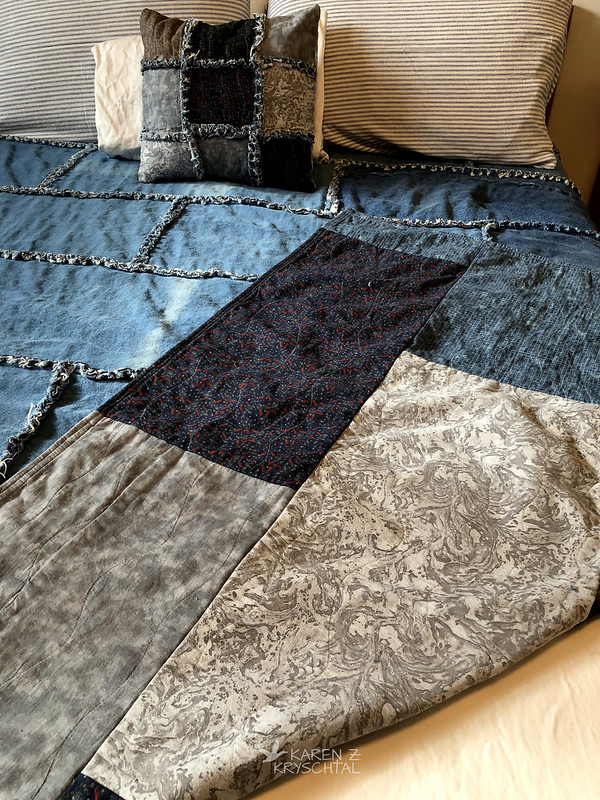
IMG_4853DenimSham

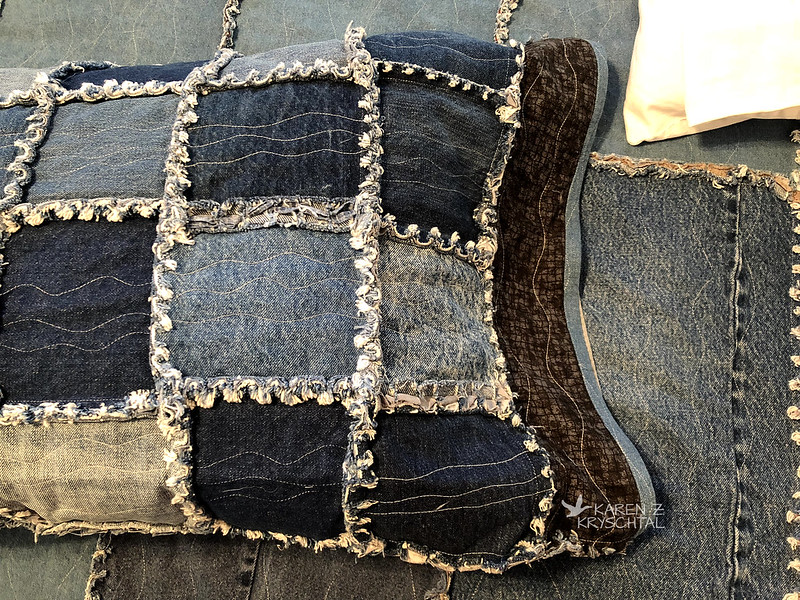
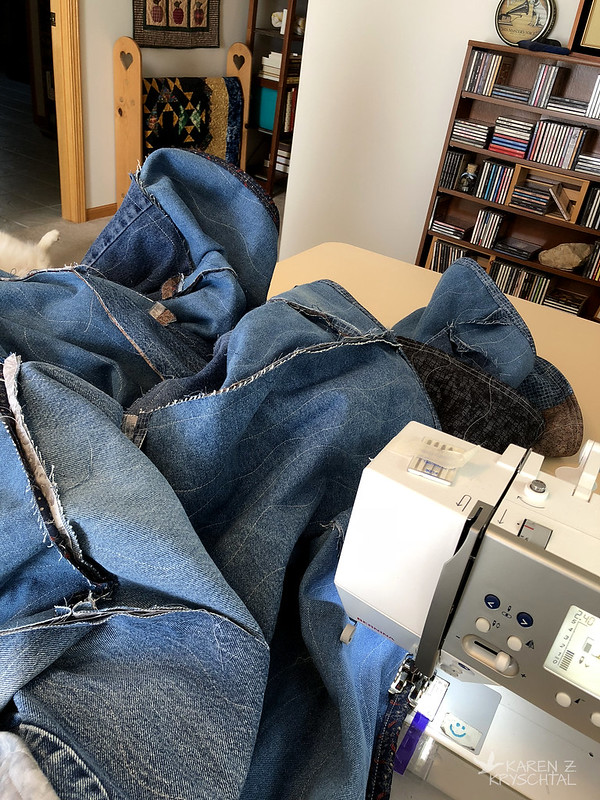
That's right! The remodelers left by about 2:30 or so yesterday, so I raced down to the Studio to see if I could get those pillow shams done. Not only did I get them made, but I clipped all the denim edges and gave them a good wash and tumble dry!!!

I went with the same wavy quilting as on the bed quilt - and even used a spare panel from that quilt for the open edge part.  I turned that open end twice and sewed a little 3/8" or so "binding" there for the finish.  I'm very pleased with how they came out.

IMG_4856MagsDenimBedEnsemble
Maggie whole-heartedly approves!

A huge project, all wrapped up! It feels great!

Thanks for reading!

Monday, October 22, 2018

BOOM!

Hi everybody!  In my last post, I told you I had challenged myself:  could I actually make a king-sized demin quilt start to finish before the remodelers finish our bathroom?  It seemed ludicrous - to me, anyway.  Not only do I take forever and get sidetracked very easily, I've never attempted a king-size.  Besides, the remodelers had almost a 3-month head start on me.  If you follow me on FaceBook or Instagram, you already know this, but ... I won.

IMG_4765DenimQuilt
BOOM!

Is it really "winning" if our bathroom still isn't done, though? Hmm.

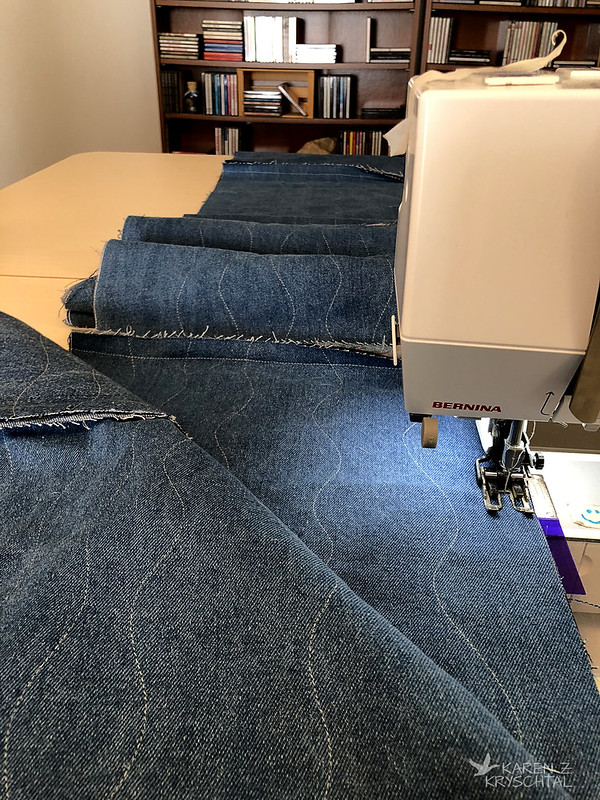
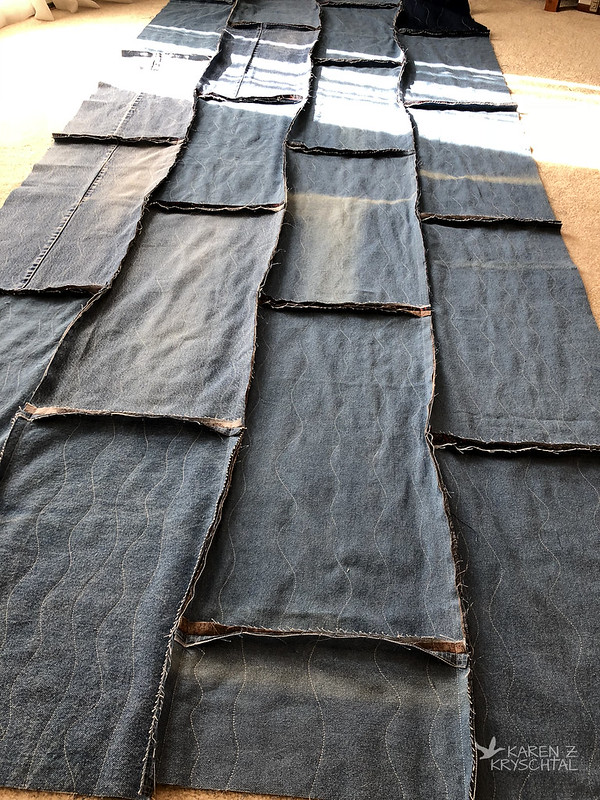
Anyway, let's take a look at the process! I love making fray-edged quilts, especially from demin!  I did something a bit different this time.  Rather than squares, I cut very large (12x24") rectangles.  I am sort of mimicking the new floor in the bathroom -- grey/distressed wood-look porcelain tiles.  You can sort of see it in the photo at this link.  (They've pried up parts of it since then and replaced tiles that weren't installed correctly.  Please don't ask.). The quilting is either sort of the "wood grain" or maybe waves?  I don't know.  I just went with it.

IMG_4731DenimQuiltRows
Joining rows

I used my walking foot.  I maybe should have used my denim foot, but honestly, I love my walking foot and use it a lot.

Before I knew it, I had half of the rows together!

IMG_4739DenimQuiltRows

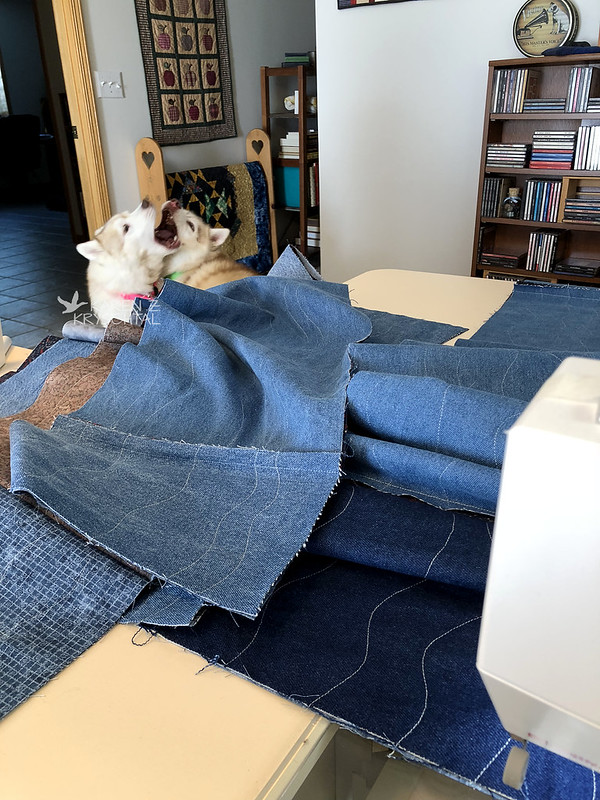
I had my own personal cheering squad:

IMG_4732CamMagsHelpingDenimQuilt

They were a tremendous help!

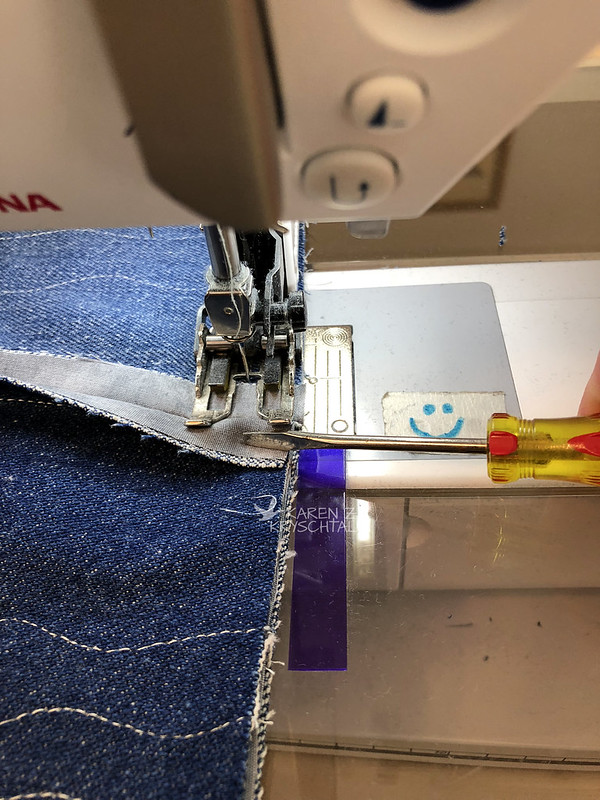
Here's a helpful hint for those thick, thick seams.  Instead of using your finger which can be under the needle before you know it, grab your little screwdriver and use that to help flatten the seams and keep everything lined up.

IMG_4779SeamTip
Everyone keeps a screwdriver handy, right?

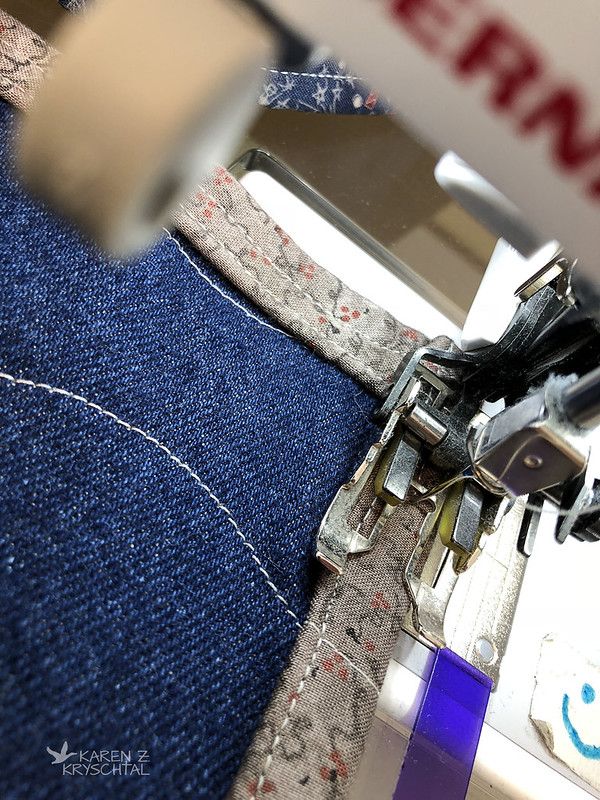
I was using slightly over 1/2 an inch seam allowance.  The purple tape is there as a guide.

I did my quilt edges differently this time, too.  Rather than fray the edges, I brought the back around twice (fold in, then fold in again) and sewed it down.  I put two lines of stitching in:

IMG_4748SelfBinding
Second time around!

I thought it would be stronger and would bring those lovely greys and blues around, making a more decorative finish.

IMG_4749DenimQuiltBindingMags
Maggie is back there, giving me the "paws up" approval!

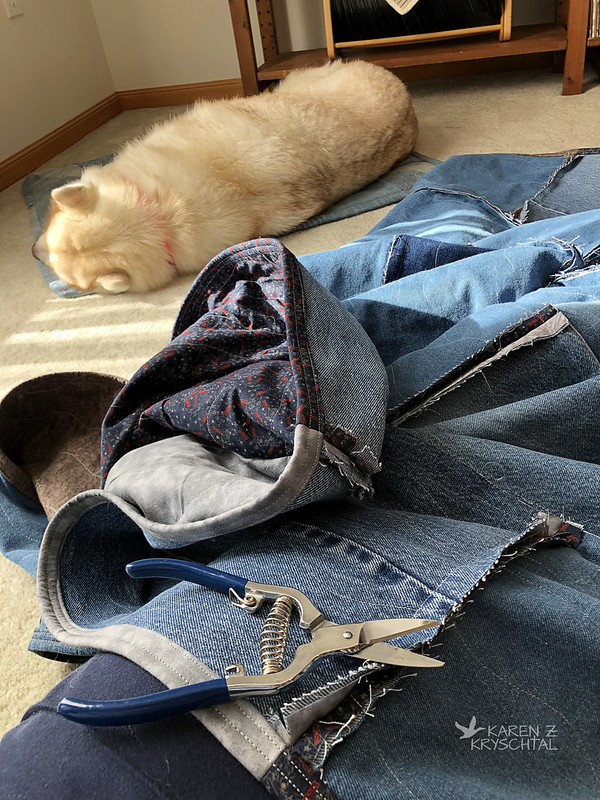
It was a huge, heavy undertaking, but before I knew it, I wasn't done.  HA!  No, not really.  It was time for all the snipping.  And snipping.  And snipping.  My least favorite part - clipping every 1/2 inch or so on every seam.  That's like ... 87 million snips and whatever you do, don't snip through the seam!!!  I sat on the floor with Cam and took my time.

IMG_4751SnippingCam
Getting snippy

Those are spring-loaded, micro-serrated blade scissors.  They are the sharpest instrument I've ever used and they scare the daylights out of me.  But they are the BEST for doing this.  The BEST!

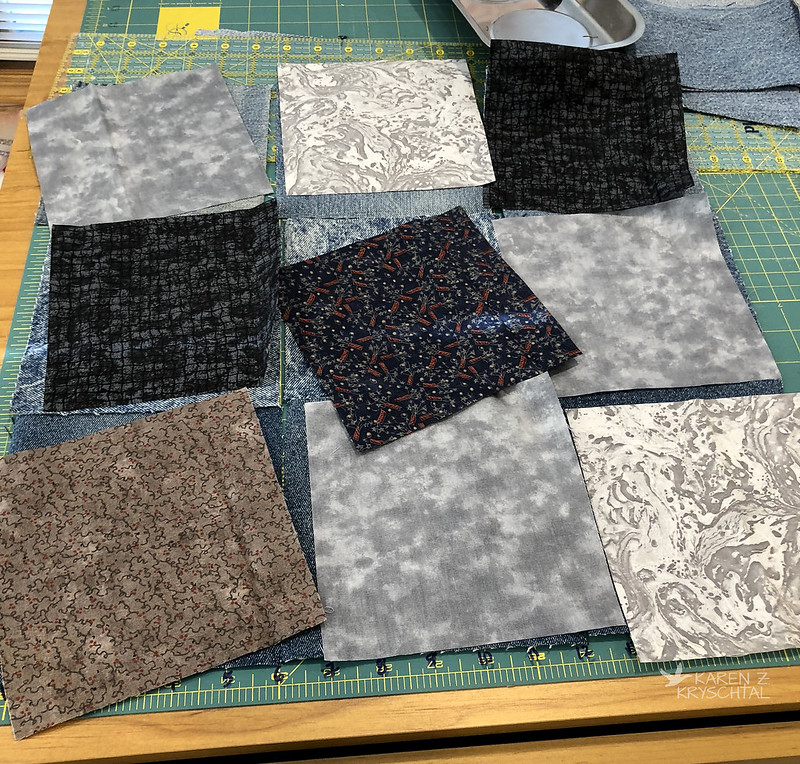
I got giddy and thought I'd do a little throw pillow while I was at it.  This time, rather than having the "frays" on the denim side, I frayed toward those greys and blues.  Here's my line up:

IMG_4719Pillow
Why not do a throw pillow?!?

Those are the same fabs as on the back.  This was another of my "do something without buying fabric" deals.  I did have to buy thread, but that doesn't really count.

Here's another look at the completed projects:

IMG_4773DenimQuiltReverse
Flipped up to show the reverse

That's after two washings.  I was impressed that I didn't clog up the plumbing.  (I'm assuming if I did, I'd know it by now.). I did stop the dryer every 15 minutes or so to empty the lint trap.

Anyway, I'm very pleased.  A quilt I made, that my pups can jump on, wrestle on, and curl up and snuggle on.  It's perfect for us.  And it's reversible.

I've further challenged myself to come up with two shams for the big pillows.  I would have finished today, but the remodelers threw me a curve ball.  Normally, the girls and I head to the Studio and just shut the door to the downstairs.  Today, they're reattaching the banister down there again and repairing the drywall the right way, as the first guy didn't do any of it to code.  There will be painting involved this time, as well.  Needless to say, my Siberians would want to "help" a bit too much, so no Studio time for us today.  I still think I can get the shams done before they finish everything.  I did finish the king-sized quilt.  BOOM!

Thanks for reading!


PS:  I normally have some quilts on the wall in the bedroom; they were taken down during construction/deconstruction/reconstruction/etc.

Thursday, October 18, 2018

Wonky Sunflower Table Runner

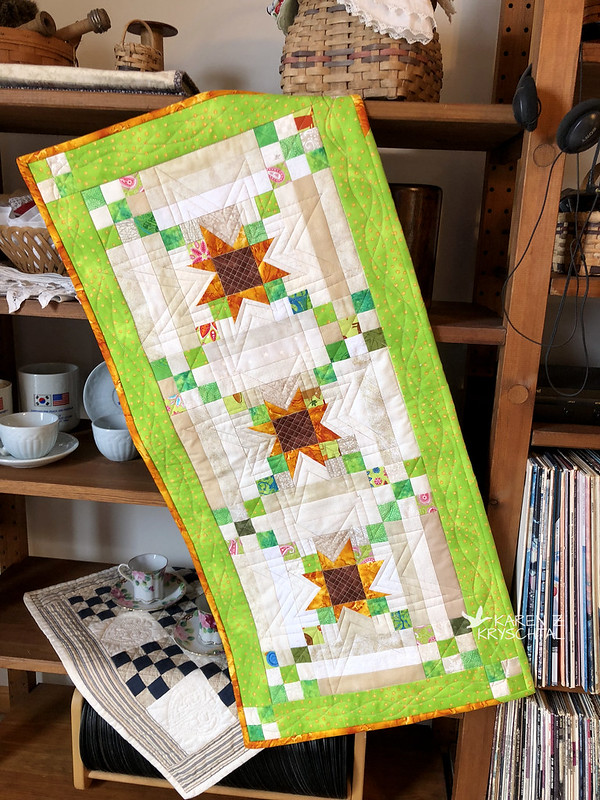
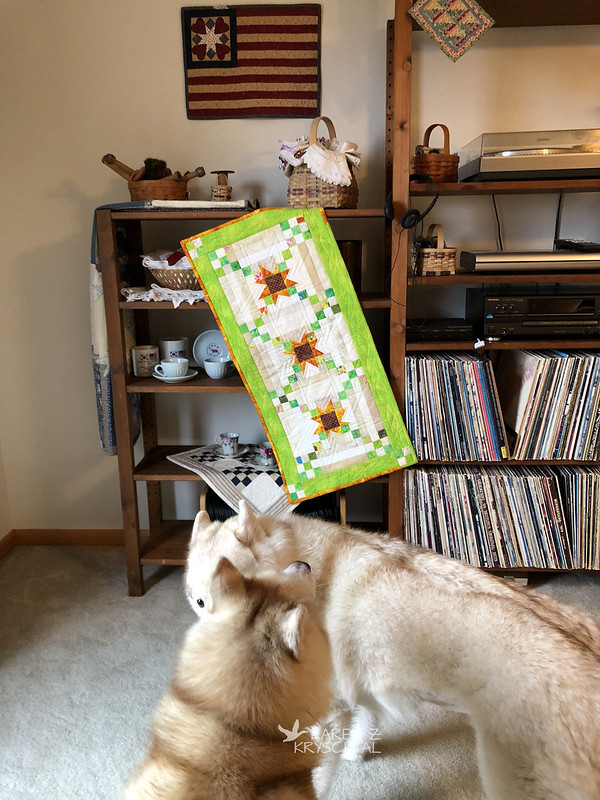
Just a quick update - I actually finished the Wonky Sunflower Table Runner!  Yay!

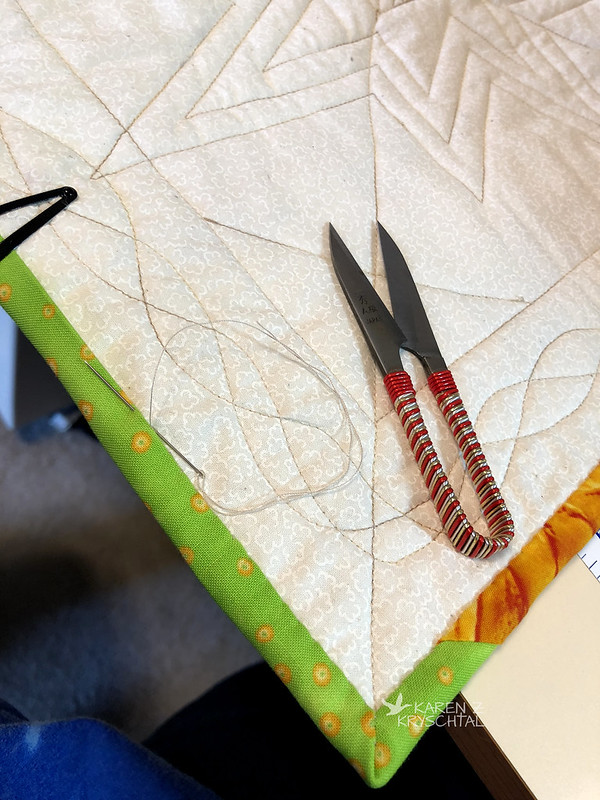
When I last showed it to you, I was hand-stitching the binding on:

IMG_4654WonkySunflowerTableRunnerBinding
Rounding third and heading for home!!!

It had been forever since I'd done that much hand work and I must say, I thoroughly enjoyed it! I find binding work to be so relaxing and one of my favorite parts of quilting. Quite possibly because it means you're almost done!

IMG_4657WonkySunflowerTableRunner
Ta-da!

I had lots of help! Here is a shot of my cheering section, in action:

IMG_4656MagsCamWonkySunflowerTableRunner

Couldn't have done it without them. (And the fact that I couldn't go anywhere else due to the remodeling.)

Here are a couple detail shots:

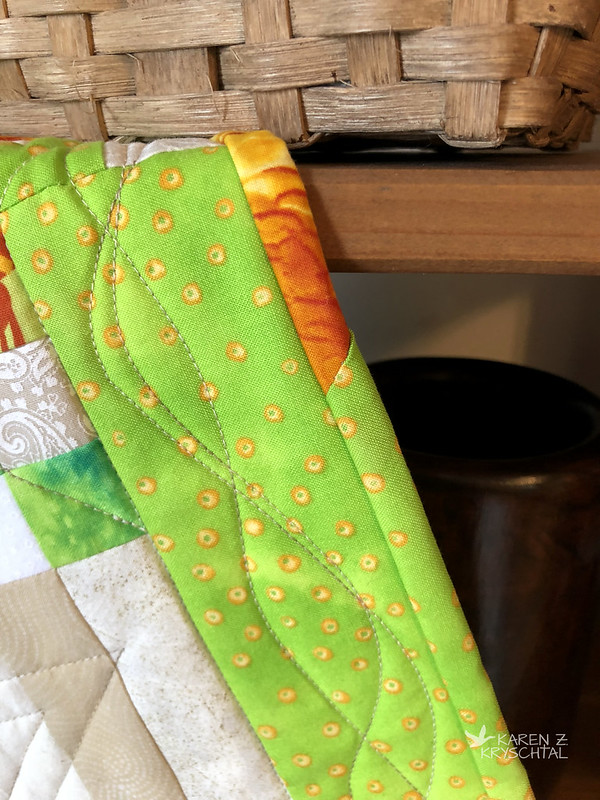
IMG_4658WonkySunflowerTableRunnerDetail

I'm glad I didn't rip out the quilting I had done; it really grew on me.  And I think the variegated thread adds depth.

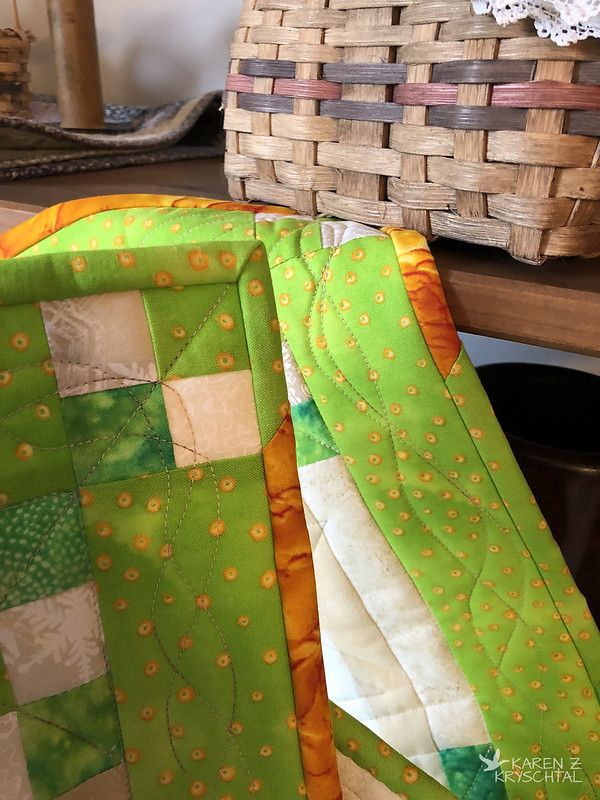
I had mentioned I did the binding using scraps of both the green from the border and the "petals" fab.

IMG_4659WonkySunflowerTableRunner

I almost always use more than one fab in my binding.  It's "me".

Next up ... I challenged myself.  This is a good one.  I challenged myself to make a king-sized fray-edged denim quilt for our bed (the bed is queen-sized, but I like a lot of over-hang) and get it done BEFORE the remodelers finish.  Ha ha ha.  They started in July; I started about the second week in October.  Knowing how long it takes me to finish anything, especially large quilts, it's a funny challenge.  Especially since they should have been done in August, or by Labor Day at the max.  Place your bets.  I'll keep you posted.

Thanks for reading!

Thursday, October 11, 2018

Heavy Duty!

Hi everybody!  I'm glad the Zippy Pouch Tutorial seems to make sense.  Once I got over my fear of zippers, I really couldn't understand what my hangup had been.  Oh, don't get me wrong -- I still fear the zipper FOOT, just not the zipper.  I've broken too many needles by not remembering to move my needle position to not have a healthy respect for that baby.

Anyway, the beauty of the Zippy Pouch is, as I said, it can be any size, any fabrics, whatever you want!  My friend Cindy commented that she likes to do use batting and do some machine embroidery on her zippy bags.  What a great idea!

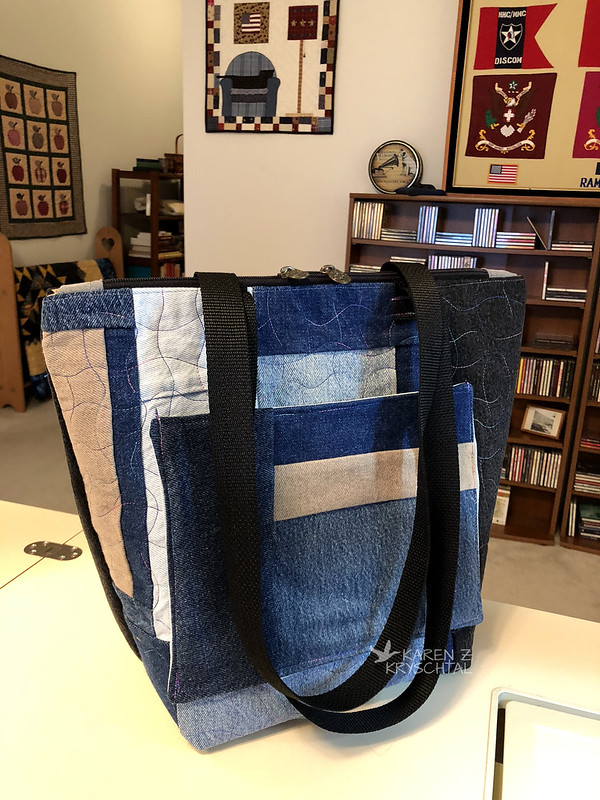
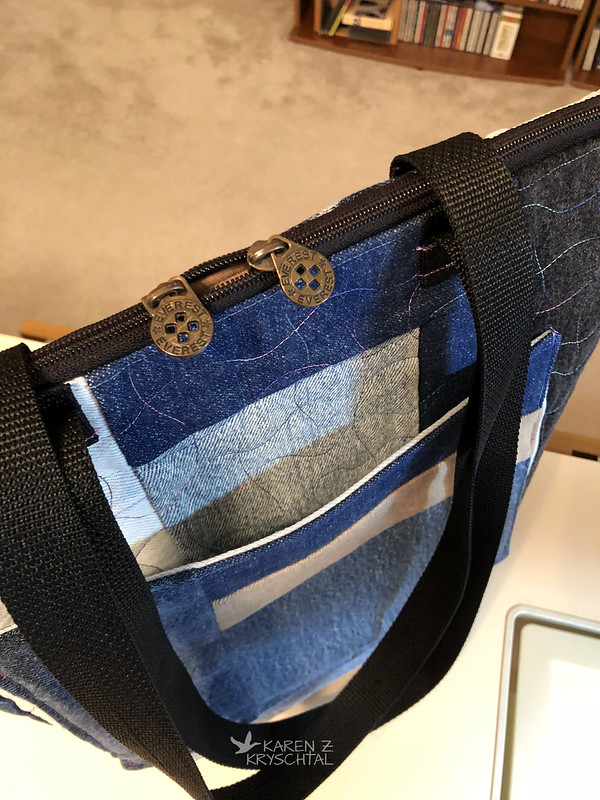
I mentioned that you can baste the zipper in place before you do all the layering - and that I had done so recently on a heavy denim bag.  It really was helpful, as I was dealing with thick layers and pins weren't really working.  This is the bag I was working on:

IMG_4566DenimBag

Denim patchwork. Nothing like thick seams to go through. BUT ... I followed the same formula - just made sure the zipper is 1" shorter than what will be the top of the bag!  I did increase the size of the square I cut at the bottom to make my boxed corners - I think 3" on a 16 inch panel?  Something like that.

IMG_4567DenimBagZipTop

I had that cute "double zip" in my stash. I think it had been on a backpack. Something. I'm not sure. It works as a great zipper for this project. I needed a bigger purse - one that could hold all my stuff PLUS my Kindle and other "in case there's a long wait" kinds of things.

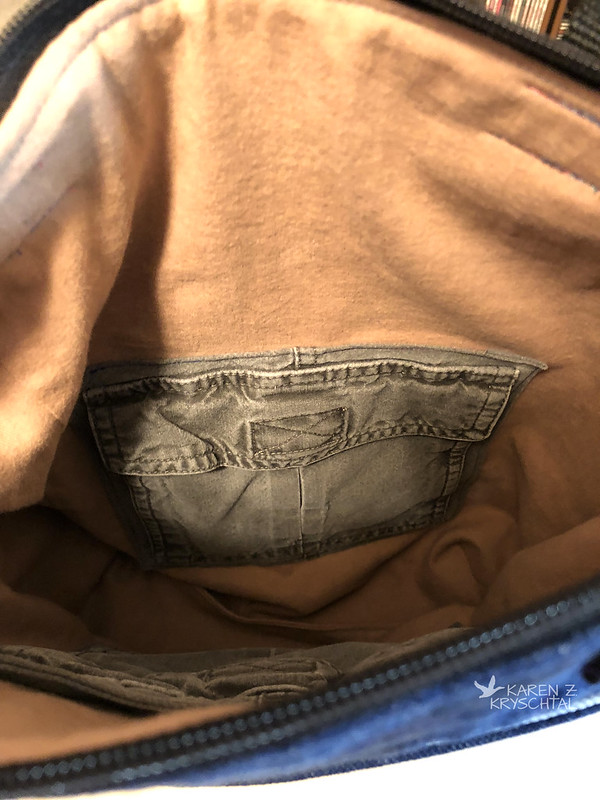
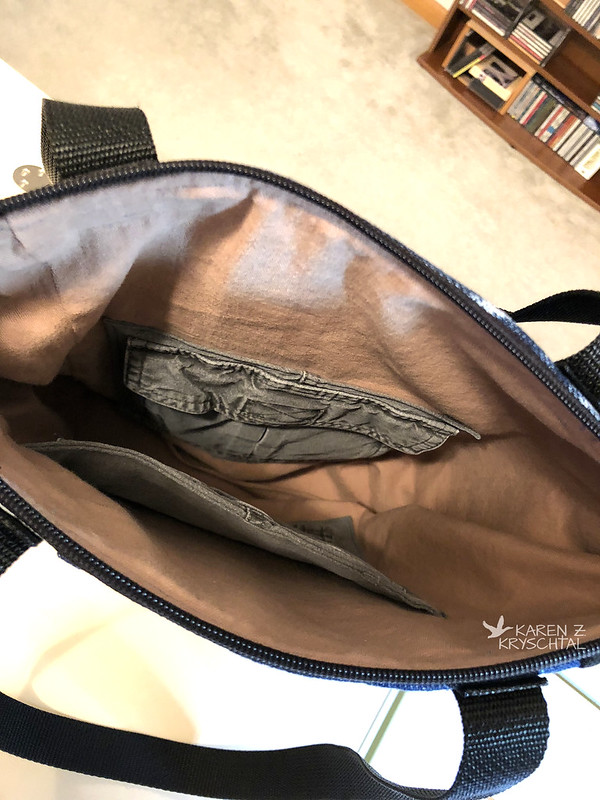
On the inside, I lined it with brushed denim from a discarded jumper and took some pockets off a pair of trousers my hubby had pitched.

IMG_4569BagInside

Maybe they were golf shorts. I can't remember. Anyway - nice pockets, with Velcro fasteners. I lined one and sewed along 3 sides, so it was double pocket:

IMG_4568BagInside

I had not put a zipper on anything this large (or bulky) before - and I'm really pleased with how it came out!  Please don't be afraid to give this a try!

Thanks for reading!

Monday, October 8, 2018

Lined Zippy Pouch Tutorial

Hi everyone!  As I promised in the last post, I'm here (finally) with a tutorial for a zippy pouch.  Let me first say there are a gazillion of tutes on the web for lined zipper pouches.  This is my way.  I'm doing this almost as much for myself as I am for those who asked, as I can never remember which tute I followed and what I did.

This is photo-heavy, but I wanted to post the complete process.  Ready to go?

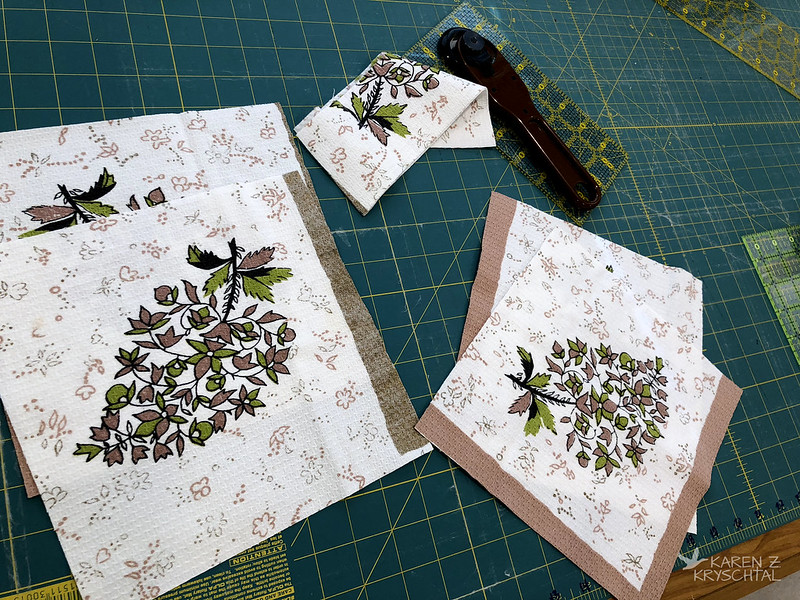
First step, cut your fabs.  Use anything - any fab, piece it if you want to.  For this tute, I'm using "vintage linen" - an old tablecloth of my grandmother's.  I made my sister a bag from the rest of it.
IMG_4438CutPieces

You want 2 pieces for the outside and 2 for the lining, and scraps for zipper tabs.  I cut my pieces 8" square; they can be any size!

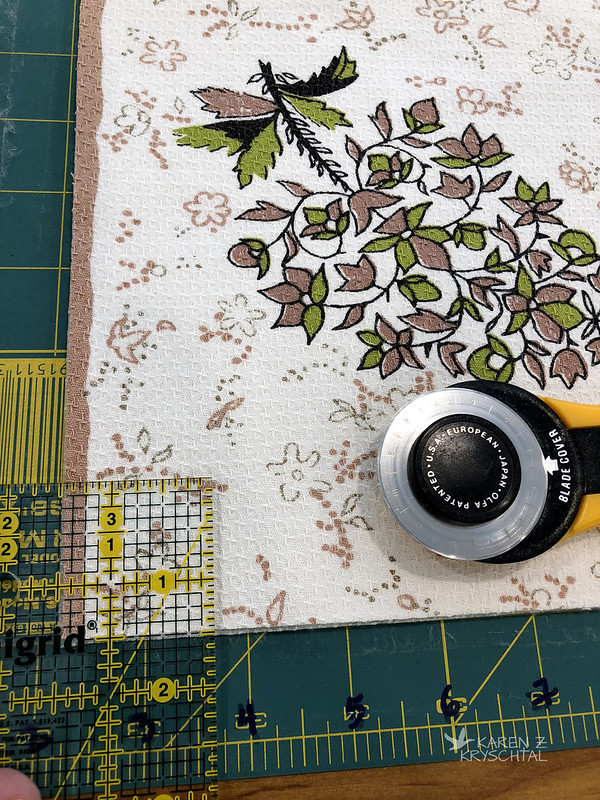
Next, AN OPTIONAL STEP (only if you want to box your corners) - cut the bottom corners off each panel like so:
IMG_4442CutCorners

For an 8" square, 1.5" square is good.  Do the bottom corners ONLY of each of the 4 panels.
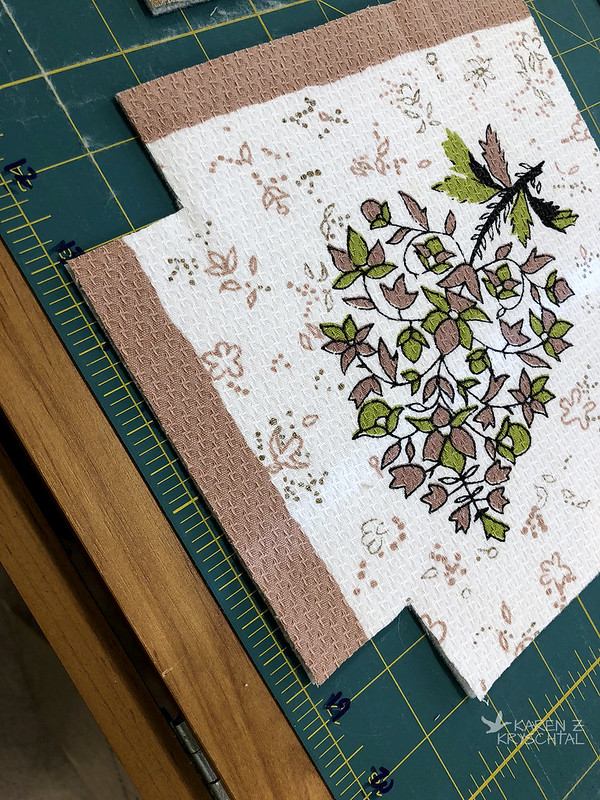
IMG_4443CornersCut

Again, that was optional.

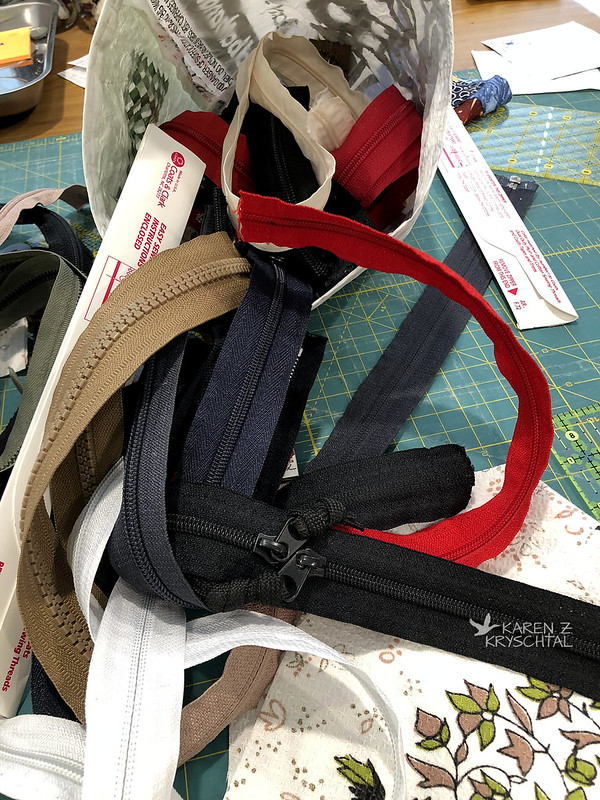
Next, grab a zip!
IMG_4440GrabAZip

I save zippers out of discarded clothing, backpacks, etc.  Why not?  Your zipper should be 1" smaller than the width of your bag and NYLON.  So for our example, a 7" zip would be fine.  Longer is totally good.  You can sew through nylon zips, so ... yeah.

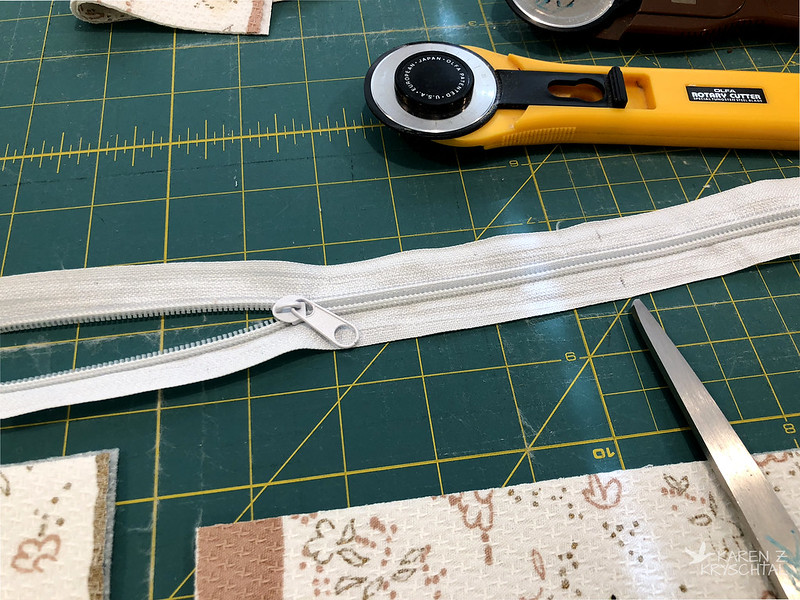
Mark the zipper 1" smaller than your panel and CUT, if needed.  If you need to cut it, make sure the pull tab is on the part you're saving.
IMG_4444CutZip

Next - we're making zipper tabs.  Use scrap fabric.  Cut about 2" x 4".  Make 2.
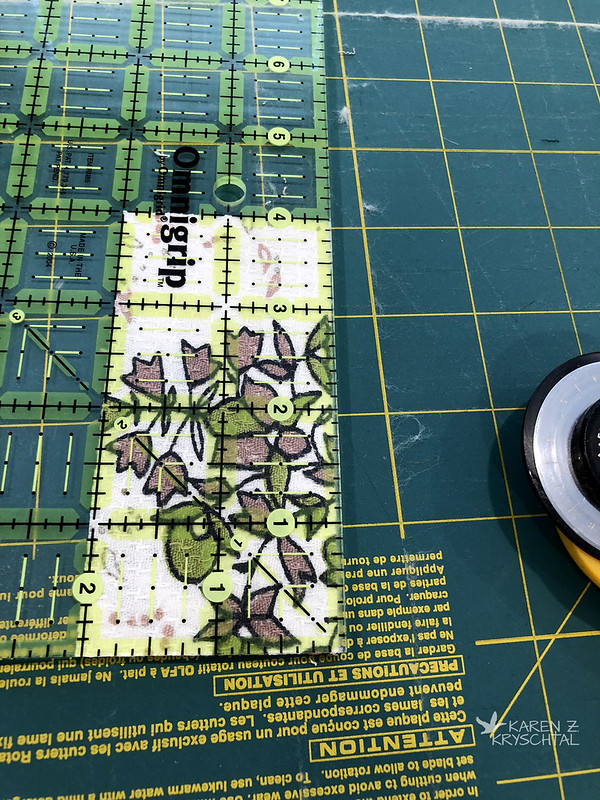
IMG_4449CutZipTabs

Take over to your pressing surface, fold in half (bringing short sides together), and press, wrong sides together.
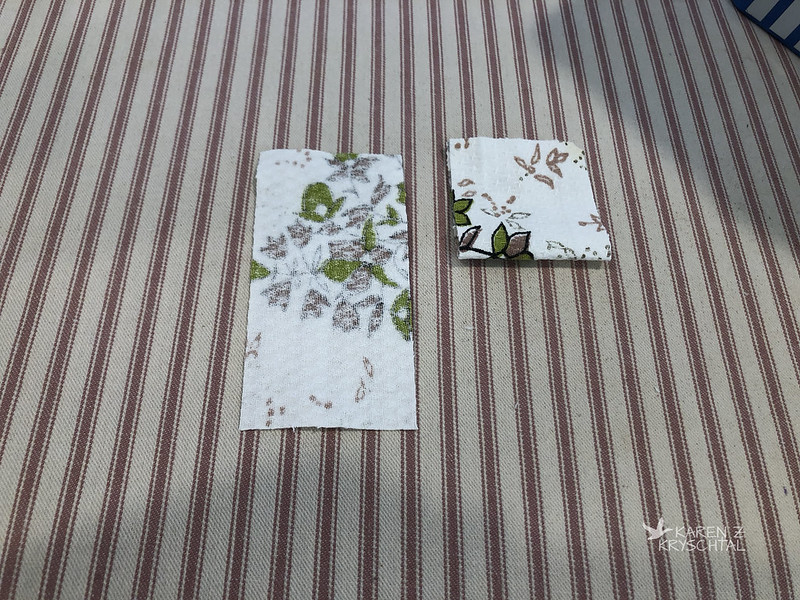
IMG_4450ZipTab

Unfold, then fold ends in to that crease.  Press them.
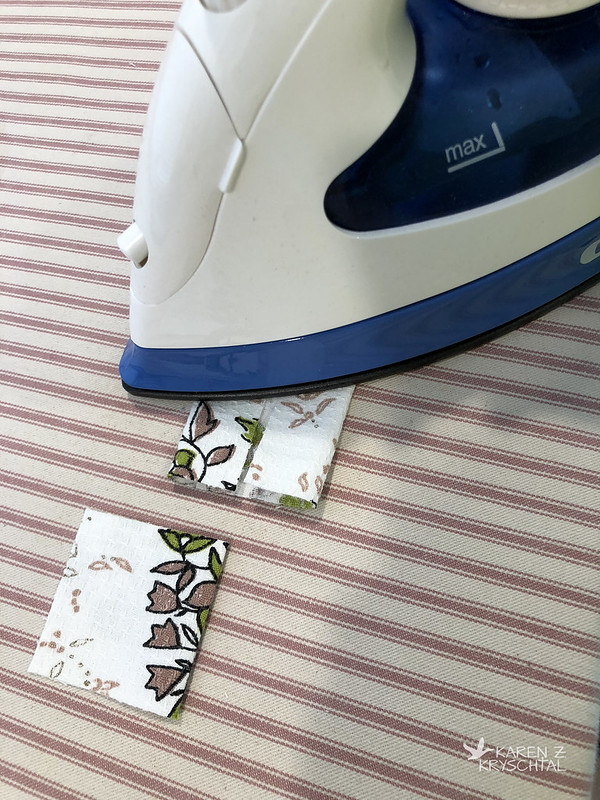
IMG_4451ZipTabs

Now fold the whole thing in - so you basically have a 1" tab.  Press.  Do that for both.
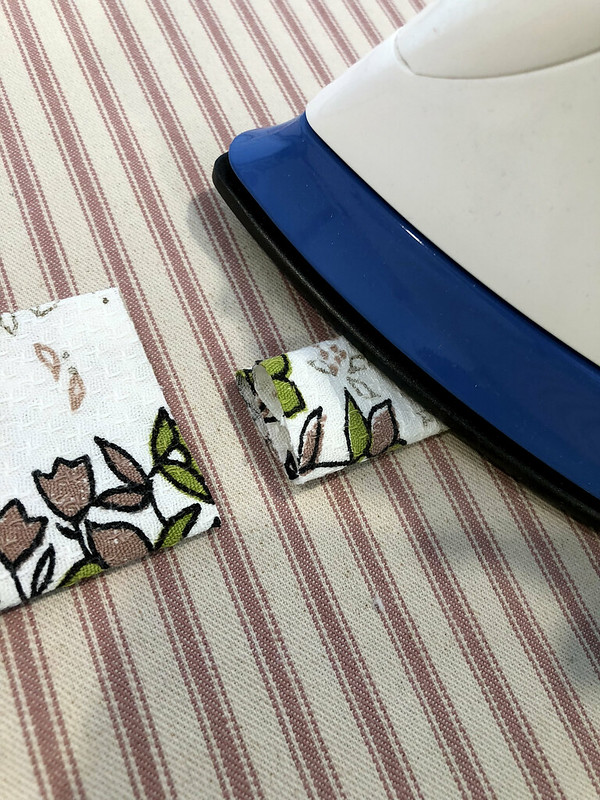
IMG_4454ZipTabs

Open your tab up and insert one end of the zip.
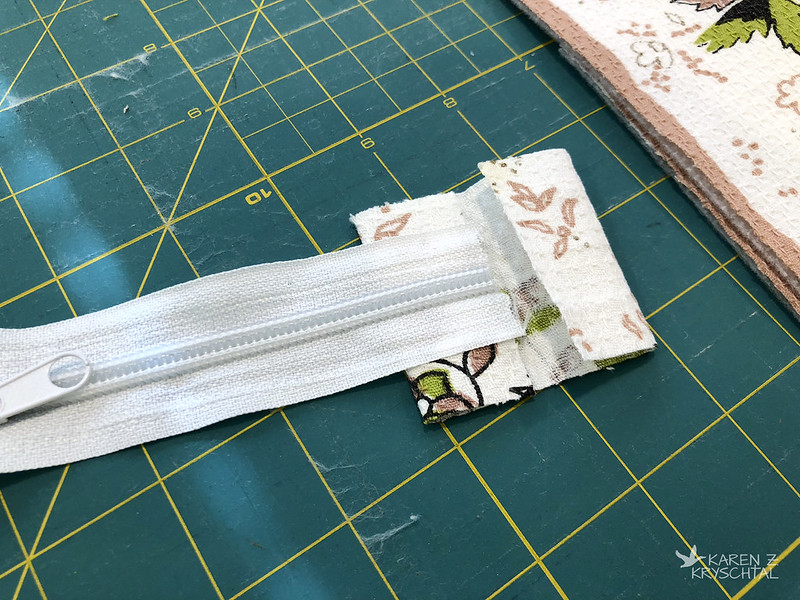
IMG_4456InsertZip

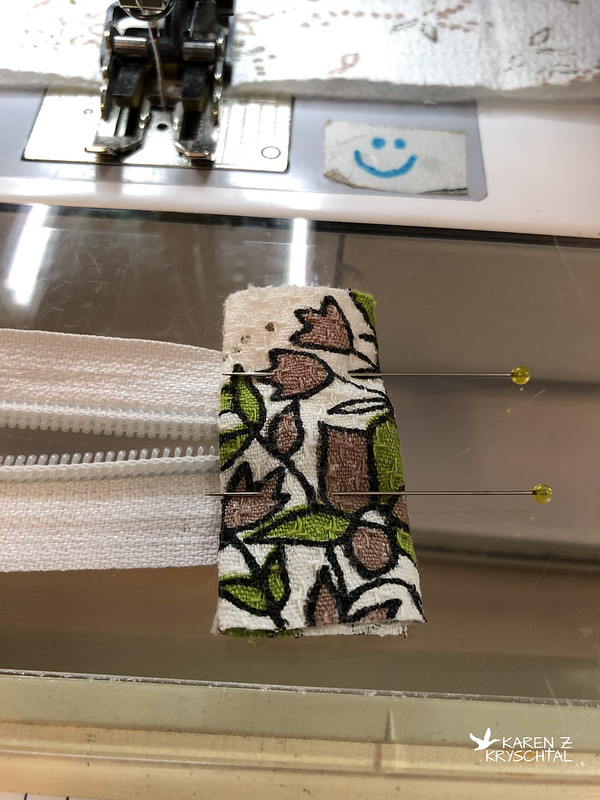
Pin shut.

IMG_4458PinZipTabs

Sew close to your folds, making sure to catch all layers.
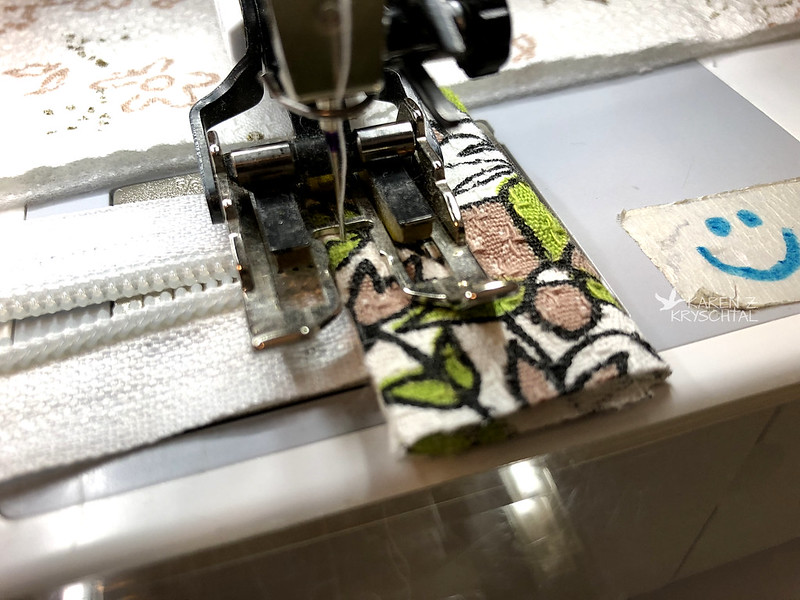
IMG_4459SewThroughZip

I like to put two lines of top stitching in there.
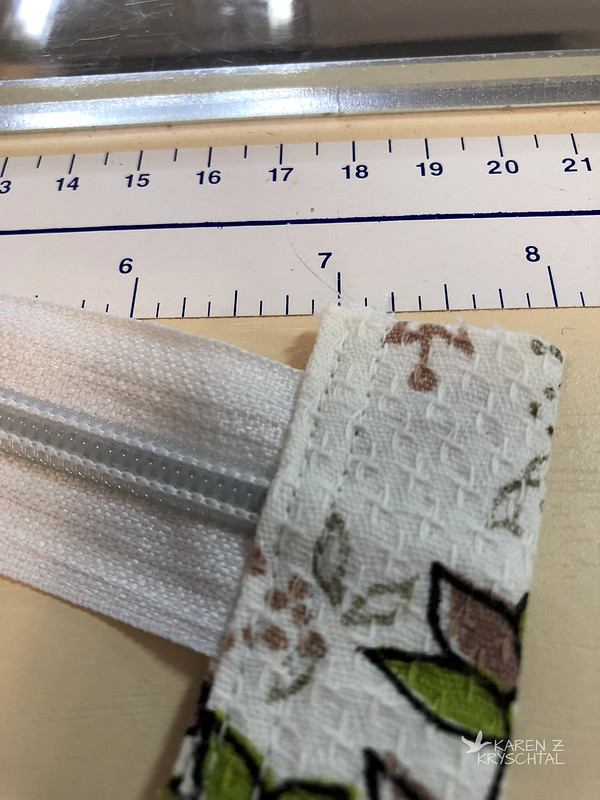
IMG_4462ZipTab

It looks cute and is strong.

Do that on both ends of the zip.

Trim the tabs even with the zipper fabric's edges.

IMG_4466TrimZipTabs

Next, another OPTIONAL step.  If you want to quilt the outside of the bag, knock yourself out.  I just put the exterior fab right on some batting and did some straight lines.
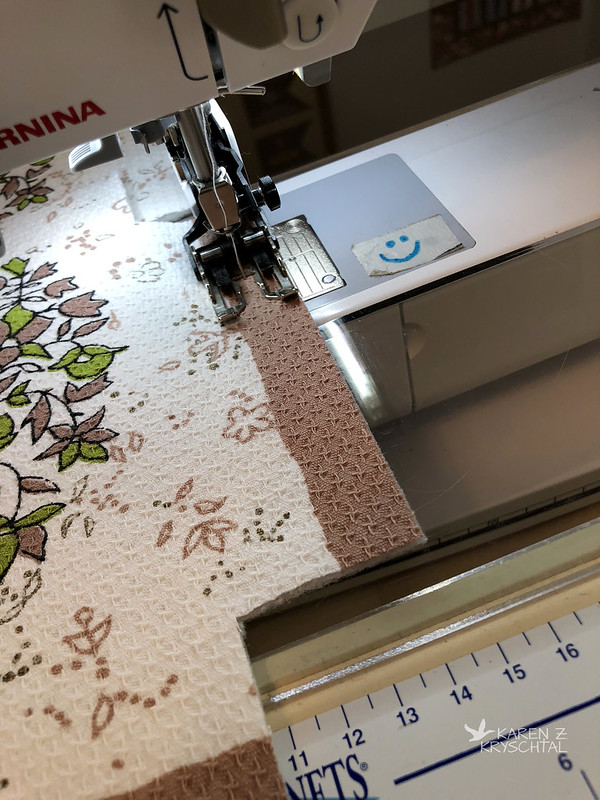
IMG_4457Quilt

Instead of that, you can add stabilizer if you'd like, or just leave it as "just fabric".  Totally up to you.

Once that's done, we'll be working at the tops of the panels.  Take one exterior panel, right side up, and put the zipper on it, right side down.  Like so:
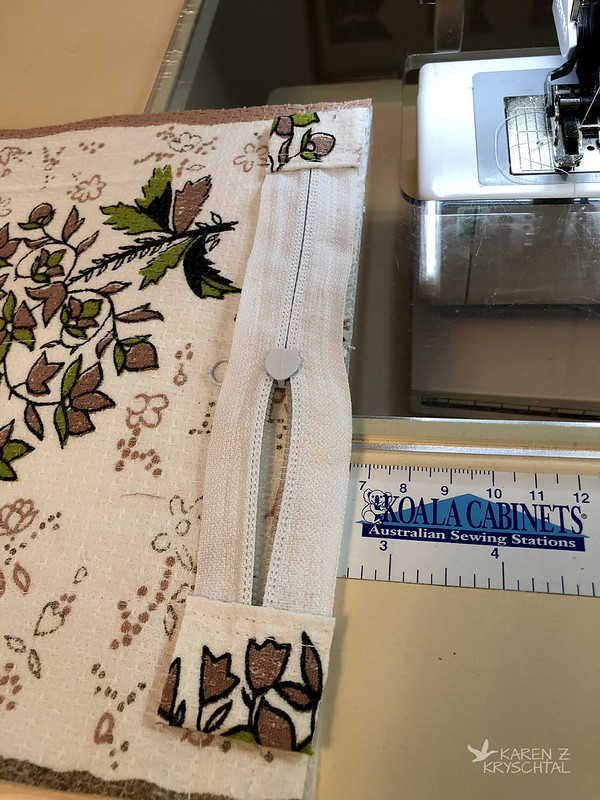
IMG_4467Layers

If you'd like to baste that down, you can - about 1/8" away from the edge.  I've only done that once - when I was putting a zip across a heavy denim bag.  It was helpful.  Now -- lay an inside panel right side down on top -
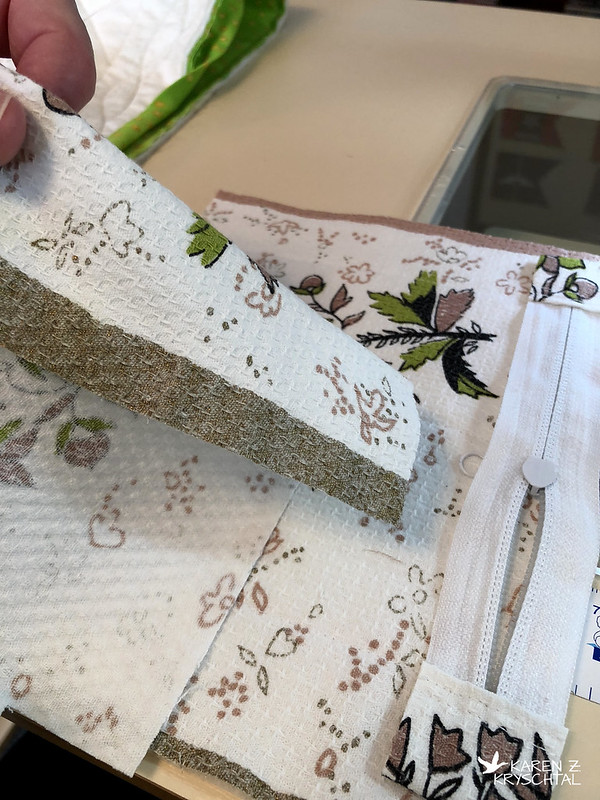
IMG_4468Layers

Line up your edges carefully.  Use lots of pins or clips.

Switch over to your zipper foot.  MAKE SURE YOU MOVE THE NEEDLE over to the left.
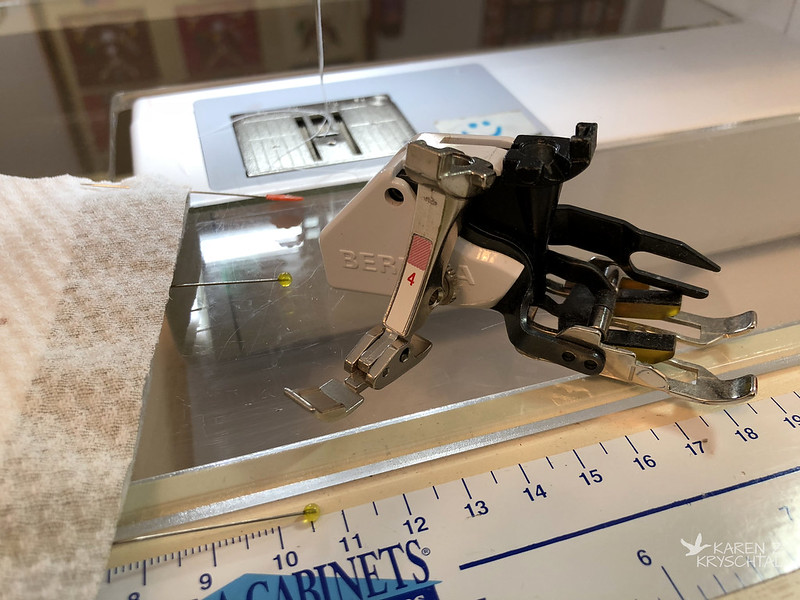
IMG_4469ChangeToZipFoot

Sew carefully along that top edge.

Open it up like this:
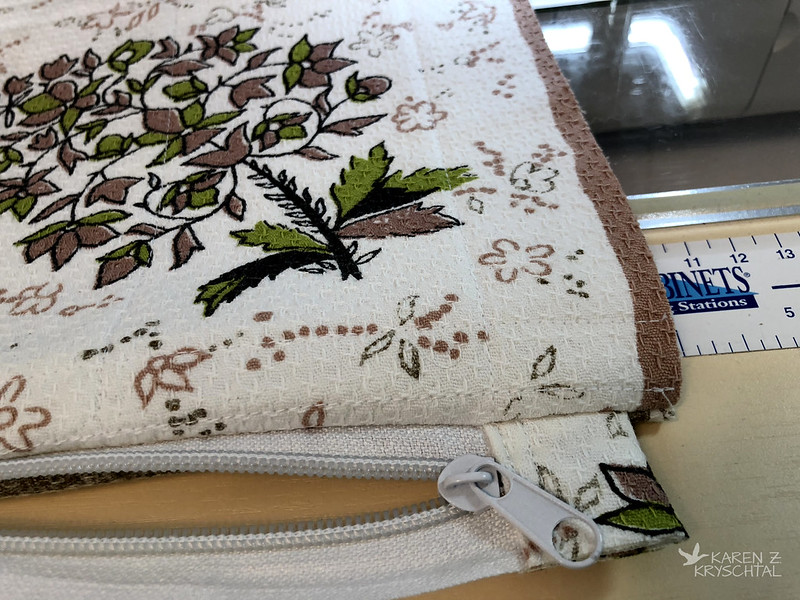
IMG_4472FoldBack

Now you want to repeat with the other panels -
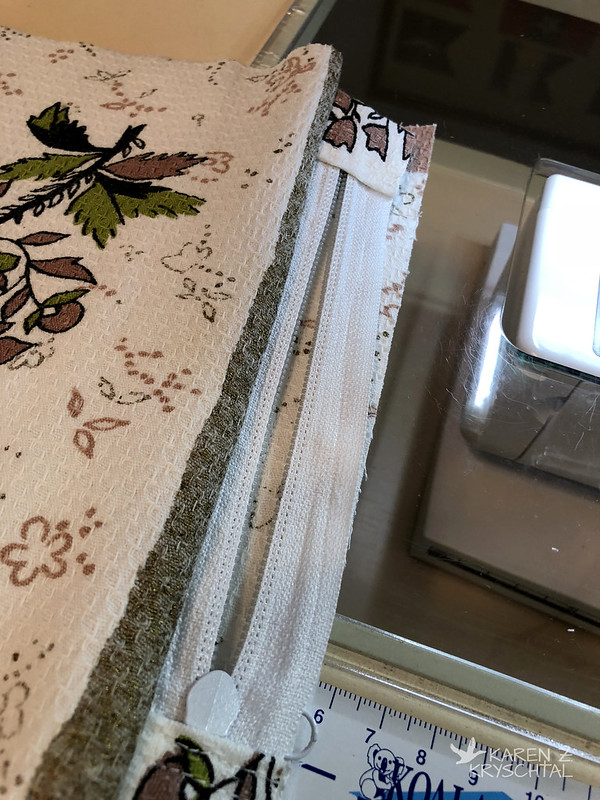
IMG_4473RepeatOtherSide

Outside panel face up, zipper right side down, then the lining face down.
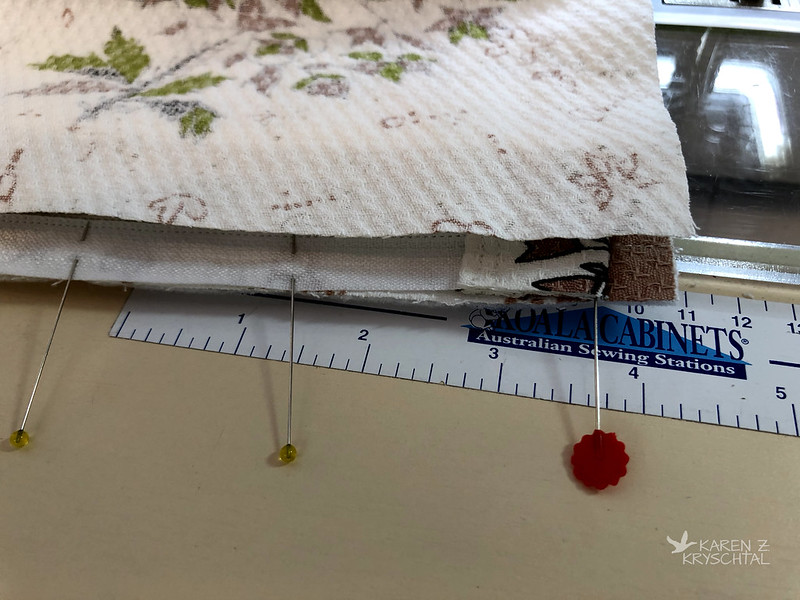
IMG_4474PinOtherSide

Pin it then sew!

Open it all nice and flat.  Take it over to your ironing board and get it all nice and smooth.  At this point, I like to put a line of top stitching right at the top.
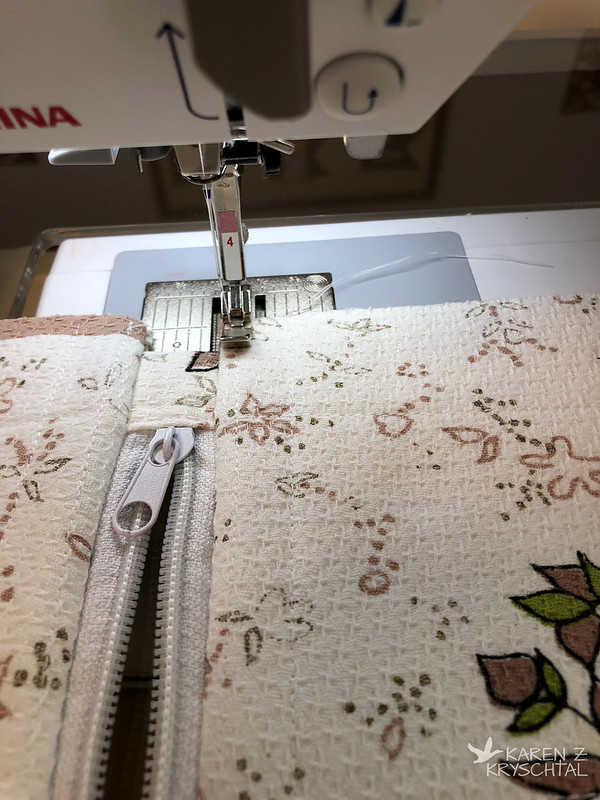
IMG_4478TopStitchAlongZip

It helps the finished bag lay nice - and if I wasn't sewing white on white, it would look decorative.  Do both sides!

After that - time to ditch the zipper foot!
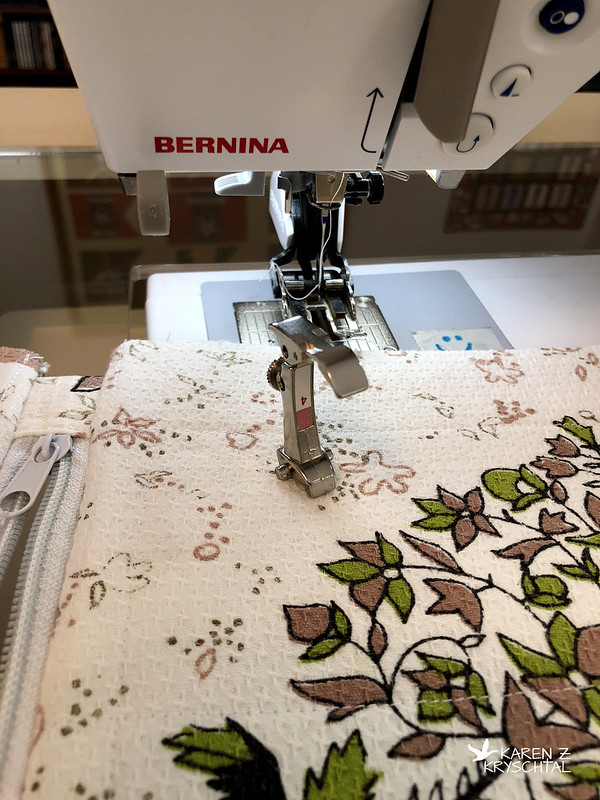
IMG_4477DumpTheZipFoot

Move your needle back to center.  (You're welcome.)

At this point, you want to OPEN YOUR ZIPPER.  Trust me.  If you'd like to avoid the use of HBO words, OPEN THE ZIP!
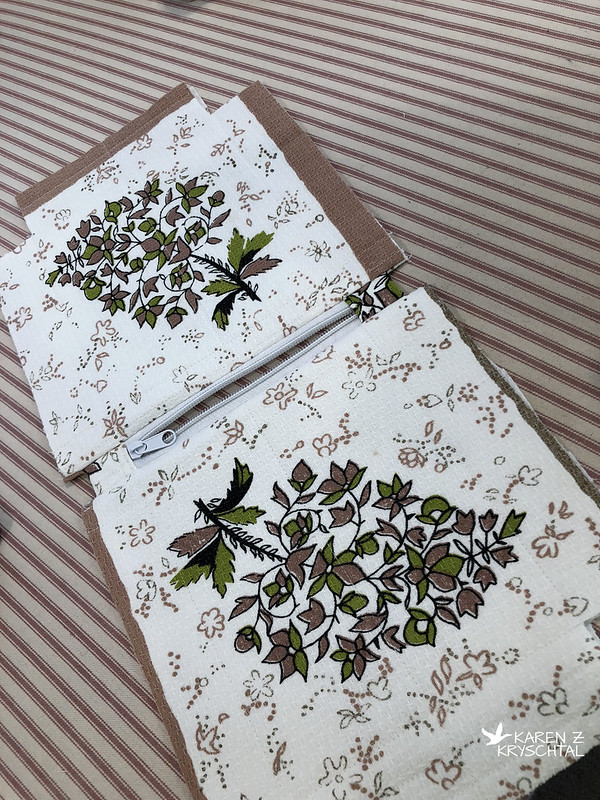
IMG_4476OpenZip

Line up the lining panels on one side, and the outside panels on the other side as seen in the photo below - carefully aligning the edges. Pin!
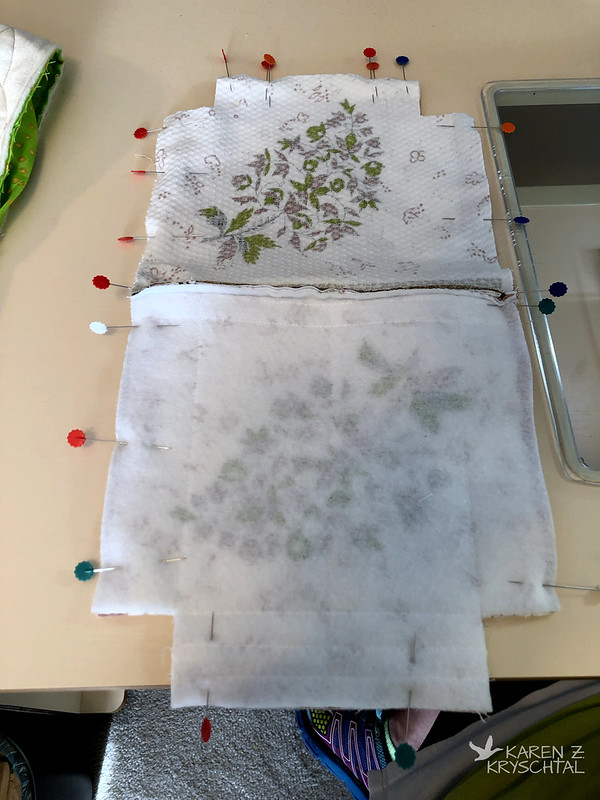
IMG_4480LineUpLayers

You remembered to open your zipper, right?  OK.  See up at the top in the photo above?  See the double pins?  You want to leave a gap there for turning.  I always mark the gap with double pins so I don't forget.

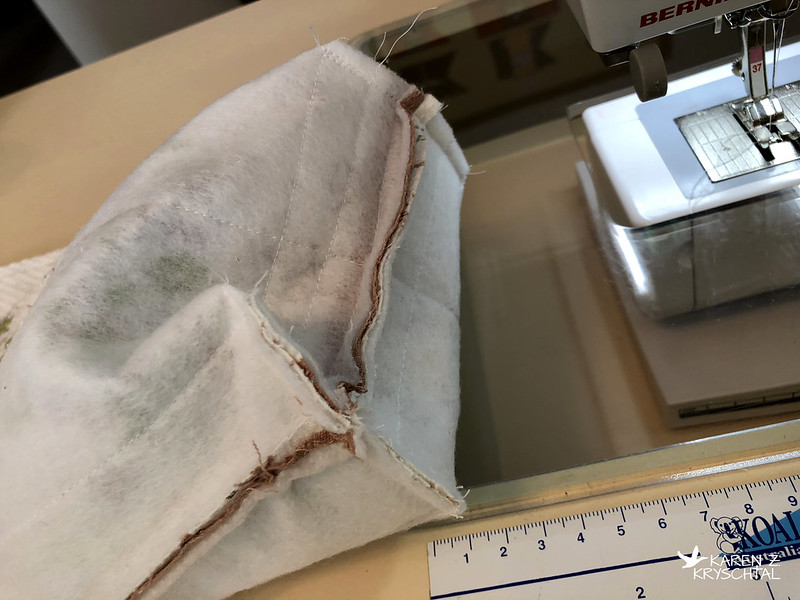
Sew all along the outside, using a 1/4" seam allowance.  When you're at the area by the zipper, just sort of scrunch everything toward the outside panels.  It will make sense.  I hope.

Once you've sewn all around the pouch, leaving that gap, you need to box those corners -- IF you cut those squares out.  Just smoosh that square so the seams match ...
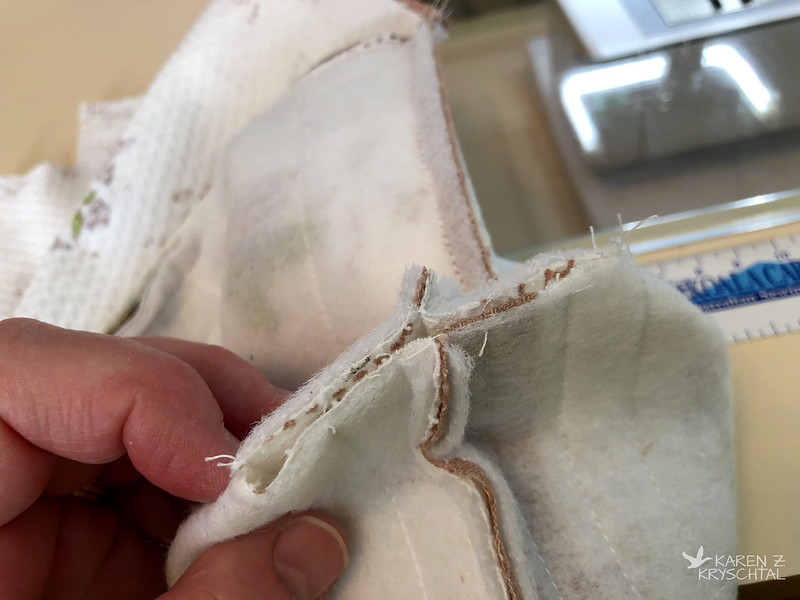
IMG_4482BoxCorners

... stick a pin in the seams so they stay lined up, then sew shut.
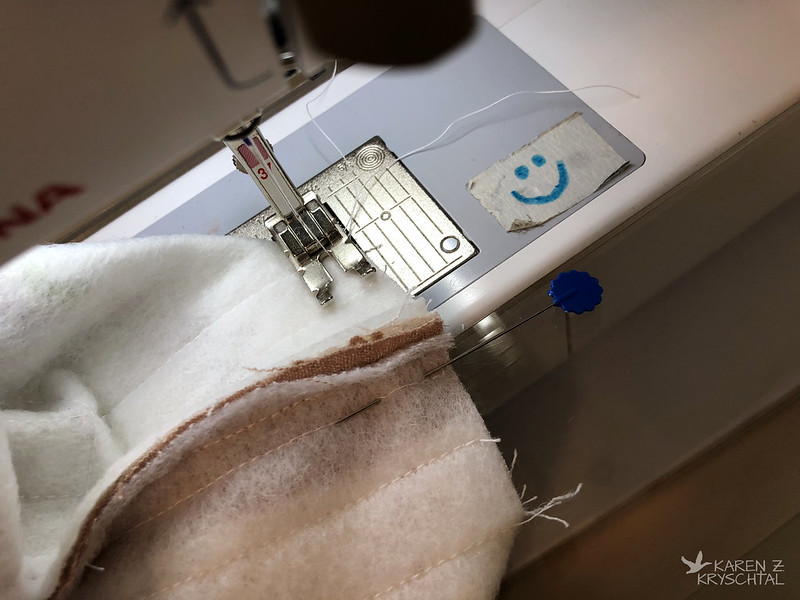
IMG_4483SewBoxedCorners

Do it for the outside ...

IMG_4484Corners

... and the lining.

Remember the gap you left?
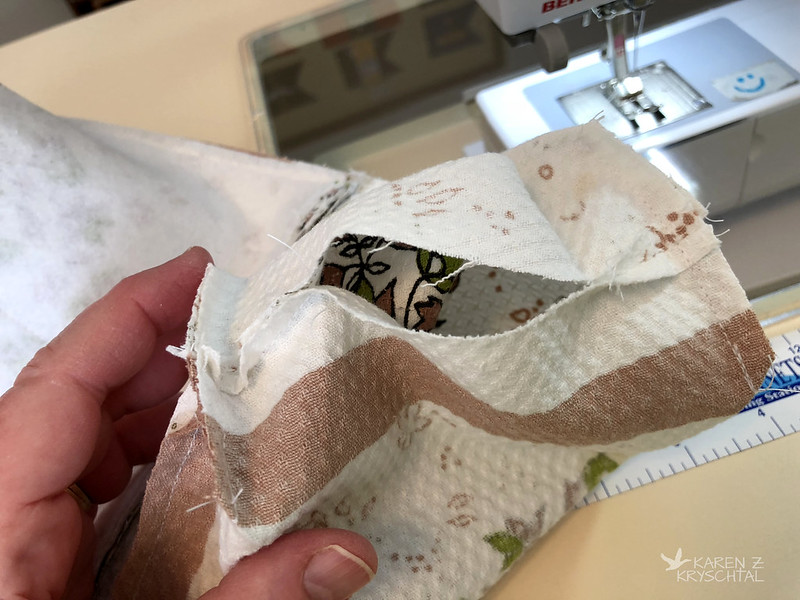
IMG_4486GapInLining

Reach in there and pull everything through it.  It may take a while, especially if you quilted the outside - it adds bulk.  Just keep pulling.
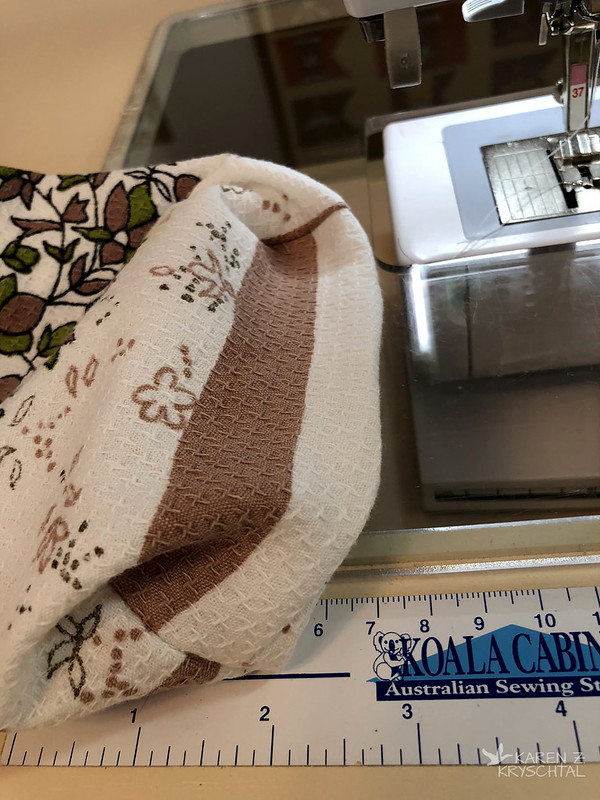
IMG_4487TurnThroughGap

Find the gap in the lining and either hand-stitch or machine stitch it shut.  Push the lining into the pouch, poke the boxed corners a bit (or if you didn't box the corners, poke the corners!), and ... TADA!
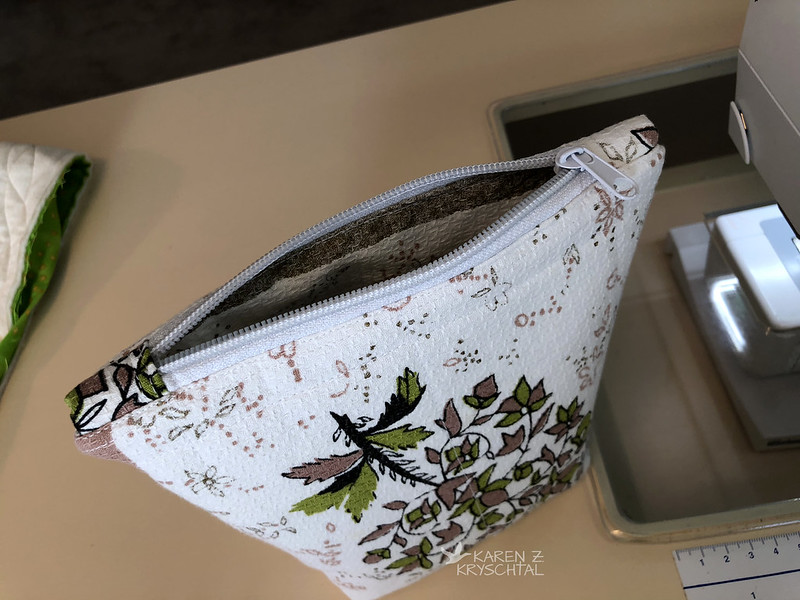
IMG_4488FinishedBag

How cute is that?!?  And check out how nicely the zip lays:
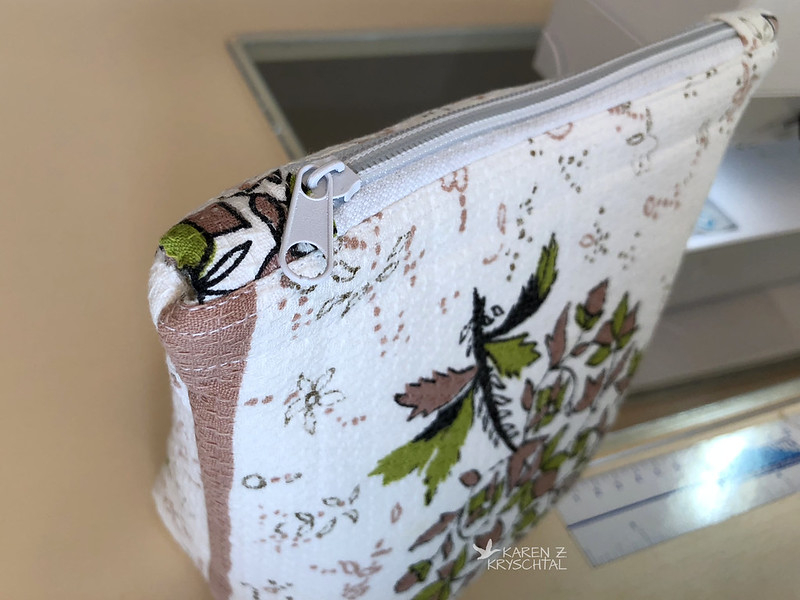
IMG_4489Finished

I think adding the tabs helps present a nice, finished product and let's face it, they look cute.

I hope that all made sense!  You've got a nice, lined pouch with a cute zip.  No exposed seams, everything lays nice, and it stands upright if you boxed the corners!  The possibilities are endless -- any fabrics, any size, any color zipper, put a zipper charm on it, do some quilting, GO WILD!

Let me know if you have any questions!  And also please let me know if you make a zippy pouch of your own from my tute!  Thanks for reading!