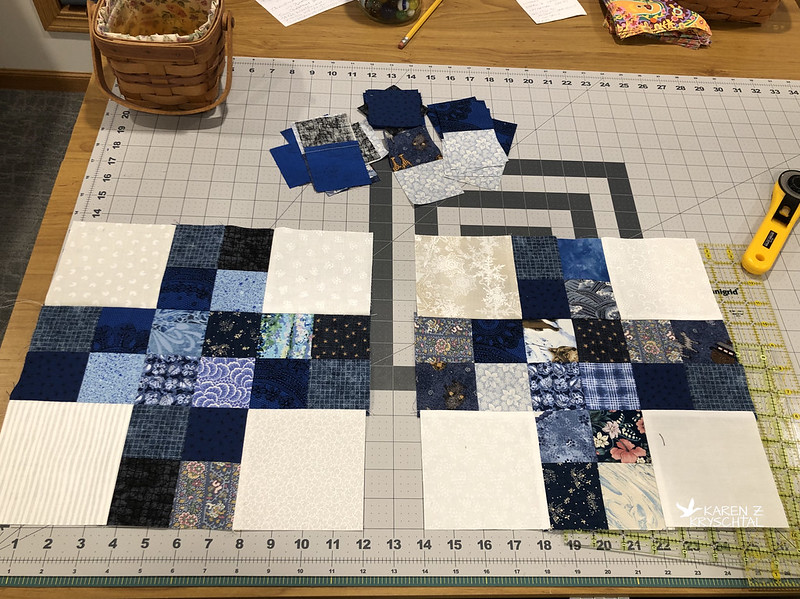
Hi, everyone! Thanks for stopping by. Today, I'm cramming a few week's worth of progress into one post. I decided to sew along with Pat Sloan, making her Traffic Jam! quilt. First, I tested the block out to see if I'd like it ...
Yes! Totally enjoyable! The blocks went together very quickly!
I worked strictly from my 2.5" scrap basket and grabbed a bunch of 5" squares from a "charm square exchange" I did years ago. Not all of the 5" squares were "my" 5" (everyone cuts differently!), so resizing them all to 4.5" for this project was perfect!
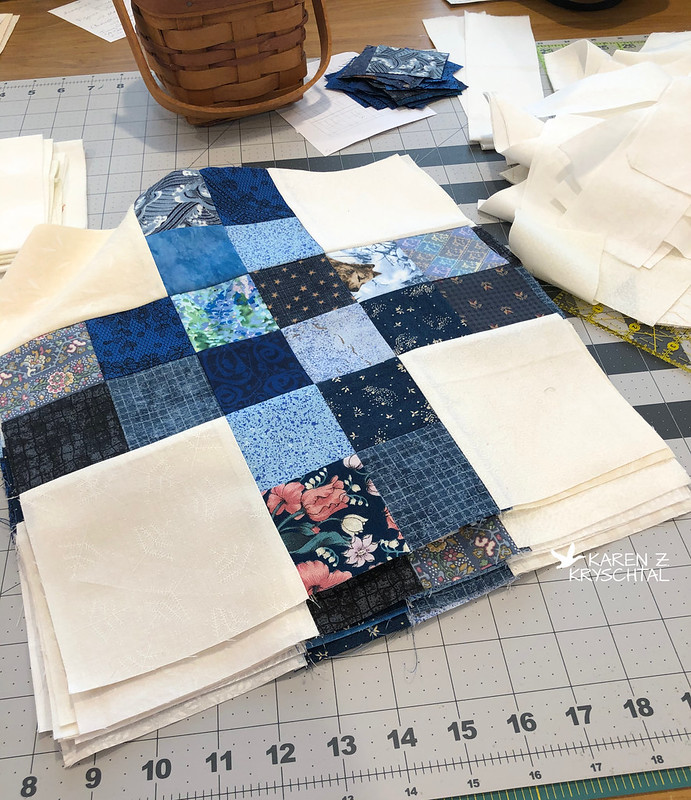
Not knowing where I was going at first, I just kept making blocks ...
... and they stacked up in no time.
I stuck to blues - I've always loved a blue & white theme!
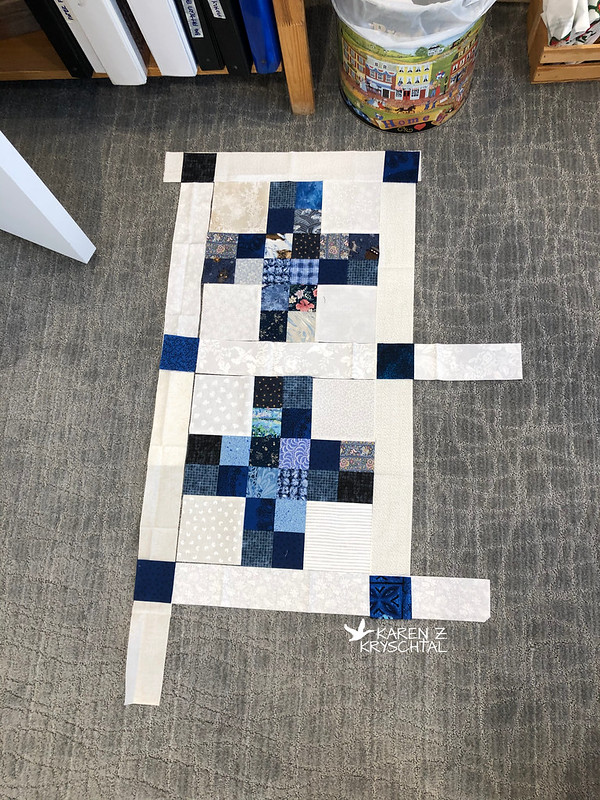
For the sashing, I went back into my 2.5" scrap basket and was able to go pretty far that way.
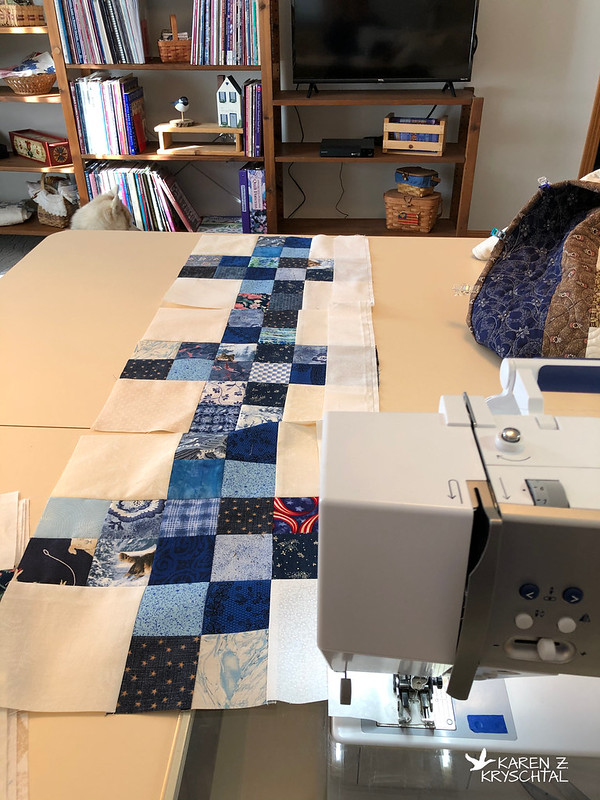
I did have to cut into some yardage eventually -- since the project kept growing. LOL. At least it's all from my "stash"; I feel great about that!
I got to work sewing the sashing on:
And just kept going!
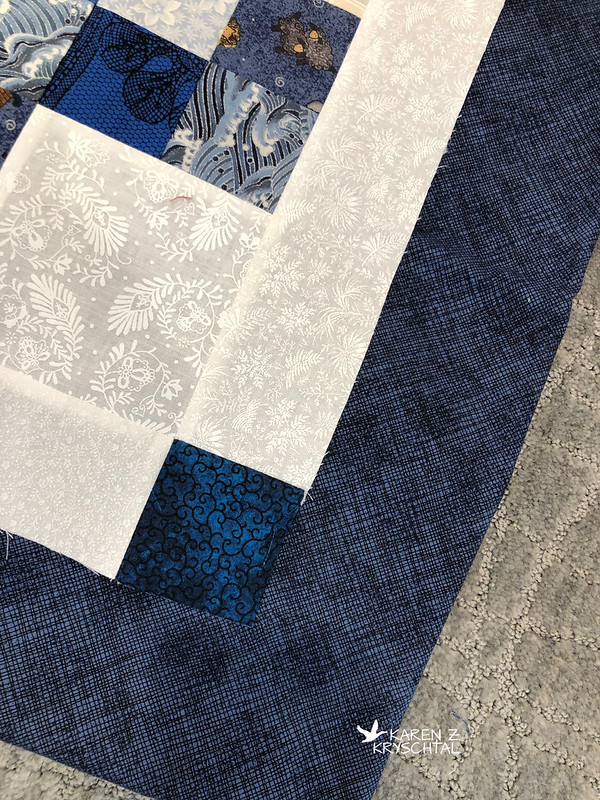
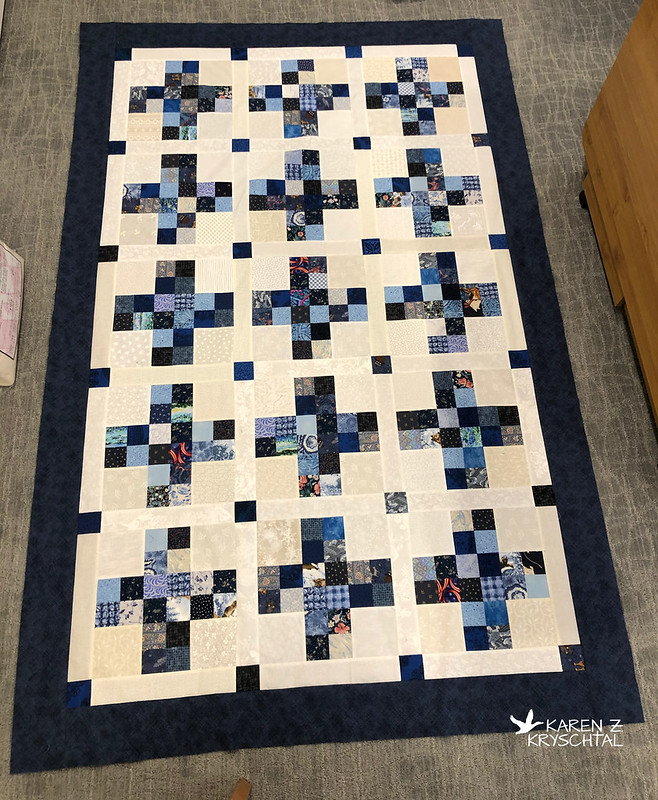
After I got the rest of the sashing and the cornerstones on, I auditioned a couple different blues for a border. I'm not usually fond of borders, but I thought this quilt really needed at least one. I decided on this sort of denim blue:
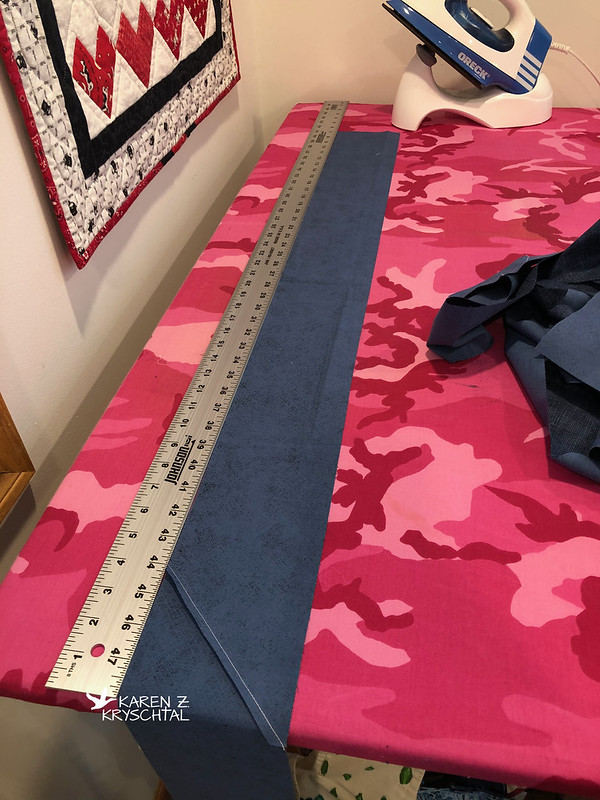
I eventually pieced those (the quilt got a bit ... large), pressed them nice and straight (you can see one of the sides in the second photo on yesterday's post), then sewed them on.
I must say, using that long metal ruler to make sure my long borders were straight as I pressed made for nice flat, non-wavy borders!!! YAY!
I eventually pieced a backing, then basted everything together. Here it is, all set for the quilting:
I treated myself to some new King Tut quilting thread - White Linen. It is perfect for my Traffic Jam! I put one line of quilting in, just to test things out. It's going to be lovely.
Thanks for reading - I'll keep you posted on my progress!
KZK
Friday, January 31, 2020
Thursday, January 30, 2020
Big And Small
Hi, everyone! Lots of things can make a positive difference in our lives - some big, some small. Let's take a look at two things I recently added!
First up, a "big" thing:
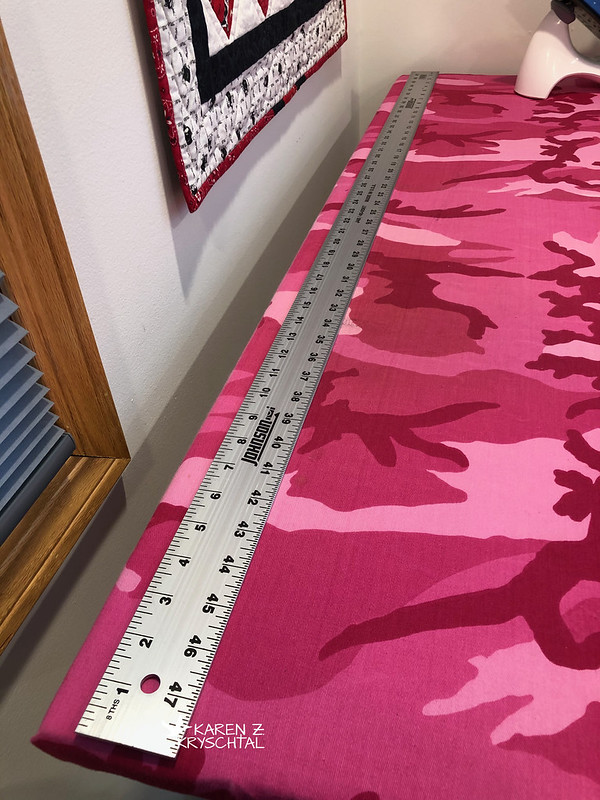
Forty-eight inches of solid metal! Why? To help keep me on the straight and narrow, so to speak.
When ironing borders or any long piece of fabric, it's so easy for the fab to get a bit "off", resulting in wavy borders or blocks.
Having watched a lot of Donna Jordan's videos, she always has a long, metal ruler on her pressing surface to help her keep everything straight. She finally mentioned in one of the vids that she bought hers at the hardware store - why didn't I think of that?!? So ... a couple weeks ago, when my husband said he was going to Menard's, I asked him to look for one - and if it wasn't too expensive (I'm rather ... frugal), would he mind picking one up for me?
Not only did he score one for me, but check this -- LESS THAN $8!!!
File this under "what took me so long"!!!
Next up, a relatively "small" thing ... and the result of a compilation of a few more videos. I saw a round zippy bag several YouTubers made that was being used for earbuds or change. I thought - (a) I've never made a round bag and (b) wouldn't that be a cute poop bag holder?!?! I grabbed some fabric I purchased in Korea that is actually from a Korean fabric line and ...
How cute is that?!? The zip is recycled from a discarded garment and is totally perfect for the bag. I put little pulls at both ends of where the zip is; I looped a carabiner through one to hook to her leash and the other is perfect to hold onto when you zip the bag shut. The fabric is a great coordinate with Cammie's "wicked purple" harness/leash/collar.
For the circle, I used an old "Stamps.com" CD that I keep around for template purposes - so the whole bag measures less than 5" in diameter. Just large enough to stuff a few bags in there.
Since I never go out without bags, it's nice to have another holder handy!!
Thanks for reading - and remember - even little things make a big difference!
KZK
Wednesday, January 29, 2020
Backing It Up
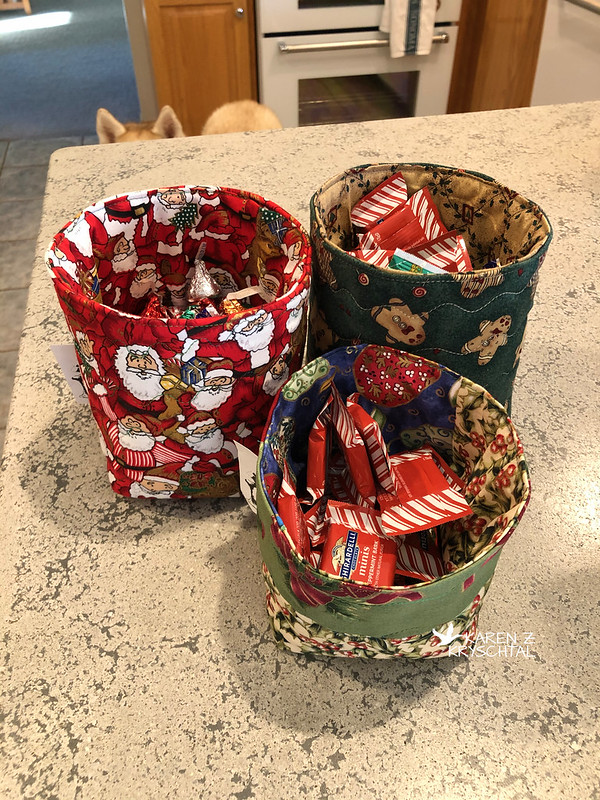
Hi, everyone! I thought I'd back up a bit and show you a few of the Christmas gifts I made. These were for neighbors and/or local friends/special people. I had a BALL going through my Christmas fabric and coming up with different "fabric gift baskets"!
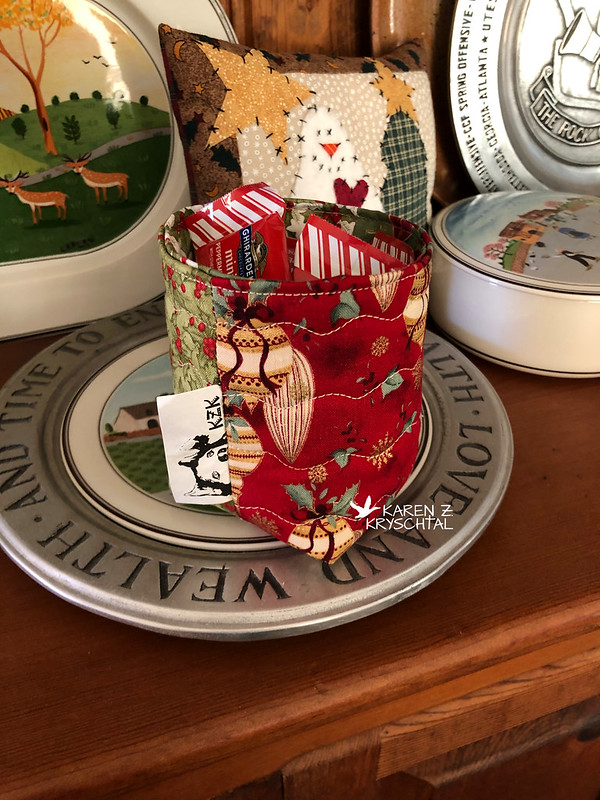
First up, a super small basket for a special friend:
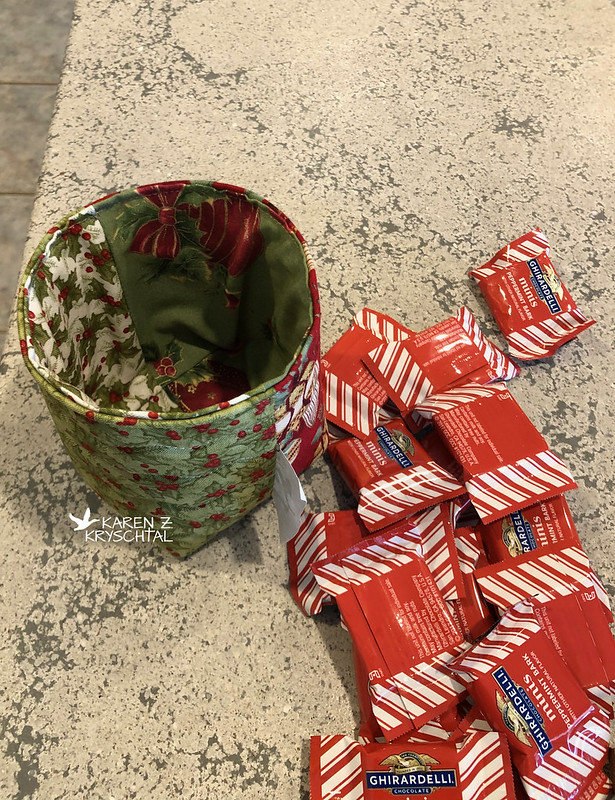
Here's a look inside:
I filled hers with Ghirardelli mints. Cute and man, those chocolates are so good!!!
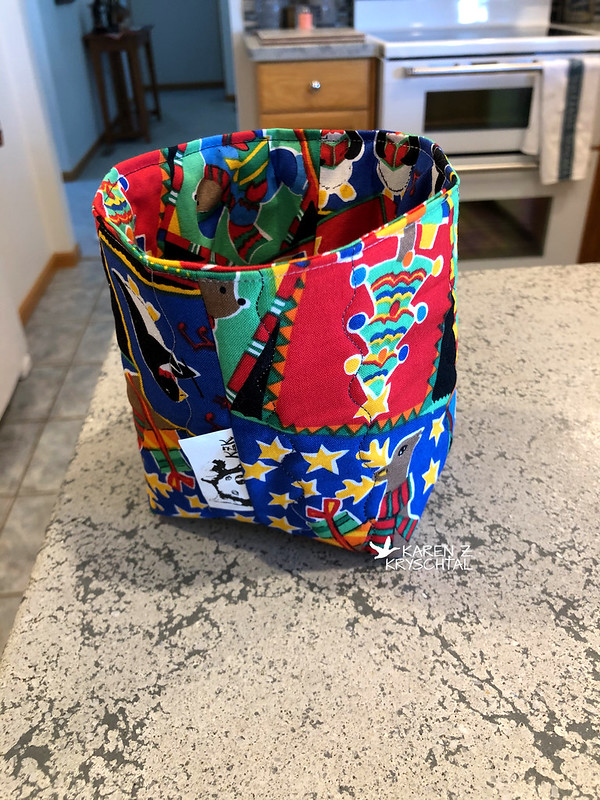
All of the following had a mix of different yummy chocolates in them! Here is the one for our neighbors 3 doors down:
I think that fabric is SO FUN! It's so colorful and cheery!
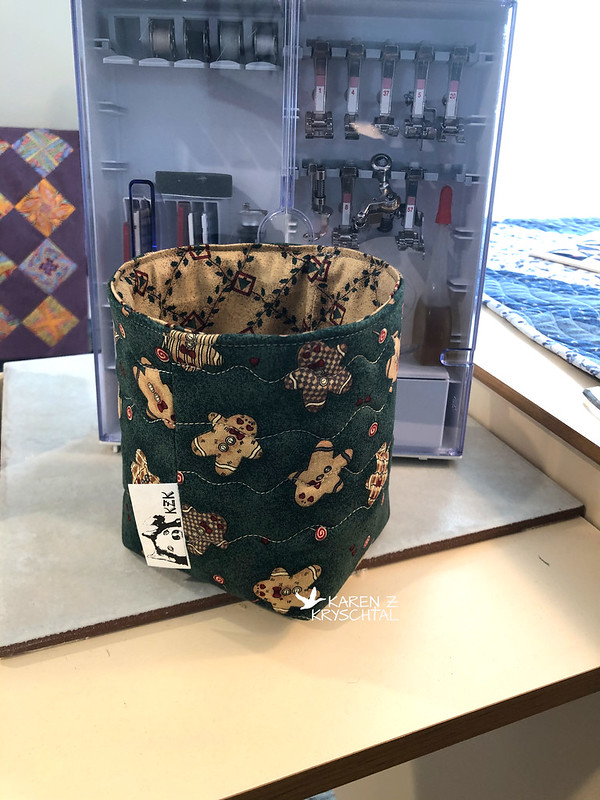
For our wonderful next door neighbors:
I thought the classic gingerbreadmen would be so cute for them!
For our 2 doors down neighbors:
I love those Santas!
I made yet another one - sort of for us -- the one in front here:
I also wanted to do something for Cam and Maggie's "regular" vet and for Cam's Oncologist. Rather than Christmas fabrics, I went into my Laurel Burch stash. I remembered our vet saying (a long time ago) that she liked Laurel Burch, so I thought it would be fun to do these in LB dog fabrics!
Here they are, filled up and ready to take to them:
I had such fun making these, especially because of how special each of the recipients are. I loosely followed the same tutorial I linked to here.
Thanks for reading!
KZK
Friday, January 17, 2020
Square In A Square
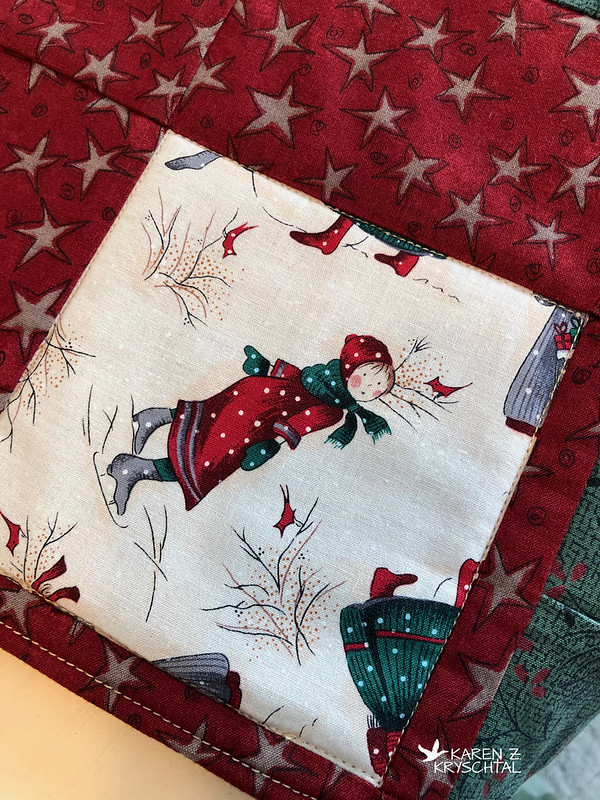
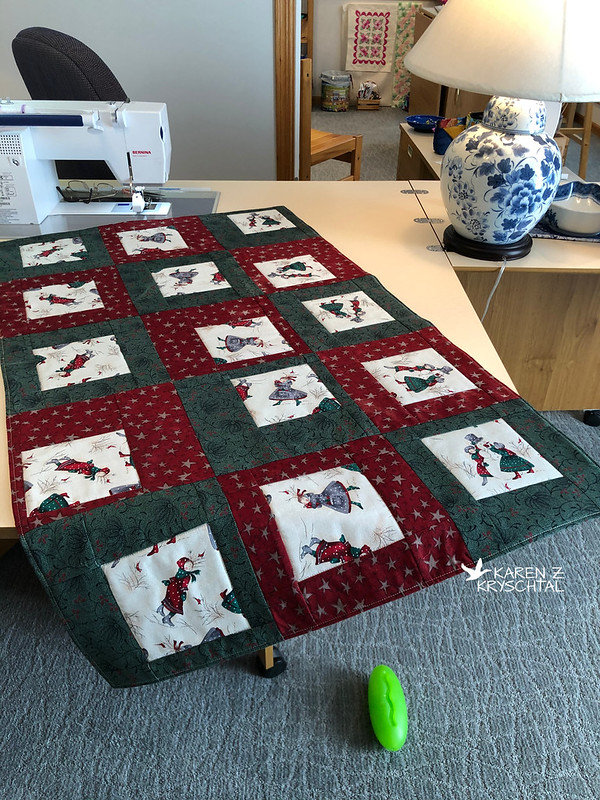
Hi everyone! Today, I thought I'd share a really sweet table runner/topper I made for my mom for Christmas. The best part was getting to give it to her in person - though a little early. (We made the trip out to see her earlier in December!) I used a new-to-me technique I've been wanting to try and it was totally fun! I also used some fabric I've been saving for something special, so the whole thing gave me great joy!
I'm calling it "Square In A Square" - you can see the whole tutorial at this link.
Basically, you place a smaller square of fabric in a larger one, right sides up, and fold in the sides. You stitch a quarter inch in from the fold, then press it open. Now do the top and bottom. This way, there is much less cutting AND no raw seams in the block. (You will have raw seams as you join block to block, though.)
How cool is that? Fast and easy! Bulky as all get out along those folded seams, but I planned to work around them as I quilted.
My top was together in no time:
There are three major scenes in the featured fabric, so I cut each one four times. I kept each "view" in a row, but turned it a quarter turn as I went down the length of the quilt.
Is that fabric cute or what?!?
I kept the quilting simple, just outlining my featured fabric squares; here are my three "scenes":
I did a "flip and turn" method, rather than adding a binding, to keep things simple. I also quilted about 1/8 of an inch in from the edge for detail, interest, and to sew up the "turning hole".
I was really happy with how it came out - and I think my mom really liked it!
Thanks for reading!
KZK
Friday, January 10, 2020
Hunter's Star Update #2
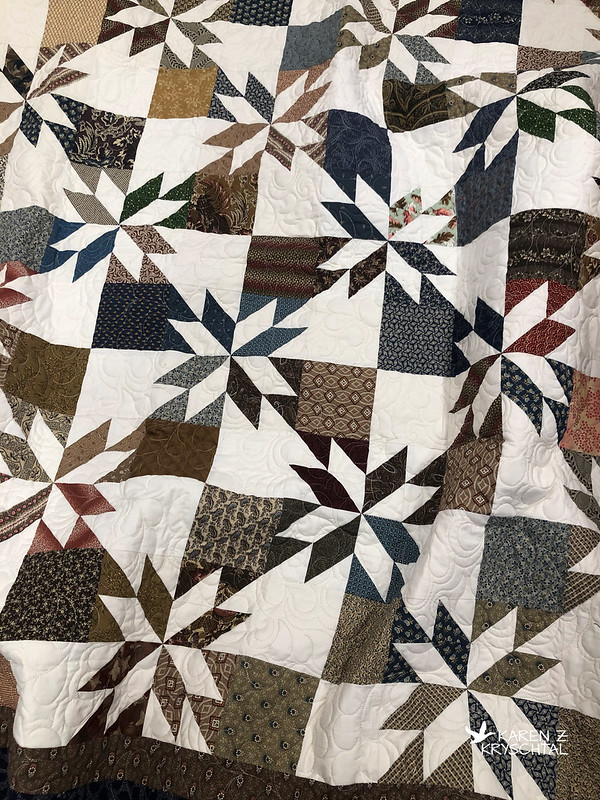
Hi, everyone! I hope you're all doing well! Another post here, trying to get you caught up on what's going on in my Studio! Remember the Hunter's Star quilt I pieced this Summer? I ended mailing it to the pros for the quilting back in October -- that baby is just WAY too big for me to quilt at this point in time.
WOW, I was SO excited!
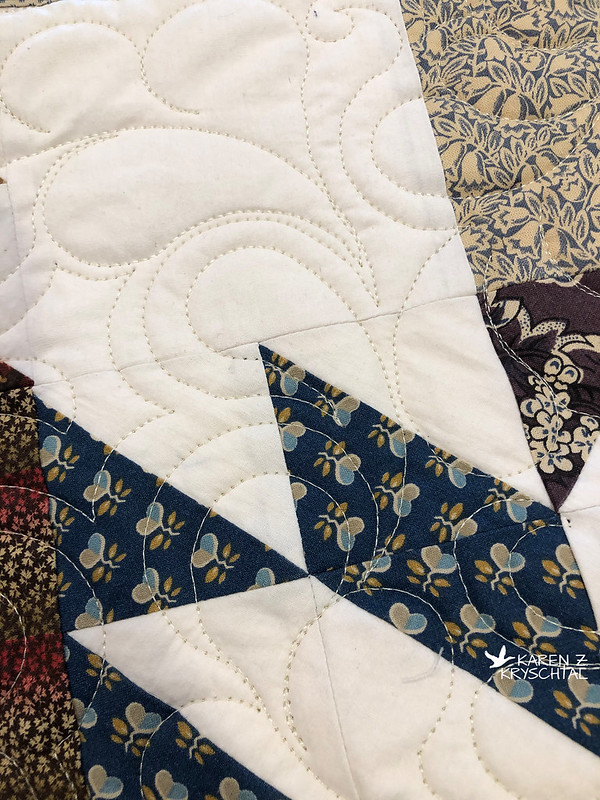
Here's a look at the quilting:
I chose an off-white/beige thread and a pattern called "Deb's Feathers". I thought that would fit with the whole Civil War reproduction theme.
They did a fabulous job! Check out the back:
I opted to sew the binding on myself, feeling extravagant enough having had someone else do the quilting for me! I went with a nice brown:
OK, two nice browns. I wanted to repeat the inner border and didn't quite have enough. I did what any woman in the 19th century would have done and chose another that was close enough.
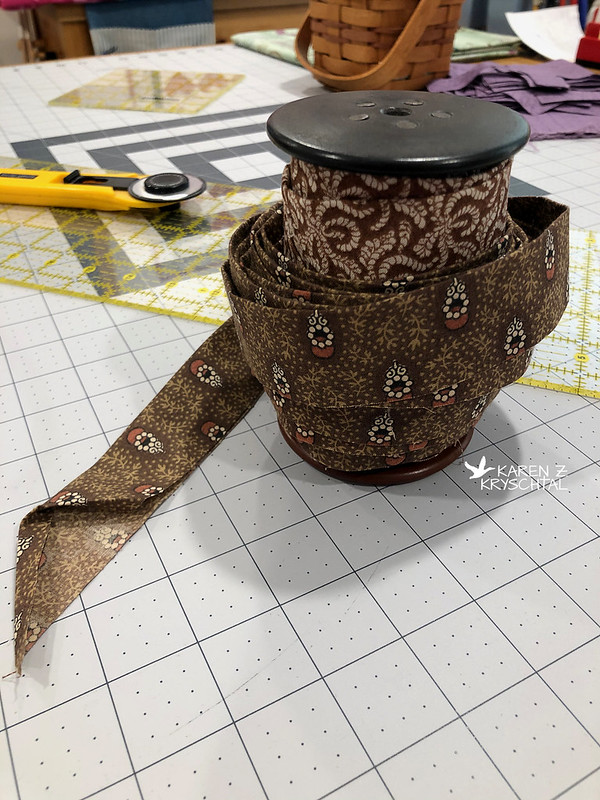
I used my system of winding the binding around an antique spool, then setting that in a magnetized tray. It keeps everything neat and tidy!
I'm slowly but surely working on the hand sewing. It will take me a while, but this is definitely worth doing by hand.
I knew it would take probably a couple of months for it to work its way up the queue; on the website, they said they couldn't promise it by Christmas. I expected that. What I did NOT expect was to see this box arrive before Thanksgiving!!!
WOW, I was SO excited!
Here's a look at the quilting:
I chose an off-white/beige thread and a pattern called "Deb's Feathers". I thought that would fit with the whole Civil War reproduction theme.
They did a fabulous job! Check out the back:
I opted to sew the binding on myself, feeling extravagant enough having had someone else do the quilting for me! I went with a nice brown:
OK, two nice browns. I wanted to repeat the inner border and didn't quite have enough. I did what any woman in the 19th century would have done and chose another that was close enough.
I used my system of winding the binding around an antique spool, then setting that in a magnetized tray. It keeps everything neat and tidy!
I'm slowly but surely working on the hand sewing. It will take me a while, but this is definitely worth doing by hand.
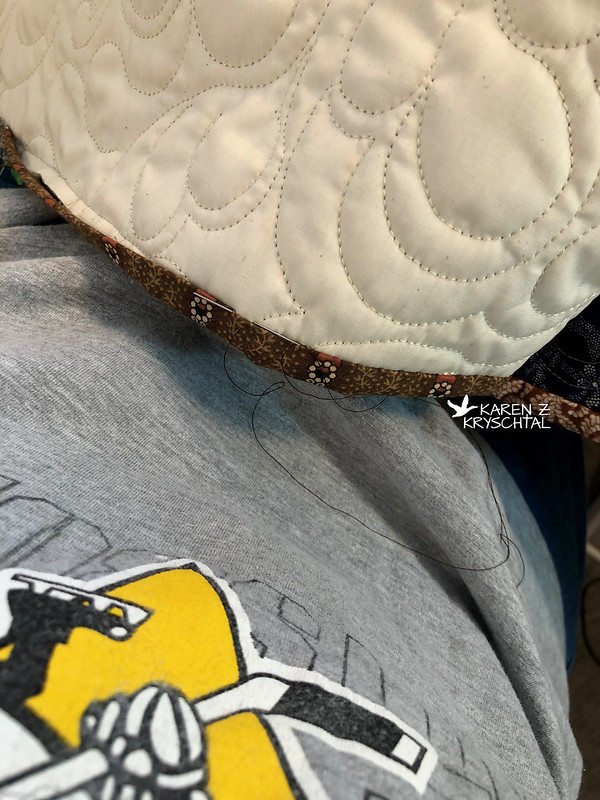 |
| And may I add, "GO, PENS!!!" |
I have it down in the Studio on my machine table; I go between hand sewing the Hunter's Star and piecing a new project. Upstairs, I'm doing the hand sewing on the Kaleidoscope/Not Kira quilt. Not that I have projects scattered all over the house. LOL.
I am SO pleased with the job Missouri Star Quilt Company did! I couldn't be happier!
I'll keep you posted on my binding progress! Thanks for reading!
KZK
Monday, January 6, 2020
Because I Love The Fabric
Hi, everyone! Before I get started, just to clarify yesterday's post - I hadn't quilted the placemats yet! They were just pieced panels, which made them perfect to turn into anything! Having said that, I have watched videos where someone took pre-made placemats and turned then into all sorts of cute bags ... but that's a different story altogether!
After I had that tote put together, I OF COURSE still had scraps. Do you ever really use all of your scraps? Anyway ... what to do, what to do. I thought a Persimmon Dumpling Pouch would be in order!
I didn't have big scraps, but that was OK! I just started piecing together what I did have:
You know, I do have an actual stiletto in a crock by my machine. I usually use a tiny screwdriver, though -- and in a pinch, a golf tee works perfectly!
I was able to piece together panels just large enough for a small Dumpling Pouch. Perfect!
I bought those scissors YEARS ago and wow, do I love them. They have micro-serrated blades and a removable loop in the handles - it makes them spring open, thus making cutting much easier. I can't remember where I got them, but Amazon has them. Of course.
Once I had my panels cut, I sandwiched them to some batting and wanted to do a little quilting. I had the perfect thread in my "stash":
King Tut Valley Of The Queens. Isn't it gorgeous?!? And I even had about 1/2 of a bobbin wound. SCORE!
I just sort of stitched beside the ditch and carried everything over across the whole piece. It was fun!
Before I knew it, I had my little Dumpling Pouch all set:
How can you not love it?
Here's a look inside:
Note the little "pulls" on each side of the pouch; the pattern doesn't call for them, but they make it so much easier to open and close the bag!
I actually bought some zips finally. Don't get me wrong, I love using ones from discarded clothing, but it's also nice to have a wide array of colors to choose from!
That's it for now! Thanks so much for reading!
KZK
Sunday, January 5, 2020
When Life Gives You Placemats ...
... turn them into a tote. If you don't like them. Or something like that!
So ... as many of you know, I have a slight addiction to watching video tutorials for quilts and bags while I'm on the treadmill. I watched one by Donna Jordan for placemats and I thought, "Oh, I have JUST the charm square packs for those!"
I got the tops of the placemats together, more or less, and realized they were far, far from perfect. I mean "FAR". Not being one to waste fabric, I wondered what I could do with them. I needed a really big tote and thought I could just wing one using the panels I came up with from the tutorial. Right?
Here's the outside:
It has a zip top, webbing straps, and a little webbing/D-ring combo.
It's perfect for attaching your keys, a water bottle, travel dog dishes ... whatever!
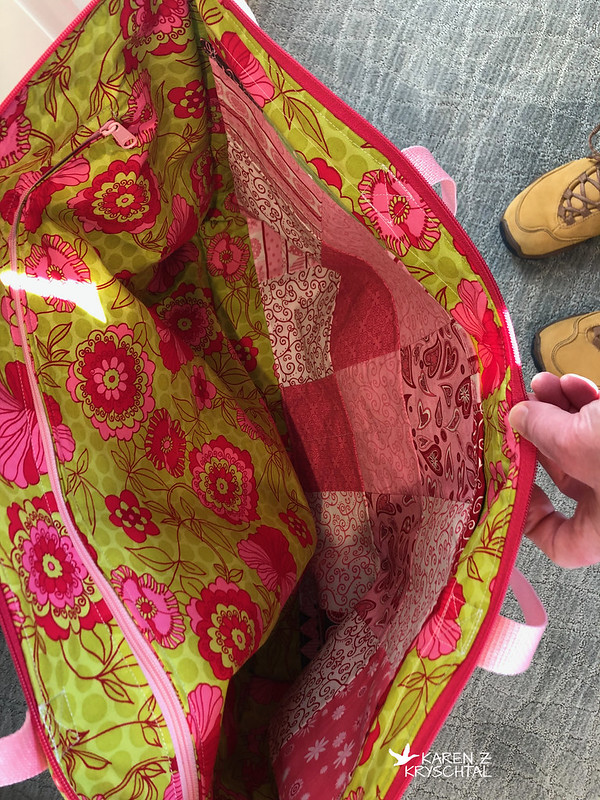
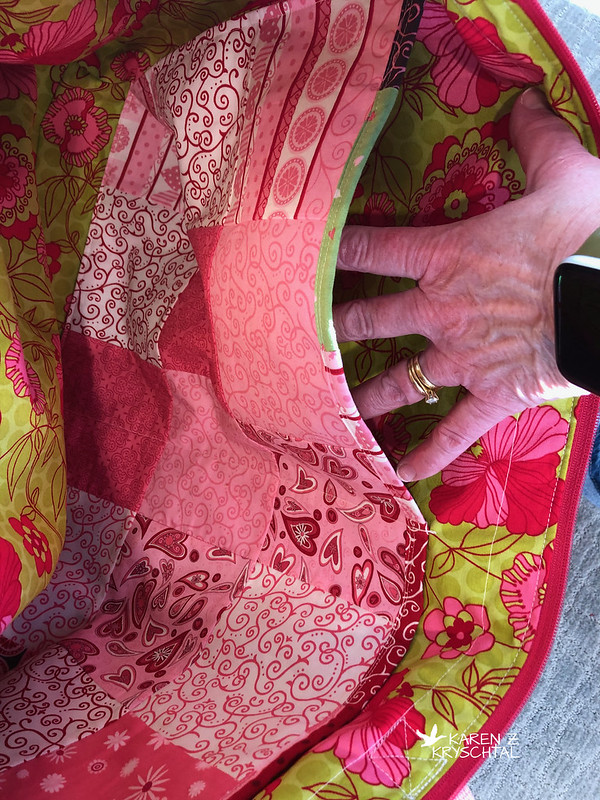
Here's a look inside:
One side has a zip pocket (I've watched a lot of zipper tutorials and figured I could give it a go!) ...
... and the other side has a huge pocket, split down the middle forming two pockets:
I took it on our latest trip and was thrilled with how much stuff I can pack in it! (I'm not known for packing lightly!)
It was mighty fun "winging it", and turning the placemats I didn't care for into a cute, kicky bag! I had to wash it after our trip and was pleased with how nicely it washed up!
Thanks so much for reading!
KZK
Saturday, January 4, 2020
Stack N Whack Scraps
Hi everyone! Let's look around and see what else I've been up to! I got out some old, unfinished projects, trying to decide what I could finish up. Years ago, I took a Stack N Whack class. (I used the book seen here.). I didn't finish all of my blocks, but have this much:
I'm pretty sure I couldn't decide what color to make the background, so I opted for a split. Because why keep it simple - right?
The basic "trick" to Stack N Whack blocks is to pin the fabric together at the "repeats", cut it EXACTLY, then stitch the pattern together forming sort of a kaleidoscope. All blocks are from the same fabric, but are all different! Very cool. Very precise. Very ... much like something I didn't want to tackle right now. BUT ...
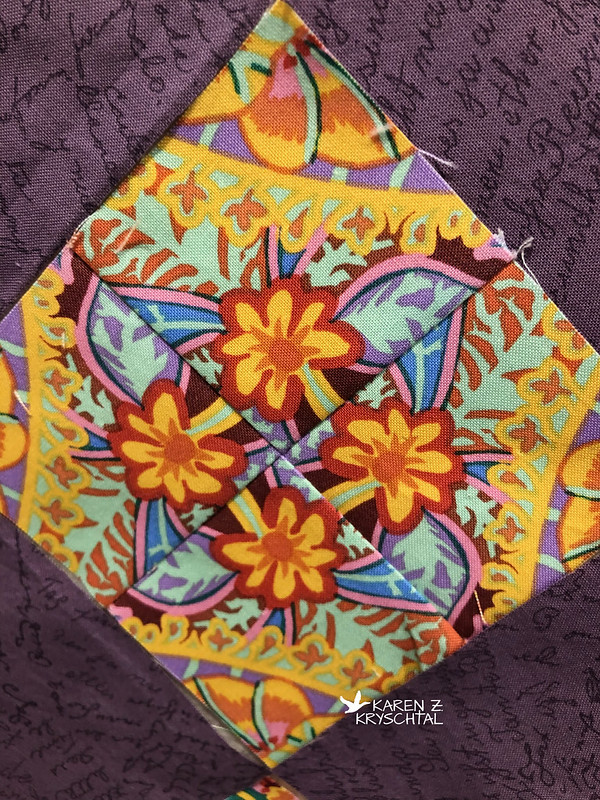
I had cut some squares while I had my fabric stacked back when I cut this baby out. I played around with them and thought I could make cute, little 4-patch mini kaleidoscopes. I gave one block a shot ...
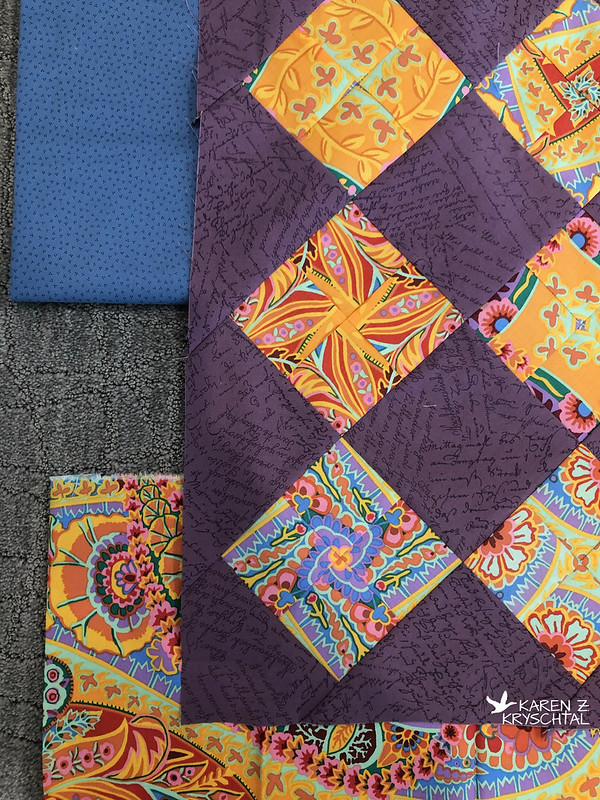
... and thought it was mighty cute. I started sewing the rest together and was really pleased with how they came out. I thought it would set the blocks off nicely to pair them up with "plain" setting blocks. I auditioned several fabrics, ran them by my FaceBook friends, and came up with using this purple:
I love that fabric!
I also decided to set the blocks on point; it makes them "twirl" a little better!
I do want a border on the quilt, but am really still trying to decide. The "focal fabric" I used for the blocks with either be a border or the binding - it will be out there somewhere!
I still like the grey newsprint on the left (it totally blends with my carpeting in the photo), but maybe after an inner border of the focal fabric. Or the green. Or ... yeah. That's why this is as far as I've gotten with this one.
I've got it out where I can see it, so in the back of my mind, I'm still mulling over what to use for the border!
Thanks for reading !
KZK
Subscribe to:
Comments (Atom)

