Hi everyone! Today, I'd like to tell you about a project that no, I didn't start 100 years ago like some of the others, but I did get the featured fabrics quite a while ago!
In exchange for making her a bag (either this one or this one ... my memory is failing me!), my friend Trace sent me some glorious fabrics from Australia! I love them -- I mean REALLY love them. And I get afraid to cut into fabrics I love that much. Is that odd? I wanted the perfect quilt pattern to show off the beautiful prints and just couldn't find it.
Enter Pinterest. I started seeing a few things I really liked, then was able to redesign a pattern into one I thought would be perfect! I took the first step:
As I wrote on Instagram, "Cover me, I'm going in!" I was about to cut. Truly the hardest part - cutting into that awesome fabric!
I love map fabric anyway, but teamed up with cool vintage cars is over the top! Oh, hey, look!!!
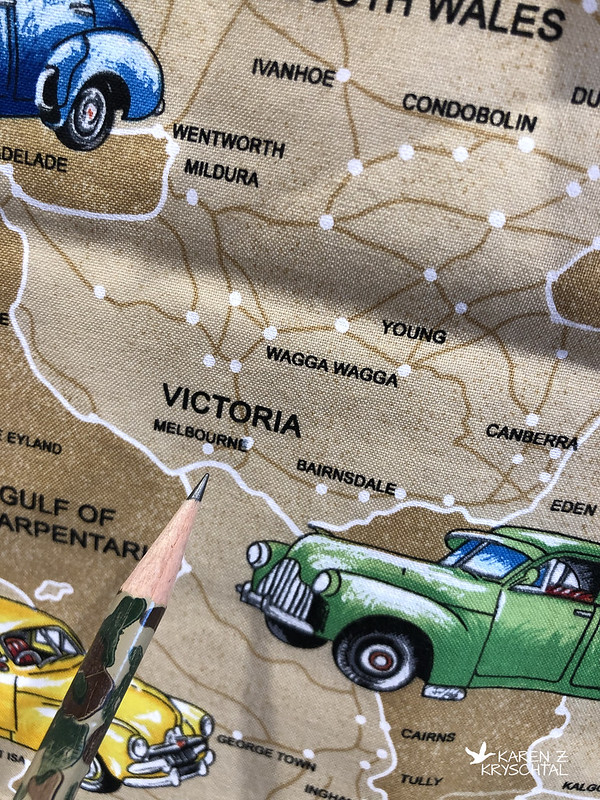
That's where Trace lives! Can you see her?!?
My pattern called for careful color placement and lots of flippy squares!
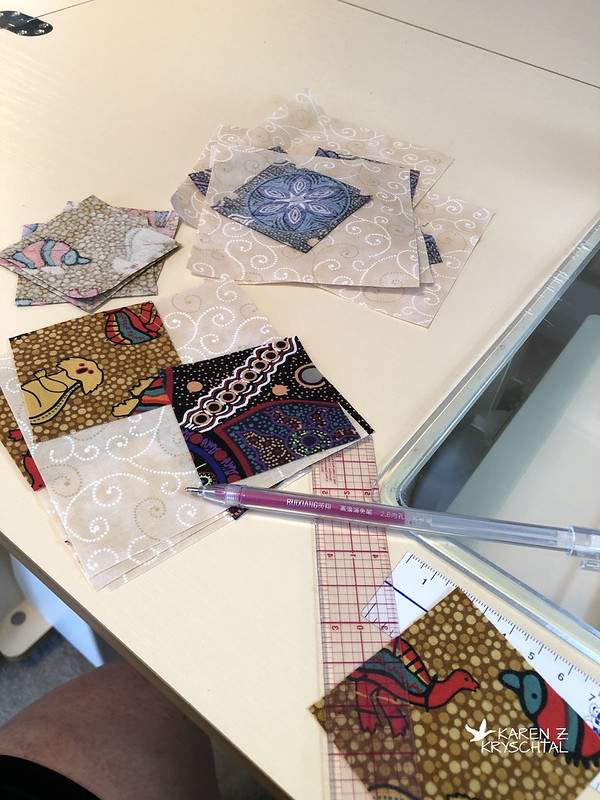
I was pretty far along in the process when I realized I should have sewn two seams 1/2 an inch apart on the squares so I'd have extra half-square triangles. I decided to remedy that by piecing those leftover triangles together:
Waste not, etc.
To get my fabs exactly where I wanted them, for the look I wanted, I started in the center and worked my way out.
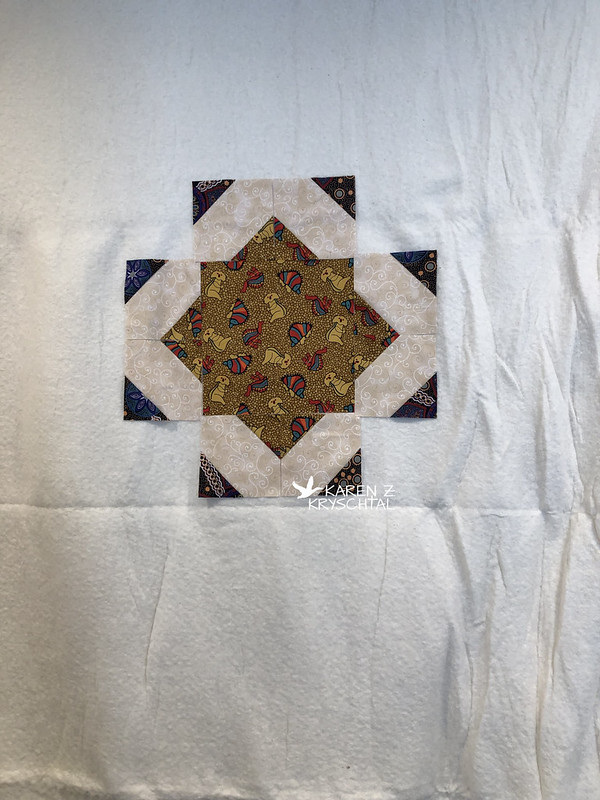
The project grew swiftly!
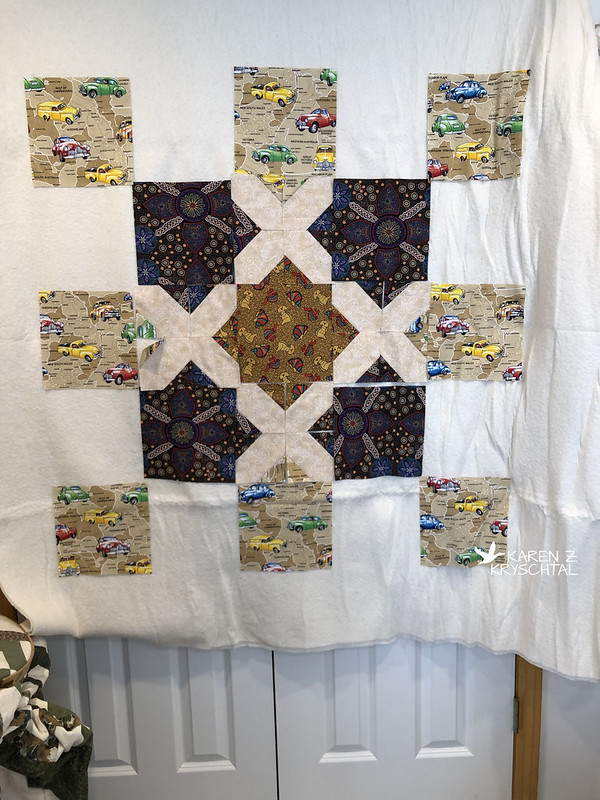
I mean, seriously. Once I was willing to cut into the fabric, it was all a breeze from there!
I love the layout! I quilted with King Tut Sands of Time - a simple wavy grid. I didn't want to detract from the fabs or the design:
Quilting wavy lines is one of my happy places, I've decided. It pleases me.
Next up, piece the binding together:
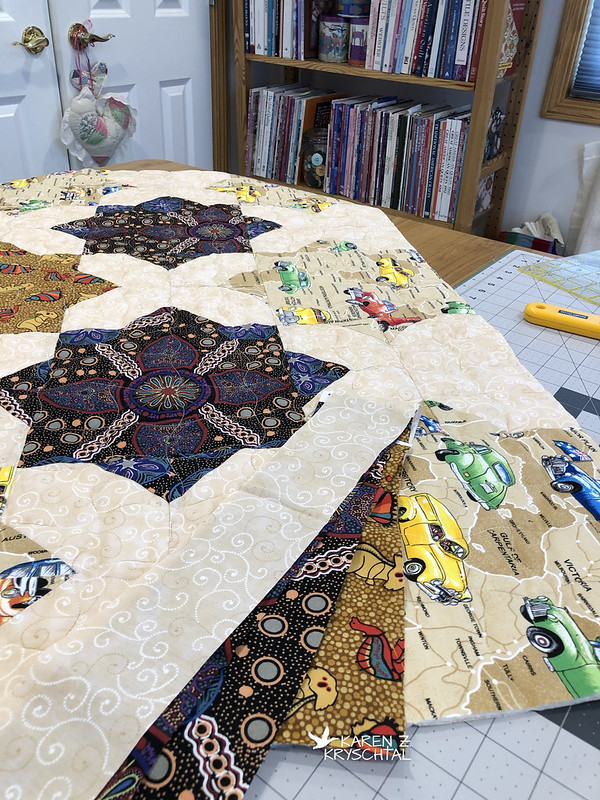
And stitch that on!
Here's a look at the finished quilt:
And here it is, hanging in its place of honor in my Studio:
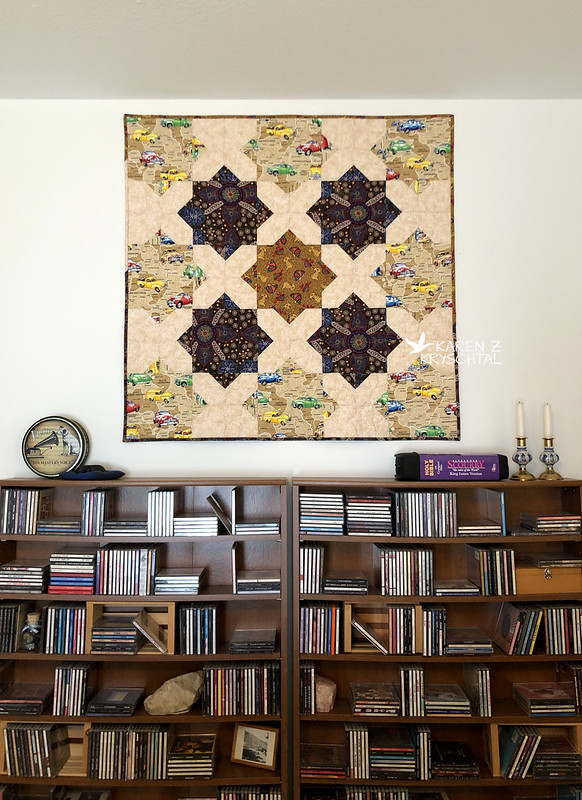
It hangs directly across from my Bernina! I've called it Australian Floor Tiles - hopefully, you can see why!
Many, many thanks to Trace for the awesome fabs! I do have a plan for the others and for the leftovers from this project - that will be implemented soon!
And thank you for reading!
KZK
Friday, August 16, 2019
Thursday, August 15, 2019
More Updating!
Hi everyone! Another "finish" to show you today, and a quick project I did a couple weeks ago!
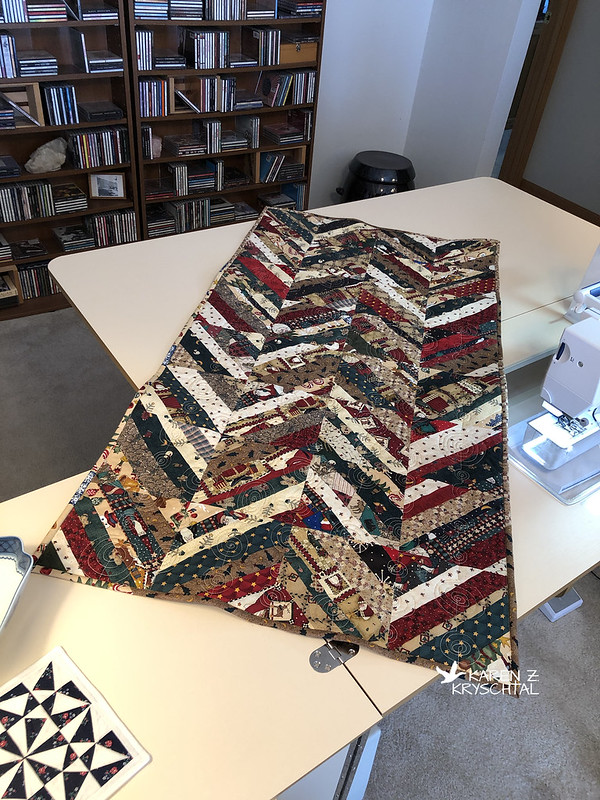
Do you remember the Christmas string quilt I pieced and quilted in April? I finished putting the binding on that and thought I'd show you how it came out!
I'm really pretty pleased with how it came out! I think it makes a darling table runner!
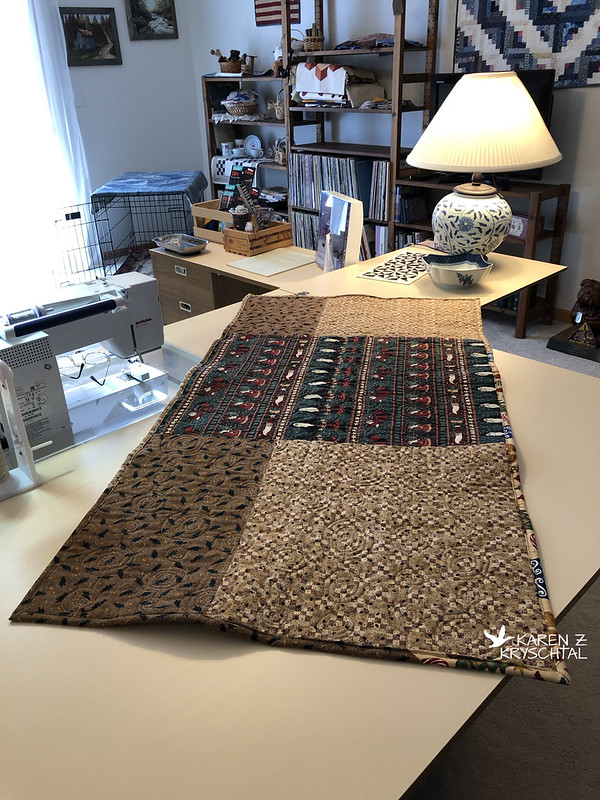
Here's a look at the back:
It feels good to FINISH things! 😀
We bought a new vacuum (yay!) and it came with tons of plastic bags to hold all the various parts - you know the ones with all the recycling codes, warning labels in more languages than you can count, etc? I love the writing all over those bags! I cut them apart, did some fusing, and decided to make a little basket for our chargers.
Maggie helped, as you can see!
Since any pins will leave a permanent hole in the plastic, those little Wonder Clips really come in handy!
It came together in no time:
I used my wooden press to flatten the seams - obviously, hitting it with a hot iron wouldn't be a good idea. The press does a good job on this kind of "fabric".
Never let it be said that quilters don't recycle!
Thanks for reading!
KZK
Late note: I sent the Christmas String Quilt 2 to my sister-in-law and her husband. ❤
Do you remember the Christmas string quilt I pieced and quilted in April? I finished putting the binding on that and thought I'd show you how it came out!
![]() |
| Christmas String Quilt 2 |
I'm really pretty pleased with how it came out! I think it makes a darling table runner!
Here's a look at the back:
It feels good to FINISH things! 😀
We bought a new vacuum (yay!) and it came with tons of plastic bags to hold all the various parts - you know the ones with all the recycling codes, warning labels in more languages than you can count, etc? I love the writing all over those bags! I cut them apart, did some fusing, and decided to make a little basket for our chargers.
Maggie helped, as you can see!
Since any pins will leave a permanent hole in the plastic, those little Wonder Clips really come in handy!
It came together in no time:
I used my wooden press to flatten the seams - obviously, hitting it with a hot iron wouldn't be a good idea. The press does a good job on this kind of "fabric".
Never let it be said that quilters don't recycle!
Thanks for reading!
KZK
Late note: I sent the Christmas String Quilt 2 to my sister-in-law and her husband. ❤
Wednesday, August 14, 2019
Hexi Placemats
Hi everyone! In my quest to finish up old projects, I've not only X-ed off another one, but have a wonderful Christmas gift for someone special!
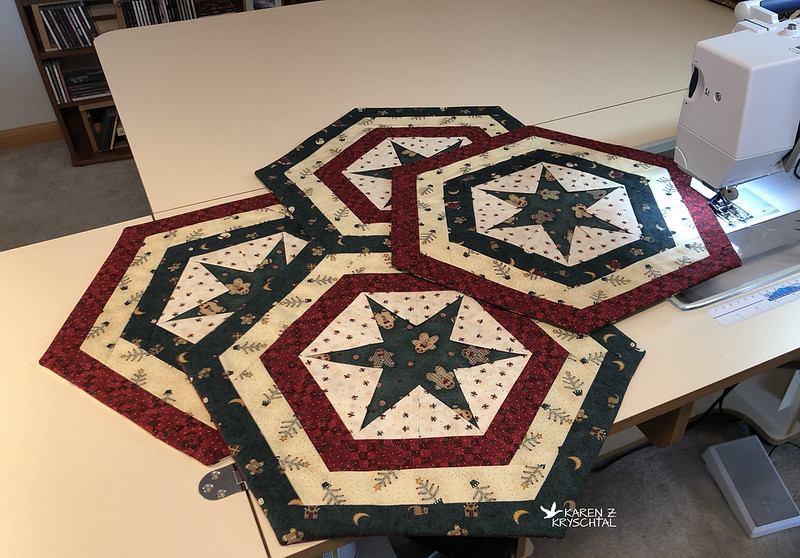
I had set aside some Christmas prints and had done some cutting to make hexagon placemats. It's an old Kaye Wood pattern that's really fun to put together in any color scheme or theme. Basically, you start with a hexagon and surround it with prairie points of sorts.
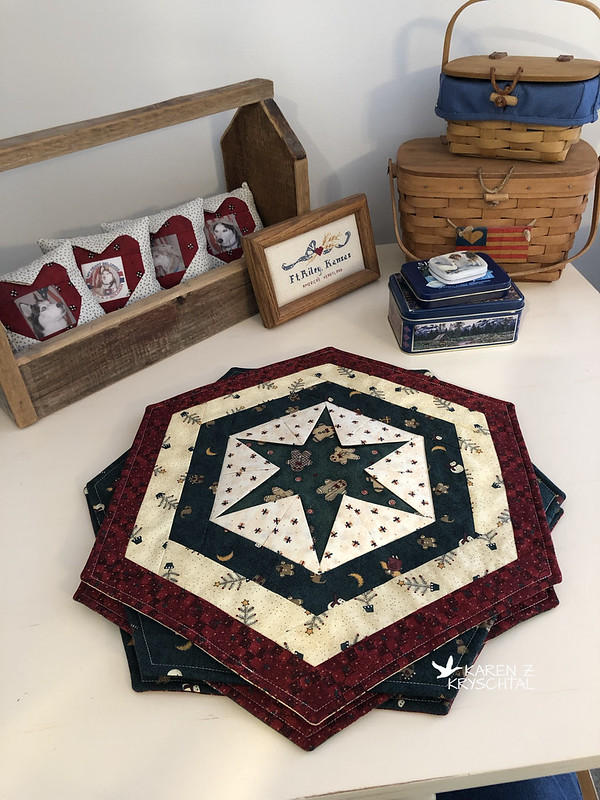
I love the inner star that forms! Add three borders, and you're good to go. I opted to do a set of four hexies, alternating the borders - red, neutral, green on two; green, neutral, red on the other two. Before I knew it, I was ready to quilt.
It must have been thanks to my cheering section.
Aren't they adorable?!?
They really don't need much quilting, so it was a fairly quick finish.
I've made these in dog prints, golf prints, coffee-themed prints, and now Christmas! They are so fun to make - and use - and I've crossed another one off the "finish me" list!!!
Thanks for reading!
KZK
I had set aside some Christmas prints and had done some cutting to make hexagon placemats. It's an old Kaye Wood pattern that's really fun to put together in any color scheme or theme. Basically, you start with a hexagon and surround it with prairie points of sorts.
I love the inner star that forms! Add three borders, and you're good to go. I opted to do a set of four hexies, alternating the borders - red, neutral, green on two; green, neutral, red on the other two. Before I knew it, I was ready to quilt.
It must have been thanks to my cheering section.
Aren't they adorable?!?
They really don't need much quilting, so it was a fairly quick finish.
I've made these in dog prints, golf prints, coffee-themed prints, and now Christmas! They are so fun to make - and use - and I've crossed another one off the "finish me" list!!!
Thanks for reading!
KZK
Tuesday, August 13, 2019
It Needs A New Name
Hi everyone! After all the work on the Hunter's Star Quilt, I felt I needed to work with more modern, fun fabrics. Something lighter, brighter, more contemporary. Nothing against the Civil War reproduction fabs, but they can get a bit heavy sometimes. To me, anyway. So ... I turned to some of the fabrics left over from my X Plus quilt and grabbed an assortment of greys and blacks. I wanted more contrast than I got with the X Plus.
OK! So now ... what to make?!? My friend Donna and I started talking about something, and she showed me a pattern she was thinking about doing. It's called "Kira" and looked very interesting and fun. I needed "fun" after the challenge of the Hunter's Star. We decided to go for it! (Ahem, Donna! You're letting work get in the way of quilting ...).
The pattern looks complicated, but is very easy to construct. I can't give precise measurements, since it's not my pattern or one in the public domain, but I can show you the process.
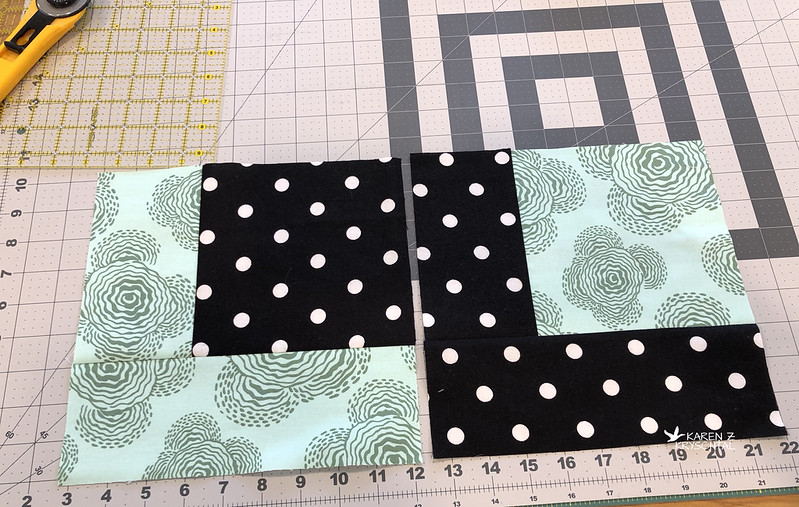
You start with blocks like this:
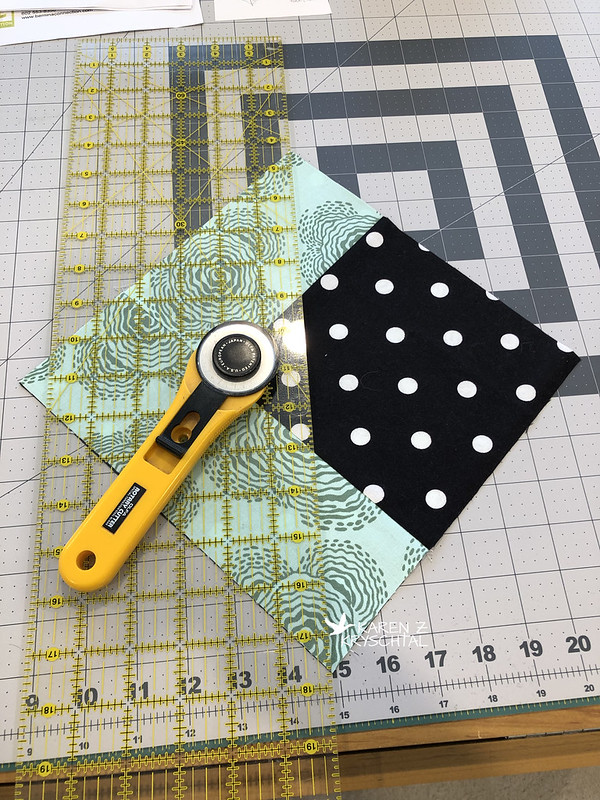
Then you stack them on top of each other, turn them on the diagonal, and ...
... slice. That's the scary part! You swap parts around and get this:
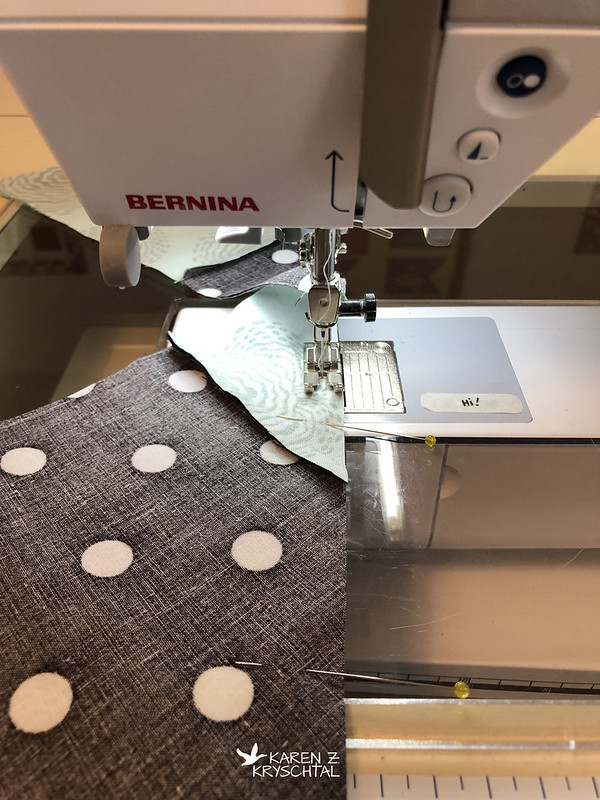
Sewing those together can get a bit tricky, just because of the bias. I found starching my blocks prior to slicing them apart helps.
So do pins. I love pins.
Moving right along ... I did as many blocks as I wanted to (I didn't want something huge this time!) and fiddled around with the layout:
I love all of the Amy Butler prints, the colorful ones, but really found myself wishing I had more of some of the blacks and greys! I especially liked this one:
How cute is that little birdie??!!??
Here's the finished top:
Tell me that's not fun! But seriously - the name? No. It's got to go. When I look at it, I see pennants or banners. Streamers, maybe. But not Kira.
It's in my stack to be quilted - and I will tackle this one myself. I'll post photos after the quilting and after I've sewn the binding on!
Thank you for reading!
KZK
OK! So now ... what to make?!? My friend Donna and I started talking about something, and she showed me a pattern she was thinking about doing. It's called "Kira" and looked very interesting and fun. I needed "fun" after the challenge of the Hunter's Star. We decided to go for it! (Ahem, Donna! You're letting work get in the way of quilting ...).
The pattern looks complicated, but is very easy to construct. I can't give precise measurements, since it's not my pattern or one in the public domain, but I can show you the process.
You start with blocks like this:
Then you stack them on top of each other, turn them on the diagonal, and ...
... slice. That's the scary part! You swap parts around and get this:
Sewing those together can get a bit tricky, just because of the bias. I found starching my blocks prior to slicing them apart helps.
So do pins. I love pins.
Moving right along ... I did as many blocks as I wanted to (I didn't want something huge this time!) and fiddled around with the layout:
I love all of the Amy Butler prints, the colorful ones, but really found myself wishing I had more of some of the blacks and greys! I especially liked this one:
How cute is that little birdie??!!??
Here's the finished top:
Tell me that's not fun! But seriously - the name? No. It's got to go. When I look at it, I see pennants or banners. Streamers, maybe. But not Kira.
It's in my stack to be quilted - and I will tackle this one myself. I'll post photos after the quilting and after I've sewn the binding on!
Thank you for reading!
KZK
Monday, August 12, 2019
Hunter's Star Update
Hi, everyone! I'm sorry it's been so long since I've posted. It's been a busy time around here - fortunately with lots of quilting thrown in! I thought today I'd give you an update on the Hunter's Star quilt.
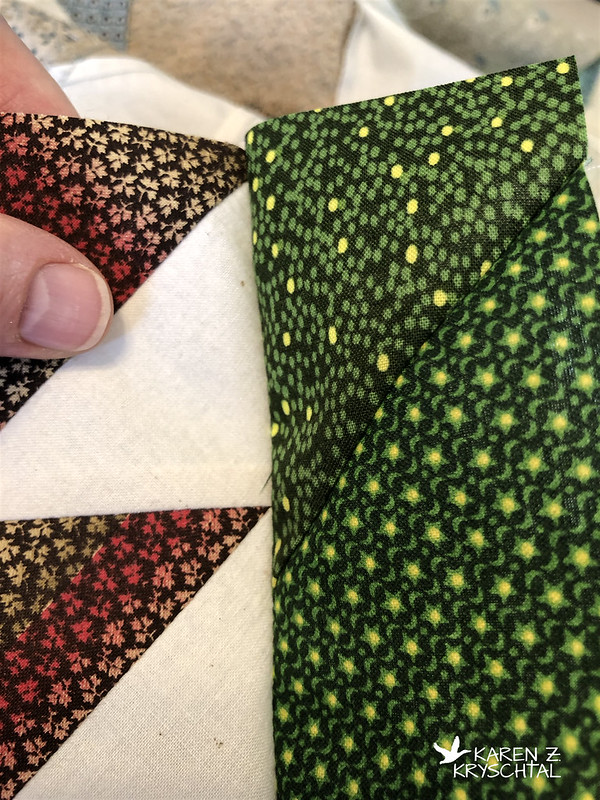
When I last posted, I was unhappy with the green/yellow inner border I had chosen. It was already sewn on - did it bother me enough to rip it all out? That would be a lot of ripping! After much thought ...
Yeah. The green had to go.
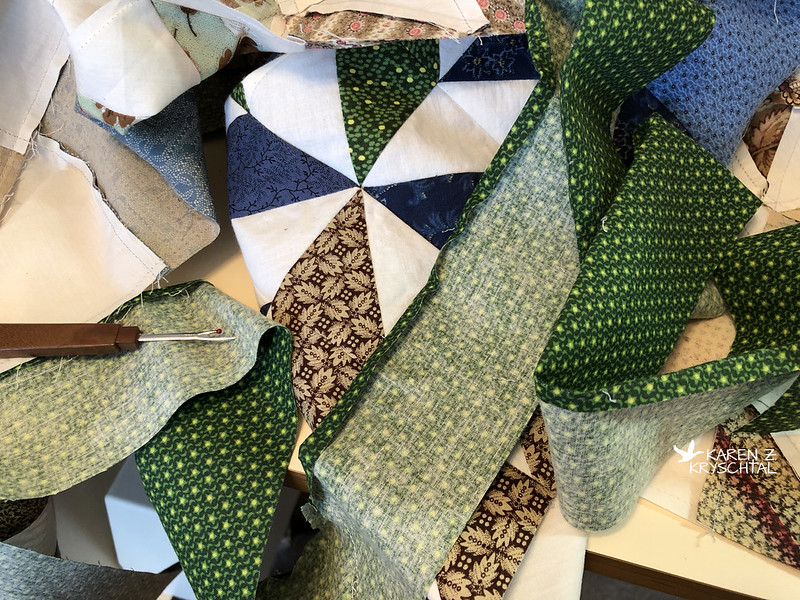
It took quite a while to remove, but I am so glad I did it! I started auditioning other fabrics -- the catch being I needed quite a bit and HAD to make do with what I have on hand. Why? A self-imposed rule. This quilt was a "use your stash" quilt.
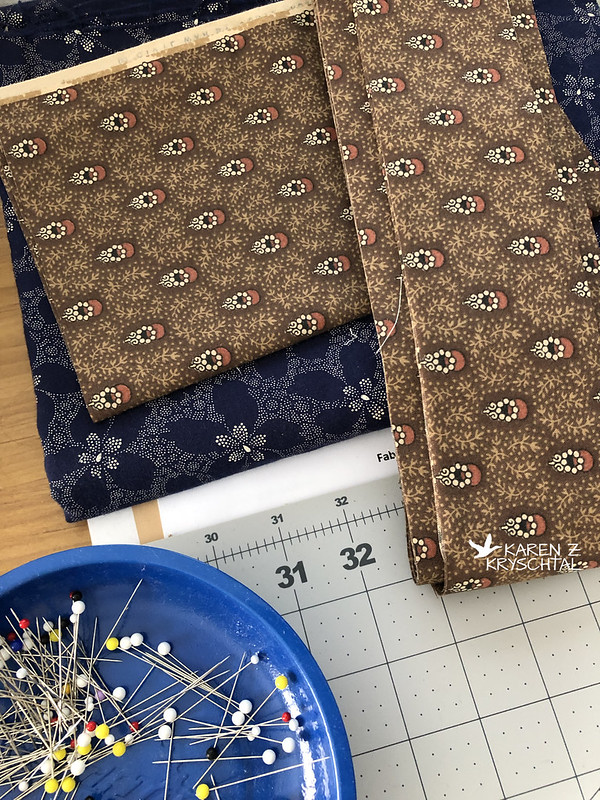
I had enough of two different browns (barely) and started playing around with them.
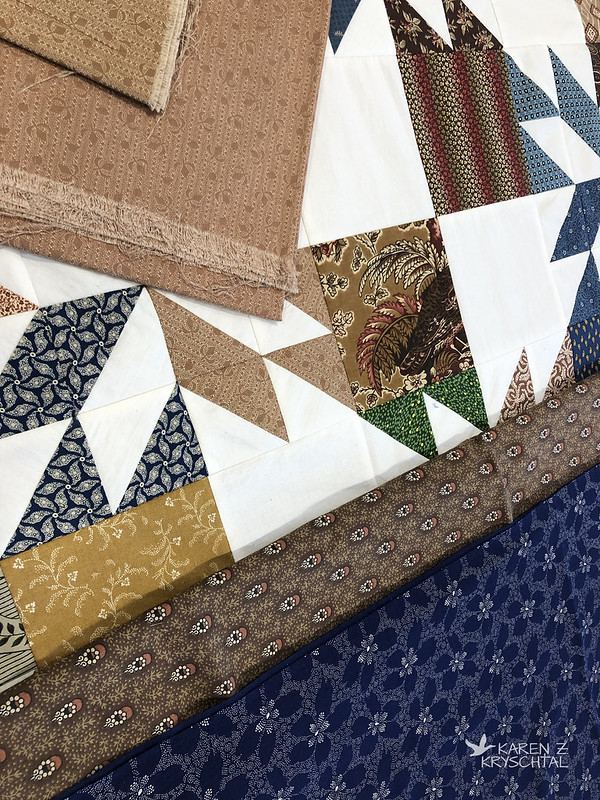
I had some of the lighter brown in the quilt already, but that other one spoke to me! I really like how it looks with the navy I had chosen for the outer border, so ...
I cut happily away, then set about putting both borders on.
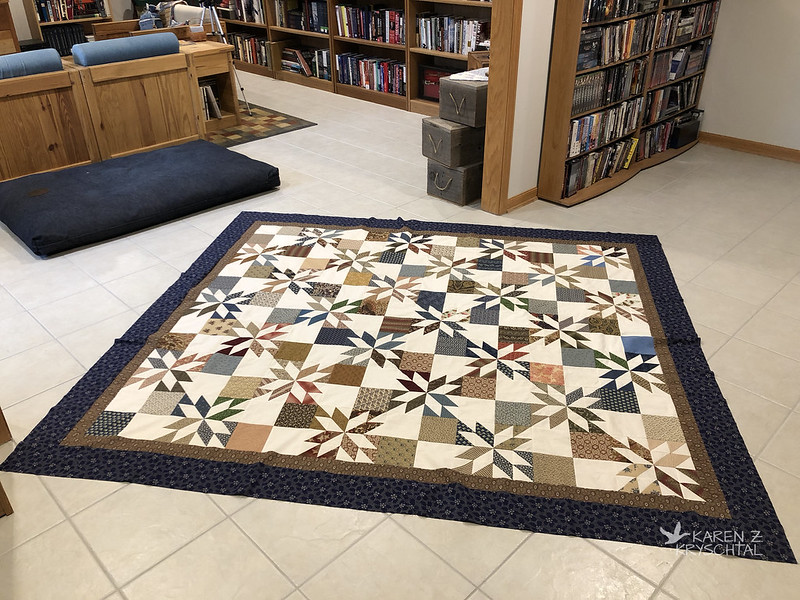
I'm very uncomfortable dealing with large pieces of fabric, so for me to do that inner border all over again was a real challenge. Actually making a quilt this HUGE was a challenge, but I kept at it and got both borders on! Here is the top:
When I last posted, I was unhappy with the green/yellow inner border I had chosen. It was already sewn on - did it bother me enough to rip it all out? That would be a lot of ripping! After much thought ...
Yeah. The green had to go.
It took quite a while to remove, but I am so glad I did it! I started auditioning other fabrics -- the catch being I needed quite a bit and HAD to make do with what I have on hand. Why? A self-imposed rule. This quilt was a "use your stash" quilt.
I had enough of two different browns (barely) and started playing around with them.
I had some of the lighter brown in the quilt already, but that other one spoke to me! I really like how it looks with the navy I had chosen for the outer border, so ...
I cut happily away, then set about putting both borders on.
I'm very uncomfortable dealing with large pieces of fabric, so for me to do that inner border all over again was a real challenge. Actually making a quilt this HUGE was a challenge, but I kept at it and got both borders on! Here is the top:
The brown and blue color scheme fits the rest of the quilt SO MUCH BETTER - and truly is more "me", if that makes sense.
As for the quilting, this is way too big for me to handle. Fortunately, I have a very talented friend who has a longarm and is in the business! She agreed to quilt it for me in September. That is PERFECT! She quilted another one of my quilts for me several years ago and she is truly skilled. Once it's home and I've sewn on the binding, I'll show it to you again!
As always, thanks for reading!
KZK
Tuesday, July 2, 2019
Help Wanted
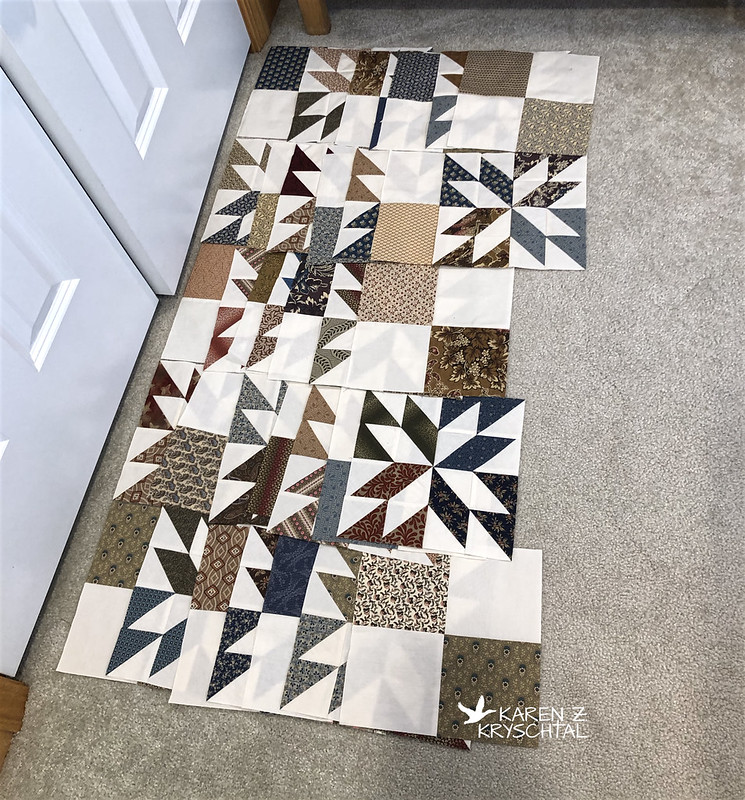
Hi, everyone! I'd love some feedback on this, please! I've got my Hunter's Star blocks all sewn into rows ...
... then sewed the rows together. Lots of points to try to avoid cutting off, but I got through it with most of the points intact. More or less.
Once together, I started auditioning fabrics for the borders. Inner first. I thought this would be perfect:
I didn't have any more of the hideous green that's in the body of the quilt (on the left), but this one comes mighty close. I don't have a lot of border options due to how much fabric it calls for; this is a very large quilt! My thoughts (which I now question) were something along the lines of - that green is so ugly I should use one just like it for the inner border! Seemed like a good idea at the time - and it's very true to the period. (Civil War Era.)
Here I am, happily sewing it in ...
Everything was just fine until I neared the end. I was lightly holding onto the border strip underneath and noticed it was getting shorter than the top ...
I may have uttered an HBO word. Or two. Or more. What's that saying? "Measure once, cuss twice"? Yeah. Then I thought, well, heck, the border had to be pieced anyway, due to how long it is, so just grab another 2 1/2" chunk of it and sew it on. Yeah. Great idea.
Wouldn't it have been an even better if I'd grabbed the same green?!? I didn't even realize what I'd done until I posted the shot to social media. Chalk that one up to being color blind and a tad rushed. Son of a ... let's just keep going. My husband (best husband in the world, I might add) said it adds charm. He's a keeper.
I kept going, adding the rest of the borders and trying to measure better this time.
It's not as wavy as it looks there, but to be honest, it IS a little wavy, since I didn't measure well. ARGH! At this stage, I was in the "starch, steam, and quilting could take care of that" stage. Hopefully, anyway.
Then, I looked to see what Civil War repros I had that could work for the outer border. I really like this blue:
... then sewed the rows together. Lots of points to try to avoid cutting off, but I got through it with most of the points intact. More or less.
Once together, I started auditioning fabrics for the borders. Inner first. I thought this would be perfect:
I didn't have any more of the hideous green that's in the body of the quilt (on the left), but this one comes mighty close. I don't have a lot of border options due to how much fabric it calls for; this is a very large quilt! My thoughts (which I now question) were something along the lines of - that green is so ugly I should use one just like it for the inner border! Seemed like a good idea at the time - and it's very true to the period. (Civil War Era.)
Here I am, happily sewing it in ...
Everything was just fine until I neared the end. I was lightly holding onto the border strip underneath and noticed it was getting shorter than the top ...
![]() |
| "Son of a ..." |
I may have uttered an HBO word. Or two. Or more. What's that saying? "Measure once, cuss twice"? Yeah. Then I thought, well, heck, the border had to be pieced anyway, due to how long it is, so just grab another 2 1/2" chunk of it and sew it on. Yeah. Great idea.
Wouldn't it have been an even better if I'd grabbed the same green?!? I didn't even realize what I'd done until I posted the shot to social media. Chalk that one up to being color blind and a tad rushed. Son of a ... let's just keep going. My husband (best husband in the world, I might add) said it adds charm. He's a keeper.
I kept going, adding the rest of the borders and trying to measure better this time.
It's not as wavy as it looks there, but to be honest, it IS a little wavy, since I didn't measure well. ARGH! At this stage, I was in the "starch, steam, and quilting could take care of that" stage. Hopefully, anyway.
Then, I looked to see what Civil War repros I had that could work for the outer border. I really like this blue:
But that's where I'm stuck. Do I hate the green? I'm not a green kinda gal, but it can work. Do the green and blue not go? Do neither of them work?
Someone whose opinion I greatly value (my quilting mentor from years ago) said she doesn't think the green works at all, but that she likes the blue. Too much of a statement from the green. Maybe that's it -- I could see how the green could overpower the quilt.
I'd love to know what you all think. I MIGHT have a soft brown I could substitute for the green -- or I'm sure I have muslin. I hate to rip out (especially that much), but I don't want to be unhappy with this.
I won't be sewing for a few days still -- we're having our main floor carpeting ripped out and replaced, so we have a lot going on. Please drop a comment or let me know on FB or email. I'd appreciate hearing your thoughts!
Thanks for reading!
KZK
Monday, July 1, 2019
It's The Look On His Face!
Hi, everyone! I wrapped up another old project recently - still going through that stack of UFOs, trying to finish things up. This time, it's another small wall-hanging:
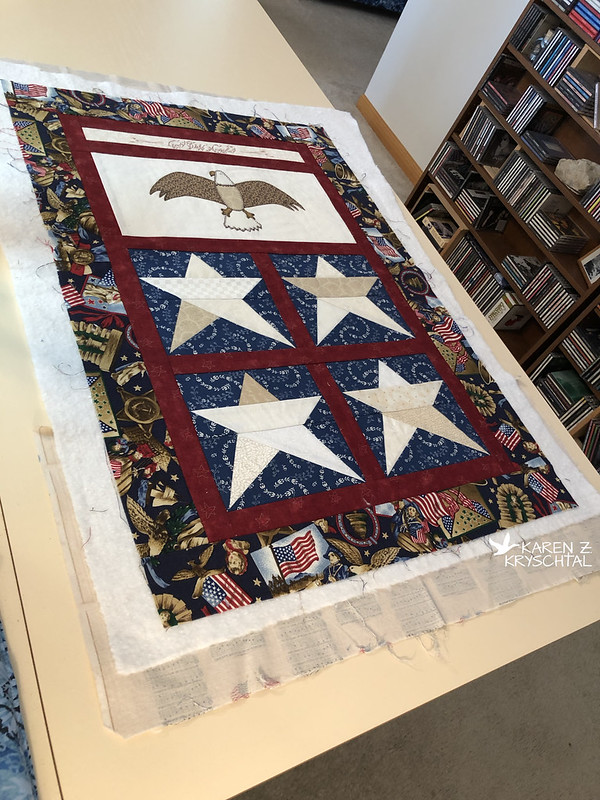
I'm calling it "Eagle And Stars".
As I recall, I appliquéd the eagle for something, had tried my hand at paper-piecing some 5-pointed stars, did some practice writing ... then just decided to put it all together. Fair enough, right? The eagle is an original, and let me admit fully that I AM NOT AN ARTIST. Seriously - check out the look on his face:
It totally cracks me up. When I hang it, I must hang it where I can see that face.
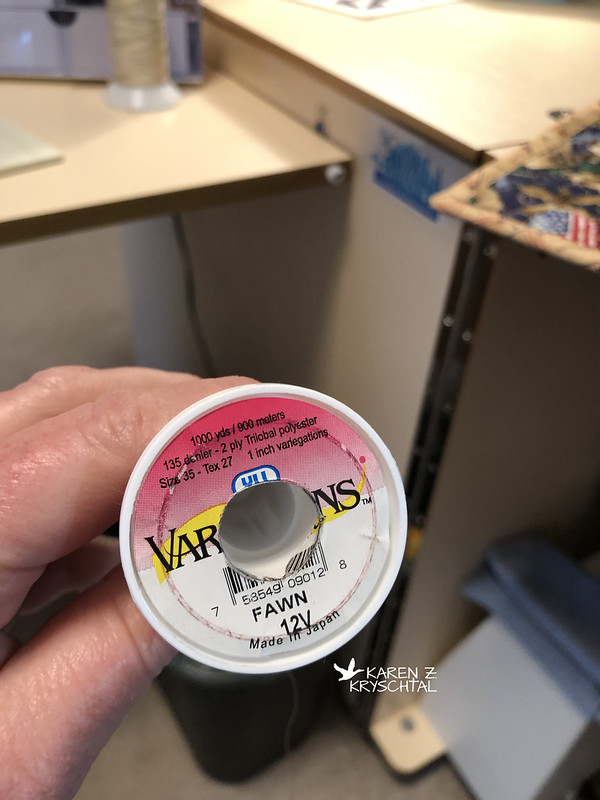
I quilted using this thread:
YLI Variations. I used it on the Forgotten Pyramids quilt, too - again, trying to use things up. I'm happy to say it is now gone.
Oh, I didn't use it all. I threw it OUT! That and every other spool like it. I could not get my machine (which is perfect) to hold a consistent tension with it. Too loose, too tight, no amount of adjusting sufficient to maintain any steady look. IN THE TRASH. I used to like it - a friend suggested that it could have been because it was older thread. That makes total sense, but let me add that the King Tut threads I have that are the same age don't treat me like that. LOL. Anyway, it's gone now. Long live the King!
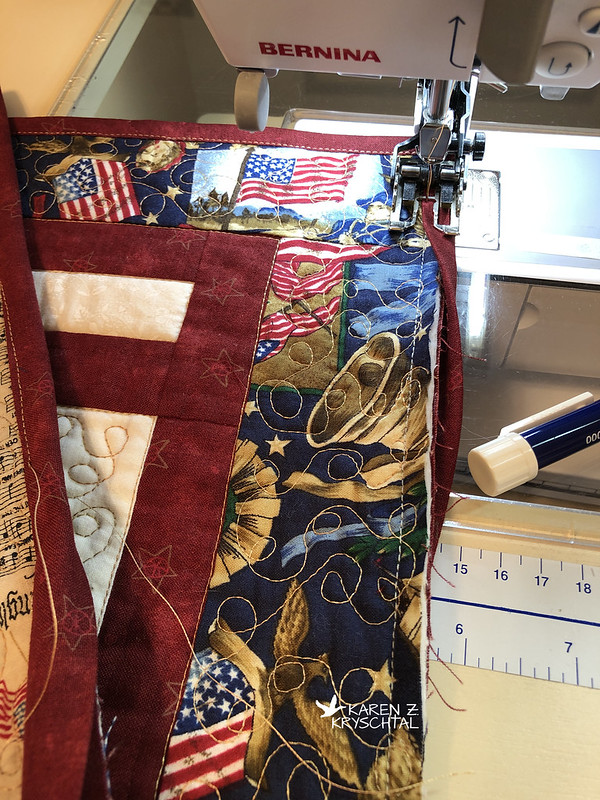
For the binding, I once again did the "sew to the back, bring around to the front" machine-style:
Other than the on-going tension issues, it worked out fabulously!
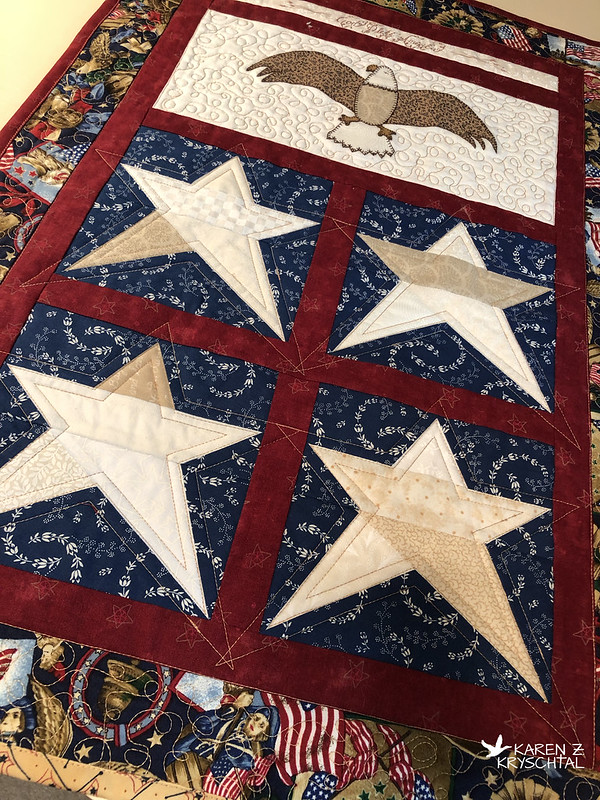
I like how the star area came out:
I had initially quilted it differently - as well as the sashing - and ripped it all out.
Ask me if I'm glad I've finished this one!
As always, thanks for reading!
KZK
I'm calling it "Eagle And Stars".
As I recall, I appliquéd the eagle for something, had tried my hand at paper-piecing some 5-pointed stars, did some practice writing ... then just decided to put it all together. Fair enough, right? The eagle is an original, and let me admit fully that I AM NOT AN ARTIST. Seriously - check out the look on his face:
It totally cracks me up. When I hang it, I must hang it where I can see that face.
I quilted using this thread:
YLI Variations. I used it on the Forgotten Pyramids quilt, too - again, trying to use things up. I'm happy to say it is now gone.
Oh, I didn't use it all. I threw it OUT! That and every other spool like it. I could not get my machine (which is perfect) to hold a consistent tension with it. Too loose, too tight, no amount of adjusting sufficient to maintain any steady look. IN THE TRASH. I used to like it - a friend suggested that it could have been because it was older thread. That makes total sense, but let me add that the King Tut threads I have that are the same age don't treat me like that. LOL. Anyway, it's gone now. Long live the King!
For the binding, I once again did the "sew to the back, bring around to the front" machine-style:
Other than the on-going tension issues, it worked out fabulously!
I like how the star area came out:
I had initially quilted it differently - as well as the sashing - and ripped it all out.
Ask me if I'm glad I've finished this one!
As always, thanks for reading!
KZK
Subscribe to:
Posts (Atom)